By continuing to use the website or clicking Accept you consent to our cookies and personal data policy and confirm that you are at least 18 year old. For details please see Privacy Policy and Terms
Accept

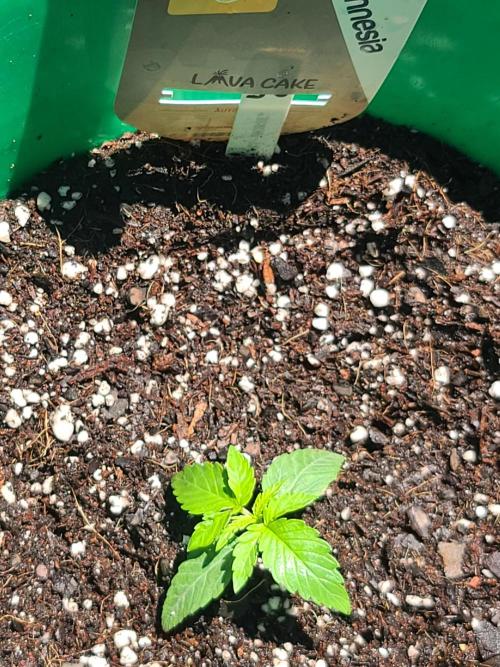
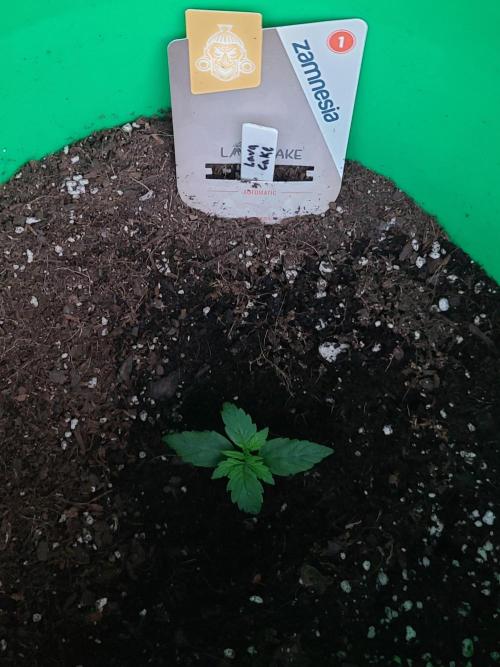
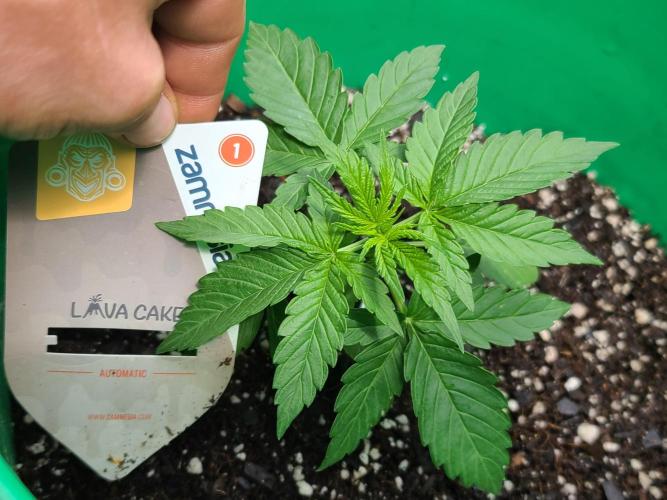
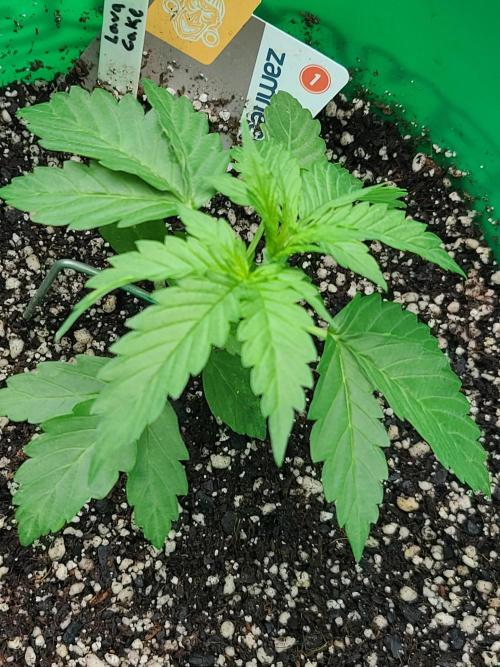
Lava Cake Automatic by Zamnesia


VEG
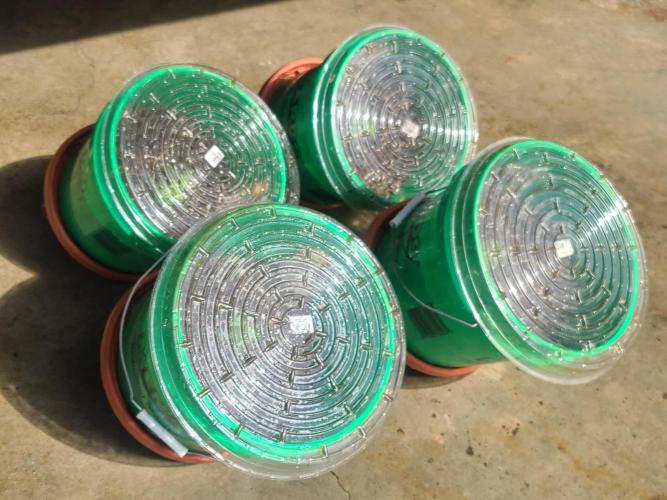
Spectra Pro Light Emitting Diodes/680W
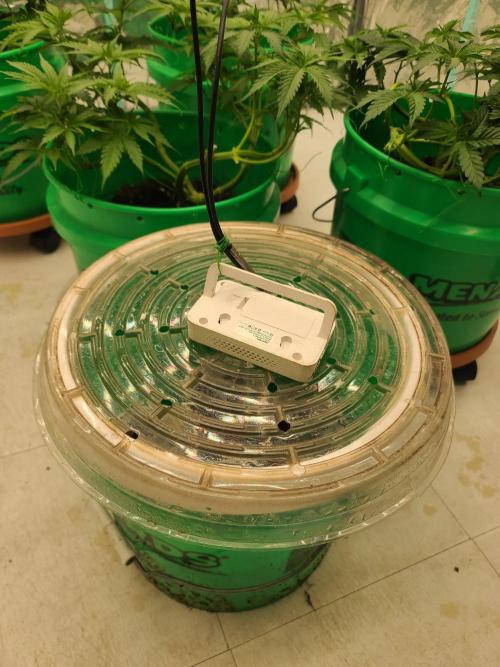
Neocision Spectra Pro 680W
FLO
Spectra Pro Light Emitting Diodes/680W
Neocision Spectra Pro 680W

Tent
Proprietary
Custom Sealed Laboratory

Fan
8" Inline Intake Carbon Filtration
Fan
8" Inline Exhaust Carbon Filtration

Filt
Clean-In + Clean-Out
Carbon Scrubber and HEPA

Cond
1500W
Pelonis Air Conditioner
Cond
1500W
Honeywell Heater
Cond
T3 VPD Humidifier
AC Infinity Cloudforge
Cond
Dehumidifier
Honeywell


CO2
Proprietary
CO2 Generator


Mix
Pre-Buffered Coco-Coir/Perlite 70/30

Other
Proprietary Substrate Ammendment Mix
Indoor
Room Type
LST
weeks 1-2
Defoliation
weeks 2
11 liters
Pot Size
Start at 2 Week
G
Germination3d ago
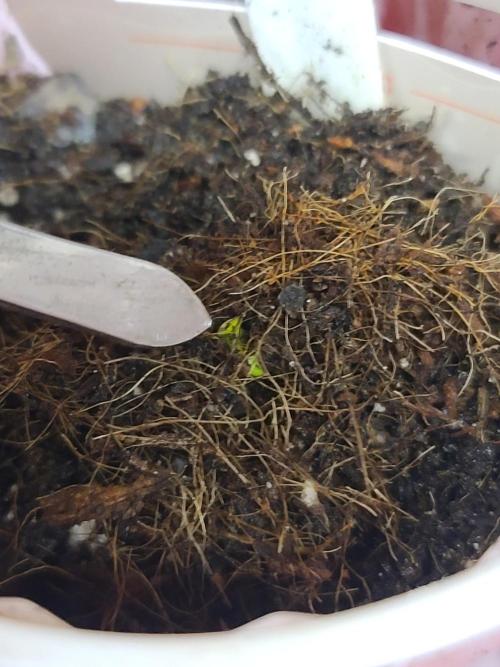
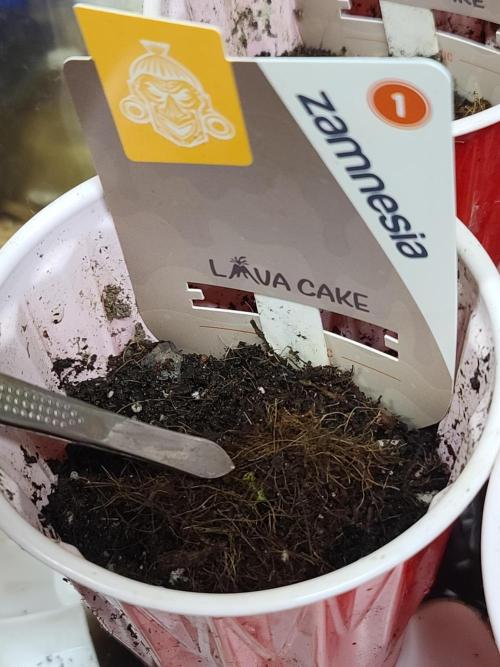
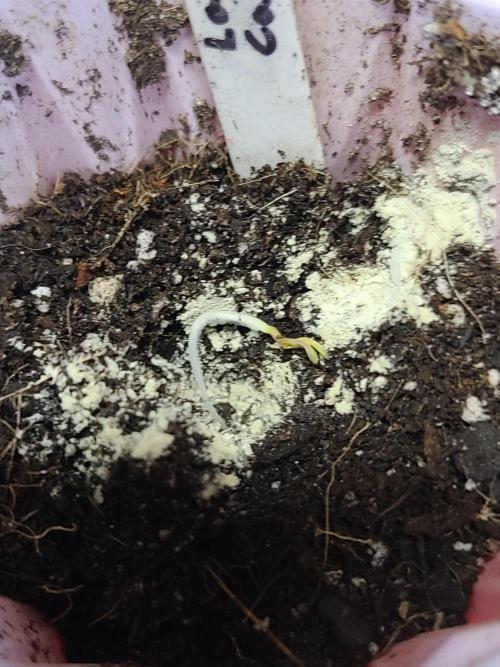
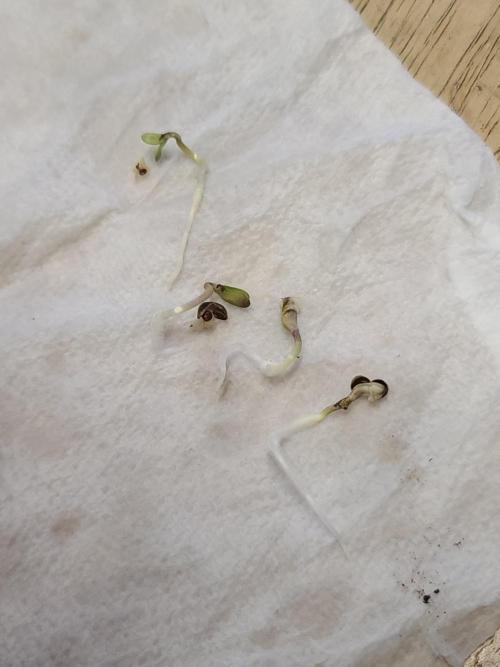
Sapphire9352 Germination began with 400 grit sandpaper lightly brushing the seem of the seeds. They were placed in water until they sank, and then into a paper towel. Germination was performed at 79°f/26.1°c. 18 hours later when checked, the taproots were extended from the seed shells. They were planted at 36 hours into my custom substrate mixture. I utilized coir husk over the tops of the germinated seeds once placed into the substrate. This was performed to ensure the necessary VPD was maintained consistently throughout the germination process.
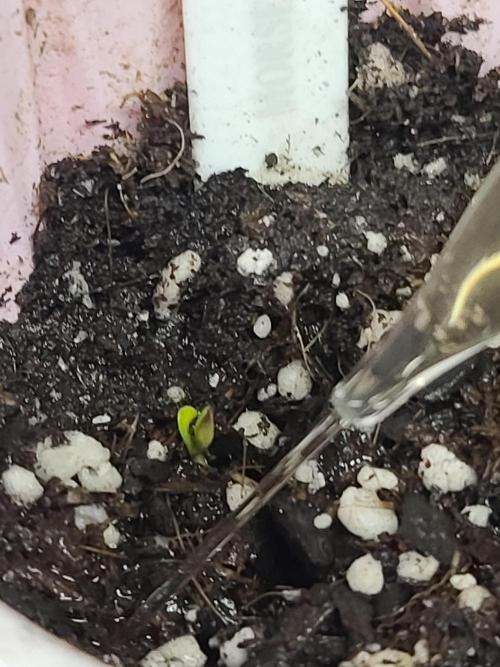
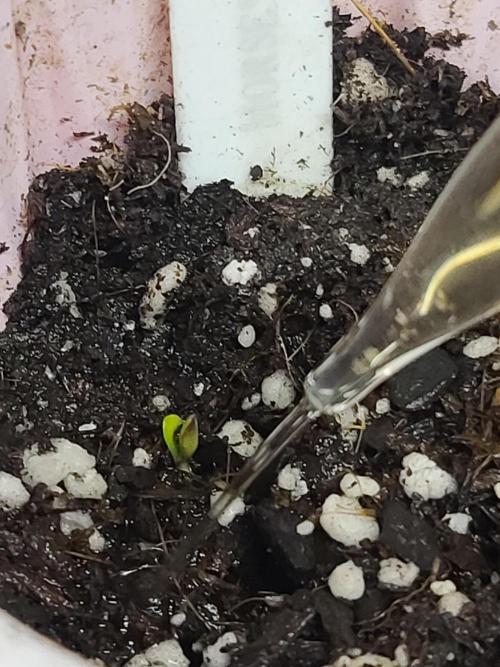
4/4 seeds germinated and showed vibrant growth, immediately.
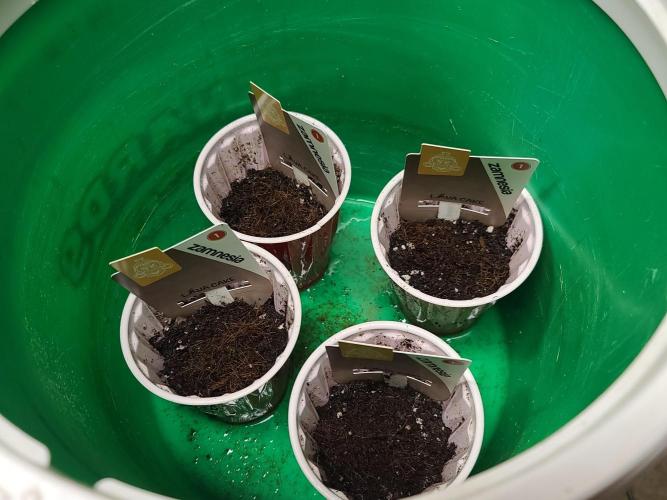
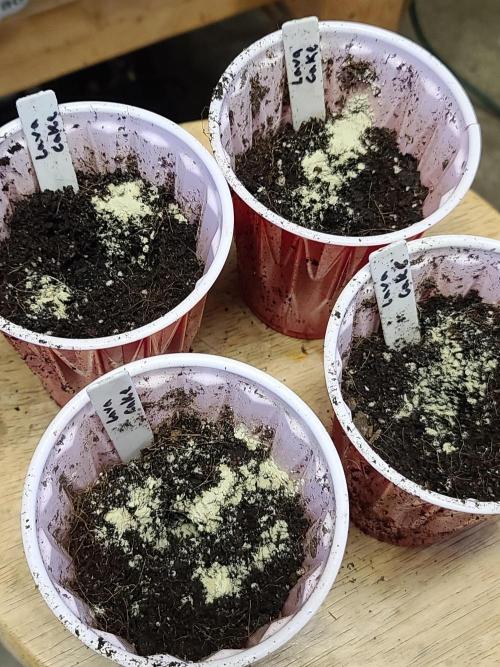
Transplantation Into Solo Cups:
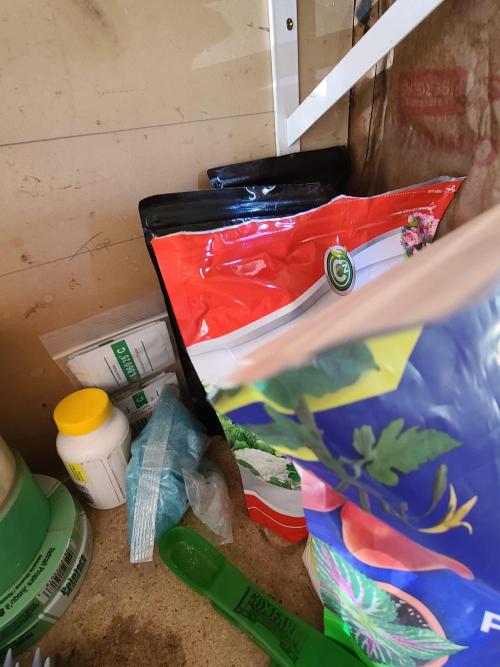
You will notice in the pictures I used a lot of hormones there. Here's the philosophy. I already know I'm planting this thing offset from center in a bucket. It will be defoliated around node 5 because you know, those early junk fan leaves would have been defoliated at pre-flower anyways in my opinion. What I did was utilized rooting hormones and Blue Planet's Root Magic and planted the seedling into the container. Covered it with a light dusting of substrate mix and coco-coir. Careful attention was paid to ensure humidity and ventilation were correct in their incubation chamber.
Transplantation Into Final Container:
*Key points if you want to skip the ramble*
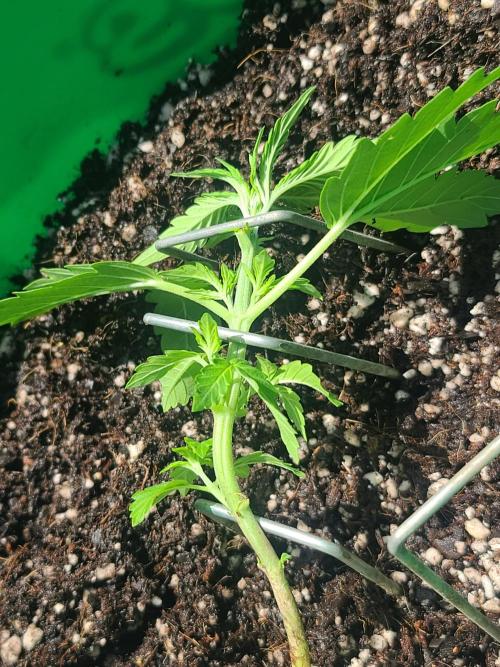
1: Planted offset in final container.
2: Stem was submerged into substrate and covered in rooting hormone to make use of the wasted stem height while the plant grows.
3: Prior to transplantation into final container, plant was not allowed to become root bound in its temporary container.
*The Ramble*
So, it's pretty critical here to understand how auto's work. Once those roots get root-bound in a container, it can prematurely trigger flowering. There are photoperiods which suffer from this as well!! In the solo cup, I wait till I just see the root poke out of the bottom. Then I transplant to it's final home. Again with hormones and Blue Planet's Root Magic, but this time I also begin using my seedling recipe on feed. The recipe includes silica additions (300% heat resist armor on my plants + bigger stalks? Sign me up!) and also Blue Planet's Easy Weed in 1.25x-1.5x manufacturers suggested quantities from here-on out until flower. By the way, if you're following this... Don't do this if you are the person who doesn't have VPD and pH basics down. You will burn your plant hard and blame me for it. Don't do that! LOLOL!
2 likes
comments
Share
Used method
Paper Towel
Germination Method
1
Week 1. Vegetation3d ago


20 hrs
Light Schedule
26 °C
Day Air Temp
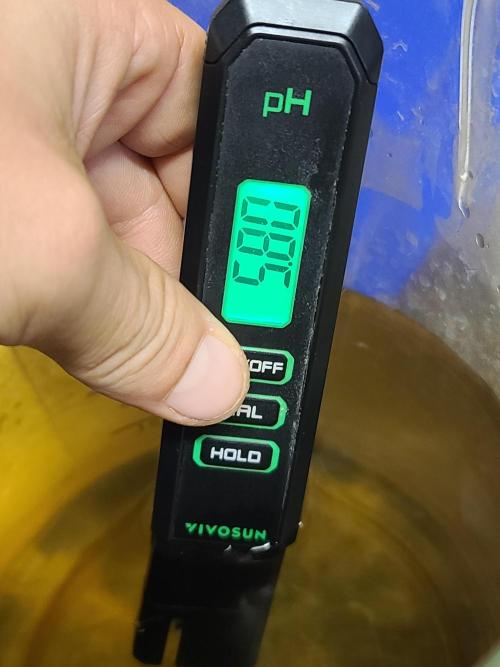
5.8
pH
No Smell
Smell
450 PPM
TDS
72 %
Air Humidity
11.36 liters
Pot Size
60.96 cm
Lamp Distance
800 PPM
CO₂ Level
Sapphire9352 Germination went by without a hitch, as did transplantation. The plants responded favorably to transplantation.
What more needs be said at this time? Let's talk about the grow philosophy behind this hurry-up-and-wait period? Sounds great, what else is there even, like I said at the beginning.
*The Ramble*
I submerged my stalks into the substrate and continued to submerge the stalks as they grew and stretched. I would put a light amount of rooting hormones and brush the edge of the plant lightly with my fingerprints. That's all the roughing up it takes!! So, during this crummy down period, my plants are now doing three main things here. It's super simple. Compare the two methods and see why I planted offset, only to pull the plant towards the center and cover it as it grew along.
A. Standard method:
1. Sit back and do nothing. Let her grow, keep her fed and happy!!
- Foliage and Roots grow. Everything normal here.
B. My Method
1. Hit the cheat code and use cheats. We have that in 2025, it's ok. Buy some cheap rooting hormones, they are dirt cheap ya'll.
2. The grower submerges the stem gradually over a week as it grows, pulling it towards the center, supplying it with rooting hormones.
3. Foliage and Roots grow, new roots develop on the stem which was submerged, and the grow medium is permeated with roots at an exponentially increased rate compared to plants grown rooted using the Standard method.
- You are setting your plant up here to supply them with a greater amount of ppm in bursts at critical points in the mid-veg period which would otherwise not be possible without serious harm to the plant.
- If you do not do this, don't try to replicate anything from here-on out until the week of pre-flower when I flush. Root structures will be identical between Standard and My Method at that point. Remember, this is just a quick skip for root development so you can hit them with massive ppm macro N-P-K amendments.
Final Notes: If you use this method, Foxfarm makes a seriously pro mixture with their, "Foxfarm Soluble Trio Pack." Do note, I'm not sponsored by any means at this point in my growing. I say that because you may think I'm selling you a product. I'm not. Nor do I use their trio pack myself. The detail which matters here is their scheduled and accurate dosage amounts for 5-45-19, 0-50-30, 9-50-10. I have similar/identical, but sourced from a vendor who purchases bulk nutrients and sells smaller batches for cheap. These numbers are amazing if you have your ducks in a line and your lab is kicking out healthy, supple, suede-like leaves throughout the grow until the heavy flower period. If that's you, you're at the point where these boosters should be used to maximize. If that's not you, you need to get to that point first or you are going to roast your plants so hard using these. Just to save you from another rabbit hole: This isn't about CO2 having magic powers. This can be done with or without CO2, but could be done much harder with CO2 supplements (bigger gains). That's the honest and me saving you hard cash+time by just pointing out this doesn't work well if you don't have the basics nailed down to a science. I'm sorry.
I gave everyone some, "Ramble," thanks for following along!! Feel free to fact check me, or you can read the AI fact check pics I put in there for you to save you some time. It's only contention was sugar... And if you look, it's doing what I said. It's difficult to overdose plants with Magnesium Sulfate and it just automatically assumes no one is doing that, bam!! Partially Accurate... Awwww!!!! Naw, lemme just say, you can definitely make that mistake. I did, anyways *mourn*. No joke... Amnesia Haze of all the strains, too. In Mid-Flower. Flush, flush, flush. If your runoff ppm is higher than your intake ppm... Houston, you have a major problem. Check your runoff ppm periodically or don't. I didn't :P I do now!!
2 likes
comments
Share
Used techniques
LST
Technique
2
Week 2. Vegetation3d ago


20 hrs
Light Schedule
27 °C
Day Air Temp
5.8
pH
No Smell
Smell
800 PPM
TDS
65 %
Air Humidity
11.36 liters
Pot Size
60.96 cm
Lamp Distance
1000 PPM
CO₂ Level
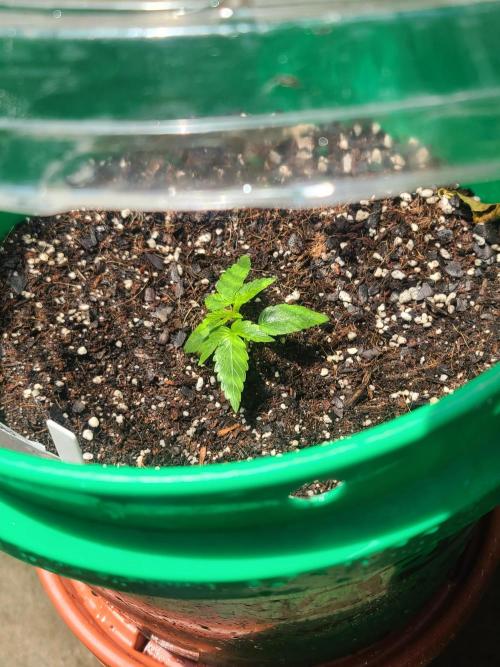
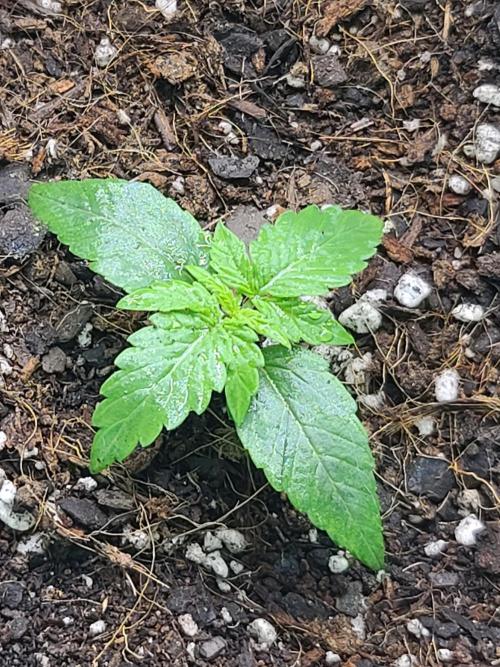
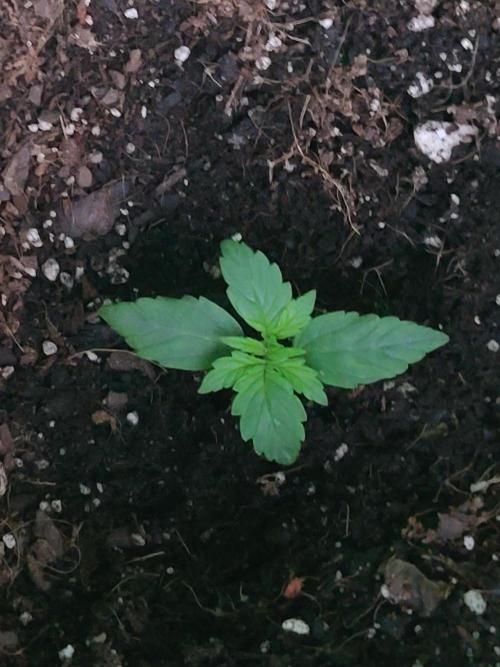
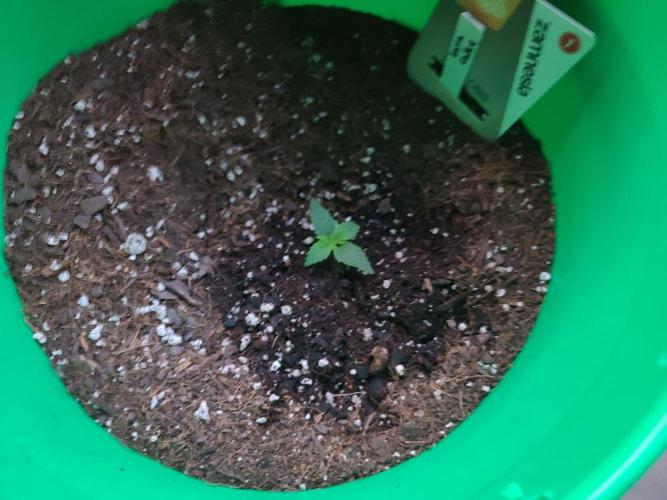
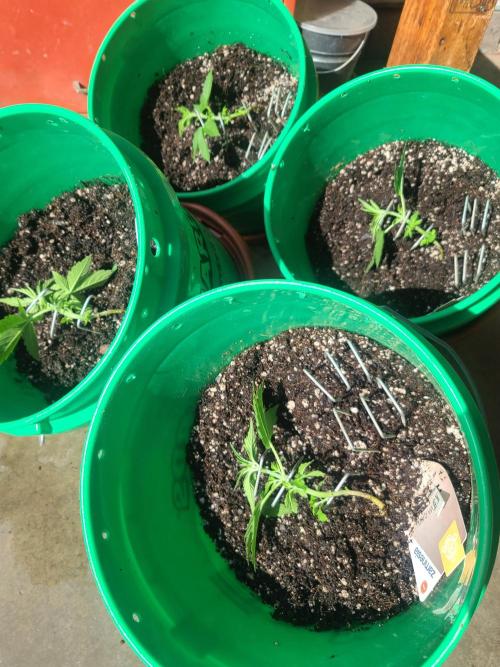
Sapphire9352 Alright. Zam's Lava Cake is a very easy autoflower to grow thus far. And they're very hearty little tanks. They did a great job on this one!! I wont say which is where, but I'm running Zam side by side with Beanfiendz, Humboldt and RQS cultivars. Needless to say, this Zam is doing very, very well. Like, surprisingly well. The level of consistency in the node formations as I'm trimming them by hand during defoliation is astounding to me. I don't actually know the level of genetics they used, but this level of consistency is what I see on S3 and F1 class seeds. Just sayin'. If you look at the pics you'll see they look a little different. That's me being a Mr. Miyagi Bonsai artist because I like to have neat things to look at. I assure you, these plants are so consistent that it's notable enough for me to give you a full paragraph on it. That's me being fair to the breeder. They did a superb job on Lava Cake Auto.
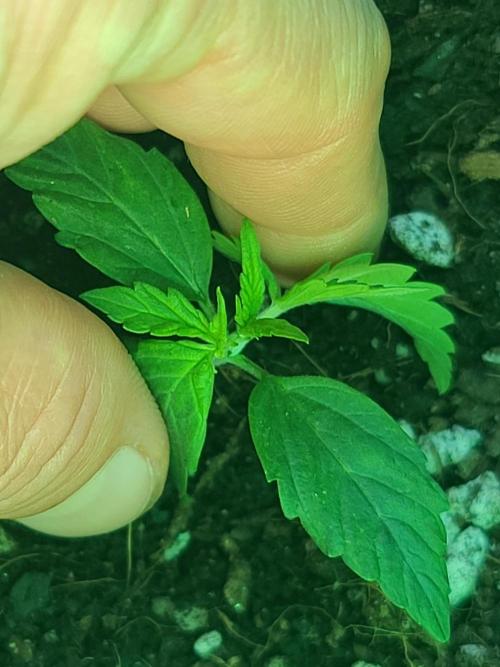
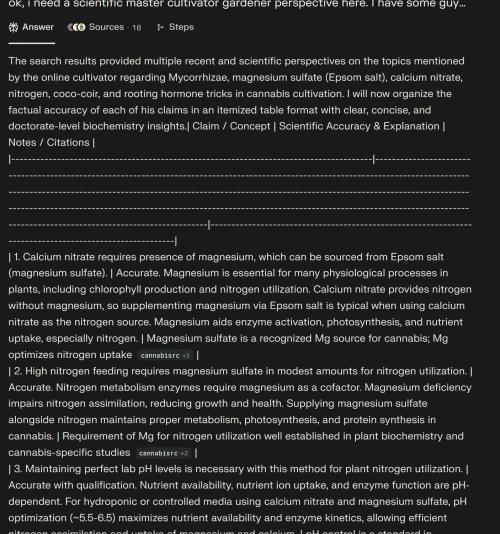
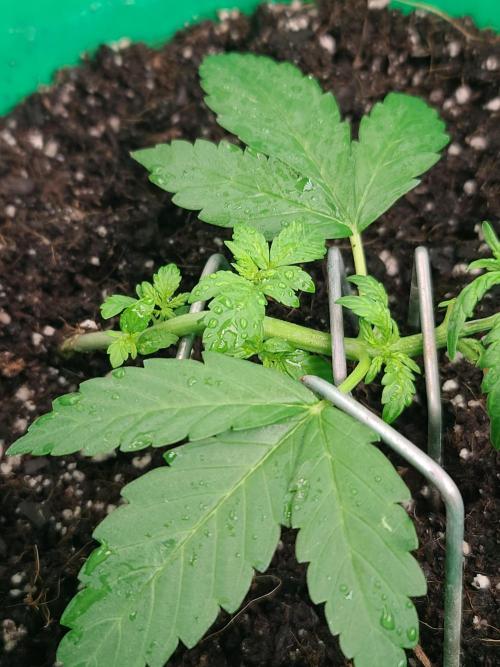
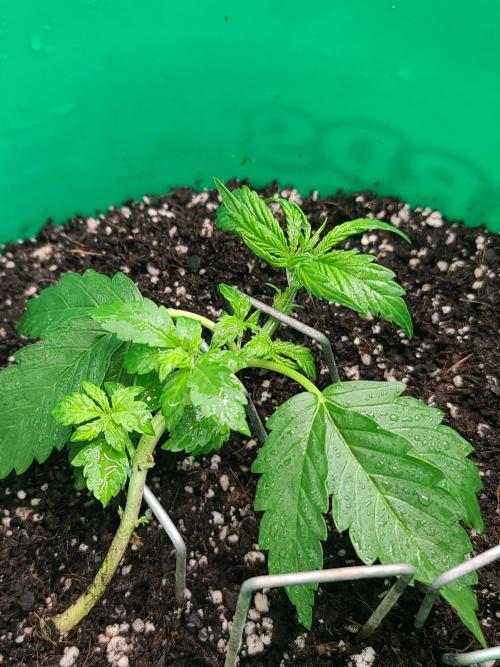
I'm not in the flowering phase, but these plants seem to respond well to everything I have thrown at them. I took them out in the sun for a haircut and they didn't seem to mind so much. In this instance, I was strategic in how I trimmed them. I used three 6" lawn stakes to suspend the plants stalk horizontally in the air across the surface of the substrate. After that, I cut away any foliage blocking light to the 5 available nodes. The idea here is to let each of these nodes grow up and receive equal amounts of light during flower.
Roots have thoroughly permeated the substrate and the plants are tanking along. I'm excited to see them take off!!
Day 19:
The plants responded well to their early defoliation. This may seem counterintuitive to some, but here is my rationale on this method. I don't have the luxury of time to truly enjoy the results of a FIMmed or Topped setup, manifold, etc... We're talking about a plant which is start to finish seedling through late vegetation in 28 or so days. HST requires a 3-7 day period of time to see growth progress, and the goal there is simply to attain more large branches/tops/even canopy. By waiting Until node 4 or 5 to use the method I used, you will end with at least 8-10 tops. I would go further and say at pre-flower, sacrifice the junk nodes you find. Either way you end up with a plant in flower with a lot of tops and zero downtime. I've done them all, they all work. This one yields huge on autos because you skip downtime. It's worth trying if you haven't before, but I wouldn't do it on a photoperiod myself. Photos are all about the luxury of time translating into the art of the grow. Autos are just blazing fast!!
Day 20 Prep-Work:
** DO NOT DO THIS - IF... **
1. You treat your coir like soil and wait for it to get dry before watering. Coco is hydro.
2. If your pH levels are not lab accurate and correct.
3. If you're a person who wants to blame me because you followed my instructions and failed. That's on you, because there's obviously a lot of moving pieces going into this on my end such as hormones and a long list of feed additives. This is my surface level communication to at least get the teaching across at a human level where everyone can understand my perspective, not a tutorial.
4. You don't have a flushing agent. If you need one that'll work, FoxFarm Sledgehammer has always done it for me. Find your fav. Water by itself is not sufficient for this level of blasting your plants with nutes.
5. You have algae issues (pH tilts up), or bacteria/root issues (pH usually tilts down). You cannot do this method if you are not a clean grower, I'm sorry. It's not a sleight against you. The pH issues will roast your plants by mid flower if you are a dirty grower doing this. Trust me, I've been a dirty grower one single time. Never again :)
6. Your not willing to supply Magnesium Sulfate to your plants. Nitrogen is great, but it needs Magnesium Sulfate to be effective. Without this, you can't effectively leverage nitrogen to have leaves which could be in an photos for an online pro article.
**
I am preparing for week 3. Specifically days 20 and 21. In my case I'll be using some (Ca(NO₃)₂) Calcium Nitrate in varying PPM feeds for the plants. Overall I will ramp this up and then cease for a week. Each week from here until flush, there will be some degree of (Ca(NO₃)₂) as a one-per-week macro amendment. For the time being I am also including MgSO4 Magnesium Sulfate. The reason being two-fold.
1. Coco-Coir possesses cation sites. Although I have a custom coir mix where I know the exact amounts, I'll just tell you I've done this with the Coir bricks, FoxFarm Coco-Loco, etc etc everything left and right you can think of. I had fun learning. Here's what I learned, take it and run. Ignore the dopes out there under-supplying their grow media. Coir needs to have its cation sites recharged (sodium and potassium knocked off) not just at the beginning... It needs to be continually happening. This solves for that. This gets used to recharge those cation sites continually on top of your feeding schedule, and I play it by ear with each run of plants to determine how often it is added to my feeds. Typically, I find a 1 week interval for this to be just right. I've never found it to be less than this unless you are playing catch-up on a deficiency. You'll see as my grow goes on. Also, I am not giving exact amounts for a reason. This is something you have to learn by experience because every strain reacts differently. Ease into it. You're just looking for angry tips at flower... Not beyond that, just maintain it once you hit that point. I start here so it's available. This auto has 2 weeks left in veg and has been a week permeated with roots.
2. If you got this far, I'll tell you the 2nd goal with using MgSO4 Magnesium Sulfate. Volatiles will pop like you've never had them pop before. If you don't know what those are, take a bit and do some research. If you're lazy and want to skip the research, this is how it's done: -Sulfur-. Practice on Diesel types to become pro ;) In this case, sulfur is a happy bi-product of a nitrogen-cal-mag nute blasting because it's attached to the magnesium in MgSO4. It's cheap, and you can find it at Anytown U.S.A. Wal-Mart's all year around in the garden and bath section under the name Epsom Salt. Enjoy the tip!! Here's another on the house. If you smell sulfur, stop. You went too far, and you need to address why you are hitting them that hard with a minor amendment for next run. This is like, feather touching it. For perspective, I'll use 1/4 teaspoon or so in English units per gallon, once a week. This is a cleaner, elemental alternative to Molasses as a source of elemental sulfur additions. Be careful though, I said sulfur. You would still need magnesium. But if you're using this method you do need to stop using molasses because they conflict. The greatest miss of all would be the molasses sugars in a coir substrate. You'll want to find an alternative source of glucose for your Mycorrhizae health. I highly recommend the switch. And hey, I'm running this on top of my Cal-Mag supplement which is ran at 1.5x manufacturers recommendation. See why pH and having everything matters, now? You can easily get salt buildup if you don't flush.
Use a flushing agent before flower and before your fade/pre-harvest. It doesn't burn up the plants. I find Saponins to be quite appropriate, cost efficient, and effective for use with Coir dominant mixes. If you find one that's better, I'm all ears!! I don't know it all, I just know what really does not work!! LOLOL Lot's of fails to figure this stuff out for me. I'm a goofball at life!!
2 likes
comments
Share
Used techniques
LST
Technique
Defoliation
Technique
Enjoying this diary? Follow for more updates!


Prefer the old Diary view?
Go back to the old Diary view