


By continuing to use the website or clicking Accept you consent to our cookies and personal data policy and confirm that you are at least 18 year old. For details please see Privacy Policy and Terms
Accept
Likes
Comments
Share


@PeppaWutz
Follow
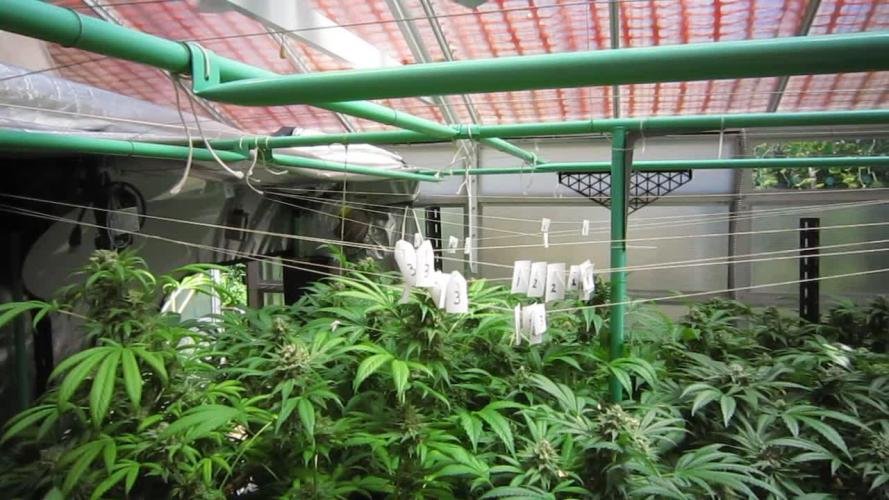
Flushtime... 😃 last week started and I will flush them for 4-5 days. Dont want to change water 2 times a week
Trichomes and buds looking good. Next week harvest 👊😋

Likes
43
Share


@TheCannaProphet
Follow
~ Seedsman Zkittlez Auto ~
Zkittlez (Grape x Grape Apple) Auto x Auto Fruit (Auto Fruit Cheese x Auto Blueberry)
Zkittlez Auto is one of the very sweetest-tasting auto strains available anywhere. It is a sativa-dominant (60%) strain that was bred from Zkittlez (Grape x Grape Apple) Auto crossed with a male Fruit Kush Auto, the latter a remarkable fruity strain bred from Fruit Cheese Auto and Blueberry Auto. Growers can expect to harvest some good yields of high-THC buds.
Zkittlez Auto remains a fairly short plant, rarely exceeding 120 cm. in height wherever it is grown. This is a vigorous plant which is able to metabolize a high level of nutrients and she's a thirsty girl too! If growing indoors close to neighbors it is strongly advised to ensure good and effective carbon air-filtration in order to neutralize powerful odors. This strain's life-cycle is approximately 90 days from seed to harvest.
The leaves on this plant are big and wide serving to convert every lumen available into Zkittlez goodness. Indoor growers should obtain between 400 - 500 gr/m2 while plants cultivated outdoors will produce slightly more at 500 - 600 gr/m2. Lateral branching is very good and it is recommended to use supports/ties to prevent snapping and keep buds close to the light source.
This strain's scent is sweet and fruity with candy and berry notes. Its high-THC has been measured at between 21 - 24% with less than 1% CBD. The effect is well-balanced, cerebral and euphoric, and is very good for social situations as well as for relaxing in front of the TV either alone or with company. It also has the added effect of helping to relieve chronic pain, helping with nausea, insomnia and depression as well as stimulating the appetite.**
**Credit to Seedsman.com
________________________________________________________________________________________________________________________________________________________________________________________________________________________________________________________________________________________________________________________________________________________________________________________________________________________________________________________
~ The Setup ~
~ Grown in a 2qt plastic popcorn pot filled with Mother Earth Grow 70/30 Coco/Perlite with Xtreme Gardening Mykos added.
~ Seed was germinated directly in the medium without any 'pre-soak'
~ Feeding will be by Dutch Pro Nutrients
~ 24hr light cycle while germinating
~ 20/4 light cycle after first leaves appear.
~ 4x8 Gorilla Tent
~ HLG 650R w/ 30w Supplemental UVA Bar controlled by a Trolmaster Hydro X controller set for a 15min Sunrise/Sunset simulation. (also a HLG Blackbird for additional side lighting if necessary)
~ Supplemental co2 controlled by an AutoPilot APC 8200 co2 controller
~ AC Infinity Cloudline T6 with Controller 67 using a Terrabloom 6x24" carbon filter
~ De-Humidifier and Humidifier when needed.
~ 14k BTU IdealAir portable A/C unit plumbed into tent for temperature control.
~ BlueLab testing instruments
~ Two Hurricane 18" oscillating fans
~ Two 6" Clip-on fans
~ Two 10" floor mounted fans
________________________________________________________________________________________________________________________________________________________________________________________________________________________________________________________________________________________________________________________________________________________________________________________________________________________________________________________
Weekly Update:
11/1- Well here we go again fam! This one's going to be super fun with one of my favorite autoflower strains from Seedsman Seeds, growing in a little 2qt. popcorn pot and entered in the 'Best Rarest & Smallest Pot by Seedsman' contest, this one's gonna be a champ! 🤩
Today I went ahead and planted a seed directly into the medium which was pre-moistened with tap water from my well. After I placed the seed about 4-5mm deep, I gently covered it with medium and poured approx. 1oz of water on it. I'll keep the pot in the tent with a Solo cup over it to retain the moisture until it sprouts... Fingers crossed! 🤞🤞
11/3- When I checked on the Zkittlez this evening I was elated to see that it had broken ground sticking up about 4-5mm from the medium! I removed the red Solo cup from her and replaced it with a clear cup that has ventilation holes in it and which I misted the inside of with water to ensure adequate humidity for the seedling.
11/4- This morning I checked on her and she's already up to about 18mm tall but has not shed her shell yet. I'll make sure that the medium stays just moist for now until she's a little older.
By late in the evening she had shed her shell and her cotyledon's began opening. I noticed, after taking a close look at her, that her first tiny set of leaves were brownish looking with light colored tips. I immediately thought back to when I was pee-moistening her medium and had a 'high moment' using my other plants nutrient solution which was around 800ppm in her pot instead of the straight well water I usually use. I thought that she was getting nutrient burn causing the funky color of her first leaf set but fortunately by the end of the 20 hour light cycle, she had her first leaf set out and the were a healthy green!
11/7- Well gromies this girl has a week behind her now and I'm elated to say that she's healthy and doing marvelously!
Up until now all I've done is make sure that her medium didn't dry out using straight well water ph'd to 6.1 @ 75℉. Today I went ahead and watered/fed her with 0.6L of well water with Dutch Pro Grow 'A' & 'B' added @ 10ml/g, Dutch Pro Multi Total @ 7.6ml/g, Dutch Pro Take Root @ 3.8ml/g, Dutch Pro Silica Von Liebig Special @ 1.2ml/g and Earth Juice Oily Can @ 5ml/g which was then ph'd to 6.0 @ 74℉.
The Seedsman Zkittlez Auto is doing great and now is at 2 inches tall with good color. Here we go into her second week since breaking ground and the beginning of a beautiful Seedsman cultivar....follow me! 😎👍❤️
~ Thank you from the bottom of my heart for following my grows and for all the ❤️and support you give! May all your days and grows be Blessed! 😎🙏💚

Likes
43
Share


@DoDrugs420
Follow
NOTE: THE COUNTING OF DAYS STARTS FROM THE DAY THE SEED STARTS ITS PROCESS, IN THIS GROW DAY 1 WAS THE MOMENT THE SEED GOT INSERTED INTO THE EASY START (i do not recomend this method for experienced growers, but higly recomend it to unexperienced growers that might accidentally damage their seedling's new root as they move them from the germination zone into their next or final pot, with easy start you can just pick up the small cube of soil and place it inside the next pot GENTLY).
NOTE: For strain informations, soil recipe and nutrient's stock please do check "Germination Week" as you will find all the information there. (Do not replicate nutrient dosages as these are higly variable depending on the conditions within the grow room or tent, so you may end up damaging or killing your plants even if they are the same strain from the same breeder).
--------------------------------------------------------------------___________________________________________________________-----------------------------------------------------------------------_____________________________________________________________________----------------------------------------------------------------
28/10- All watered with 75ml to 85ml of water with the nutrients in the above concentrations.
29/10- Transplanted now as the soil is in perfect condition between wet and dry and plants start to get a little big for their pots, since i expected them to be rootbound before the day after next watering i decided on transplanting earlier and let them fill the 11l pots right away, i only started in smaller pots as to use a lighter soil since the soil i mixed is for the main pots its some HOT ASS soil. Increased the light's height to maintain plant to light distances. Didn't water yet since i had used water to break down the coco bricks and while mixing the soil the moisture got into all of it, so there is enough humidity to maintain them like this for 1 or 2 more days, i will decide on that tomorrow. Plant height before transplant was 8 to 10 cm, i burried it down to 5 again as to spare some vertical space and try to avoid an emergency tent upgrade (highly unlikely if everything goes well, but i am getting ready for it, because with my luck i may expect 1m plants and somehow have a SOG of 1,4m plants basically clubbing with the light, i hope not, but we never know).
31/10- On these ones i switched it up with 250ml of water per plant with dilluted nutrients in the ratios of:
Bio Rhizotonic- 4ml/l
pH Perfect Micro- 0.30ml/l
Ancient Earth Organic- 1ml/l
Followed right after of 500ml of plain water per plant.
Seems to have done the trick for GG2, much more colorfull by now, however GG1 is being stubborn and keeps on pushing weird-al leaves, but still pushing leaves, imma keep this one just for the sake of it. if it doesn't work out i can always replace it later on, i just wanna see how her structure at the end of veg is and if she will produce flower, if flower production is there even tho not optimal, i will still grow it just to check out if there is any DNA damages caused by heat that could of modify the cannabinoid profile in relation to the other one.

Likes
16
Share

@Chucky324
Follow
Hello, This is the end of week 7 and the beginning of week 8 of flowering.
I completely forgot about reporting last week. Got the roof re-shingled and they finished on Tue and I chopped fire wood when they left.
Chopped for 3 days and on Sat. I couldn't remember if I reported... so I had to look... I hadn't... Oh well..
Got 3 weeks left to go and this is the last week for nutrients. I'll give a couple of weeks of ph adjusted tap water only, before harvest.
Yes... I still like to flush... For better taste.
I've tried growing right up to harvest before and was disappointed with the pot. Or had to harvest early, because of pests, and didn't flush.
I could taste the nutrients left in the plant tissue. Have you ever tried the ash test to see how clean your pot is?
When you smoke a joint, the ash at the end is supposed to be white and fall off the end easily, for the cleanest cannabis.
It always takes 2 weeks flushing, for me, to get that good white ash.
If your ash is gray... that's not too bad, if it falls off easily.
But if it's dark gray with black streaks in it and is stiff and has to be pushed off the end of the joint, then it will probably taste bad too and has too much nutrient left in it...
Have you ever smoked a joint and had it sizzle and soft pop (not like a seed pop) It has too much nutrient left in the plant
Try your own test (smoke a joint) to see how your pot stacks up.
OK. Keep Growing Straight.
Chuck.

Likes
21
Share


@Siriuz
Follow
Started Week 10
Day 64
Fed them some nutes
Day 65
Looking good
Day 66
Outdoors for 3 hrs in the morning due to blackout T_T
Rested like 6hrs zZzz no lights
Day 67
Back to 20/4 schedule
Everything is good
Day 68
Lil defoliation
Got some pics and videos for you all
Day 69 Cool Juicy Video
Day 70 End of week 10
Overrall she is great!
Plan on to give her last meal tomorrow
Floranova bloom


Likes
127
Share


@DreamIT
Follow
🎃👹👽MONSTERCROPPING RED MANDARINE 👽👹🎃
____________________________________________________________________________________________
💀 5.2 ...
💀 6.2 ...
💀 7.2 All regular, Today we add the latest product from hesi to fertilization and wait for the last few weeks, yeah !!!
💀 8.2
💀 9.2
💀 10.2 I love this plant 😍
💀 11.2
_______________________________________________________________________________________________________
📜👀 A look at the details of what I'm growing 👀📜
🍊💚 Red Mandarine F1 🍊💚 by 🌱🍭 Sweet Seeds 🍭🌱
📋 Details
⚧ Gender
▪️ Feminised
➰ Genes
▪️ 55% Indica / 45% Sativa
🎄 Genetics
▪️ Red Poison Auto (SWS39) хCalifornia Orange x Skunk hybrid)
🚜Harvest
▪️ 400 - 500 g / m²
🌷Flowering
▪️ 49 - 63 days
✨THC
▪️ 16%
✅CBD
▪️ 0,2%
🏡Room Type
▪️ Indoor
🌄Room Type
▪️ Outdoor
🕋Room Type
▪️ N/D
🎂Release Year
▪️ 2019
__________________________________________________________________________
👀📷🥇 Follow the best photos on instagram 🥇📷👀
https://www.instagram.com/dreamit420/
🔻🔻🔻Leave a comment with your opinions if you pass by here🔻🔻🔻
🤟🤗💚Thanks and Enjoy growth 💚🤗🤟

Processing
Likes
23
Share


@GrowGuy97
Follow
3 of the ladies are in flush will be cutting them down within the next or 2 & the other 2 probably have another month left! Fingers crossed for harvest!🤞🏼✌️🏼🌱
Processing
Likes
57
Share


@RastaMouse
Follow
Ok start of week 4 of veg. I have topped the front 2 and fim the back 2, not 100% sure if I fim the back too right or got to close and ended up topping lol will have too see. They have responded well to it though. I done it on sat and today (Monday) they already starting to bush more. Will do a defoliate this weekend to get rid of some of the big ass fan leafs but so far all seems to be going great. Happy growing to you all 😁🍻
Likes
4
Share


@LittleBigTrees
Follow
This week I've been pulling the top fan leaves to stop the plant growing taller and to allow the side branches to catch up. I also started feeding them.
I will probably repot and switch to flower next week now they've all outgrown their mutations.

Likes
47
Share


@blazin_skywalker
Follow
Day 22 - Rolling into week 4 looking mean and green! 💪
I need to make a decision on what kind of training I want to dish out to this lady. She's growing a bit faster than her tent mates.
Day 23 - Always experimenting - today I begin my first mainline! I've already built the foundation by allowing the plant to grow to 6 nodes, as recommended by the tutorial I followed by the brilliant Miss Nebula Haze @growweedeasy.
My next step is documented here in a video, as I take my lush, happy, healthy plant, and give her the kind of haircut that makes you want to storm out of the salon without leaving a tip. 😂
I even managed to get in my signature branch snap early in the game - being held together now with duct tape. 🤦♀️
In all seriousness though, I'm thrilled to be trying this out, despite the agony of cutting down my plant to nothing but a stump and antennae. I've seen some great growers create some serious masterpieces using this method, and damn it my curiosity is taking control!
Here's to learning something new!
Day 27 - Came home from vacation to find that my plant had hulked through the duct tape that held her snapped branch together... I guess she's doing well. ☺️ Over the course of the past few days her branches have gotten notably thicker! 💪
Day 28 - Now that each new main stem has grown out, I removed all the growth tips from below the 3rd node on each side. I left the fan leaves in tact to give plant access to extra energy as she pushes through this intense training.
I softened the branches with my fingers, very slowly, to tie down my new main stems horizontally across the net basket.
I took a sterilized x-acto knife to then top each of my two main stems at the 3rd node on each side, leaving me with a beautifully symmetrical base to my masterpiece.

Likes
14
Share


@nonick123
Follow
Día 43 (24/02) Riego con 400 ml H2O EC 0,45
Está reaccionando muy bien al Lollipopping y poda de bajos 😁
Día 44 (25/02) Riego con 350 ml H2O EC 0,45
Se empieza a formar los tricomas! 😍
Día 45 (26/02) La altura está sobre 60 cm.
¿Debería haber reducido en 1 una semana el vegetativo? Yo quería plantas pequeñas en SOG 😂
Riego con 400 ml H2O EC 0,45
Elimino algunos brotes de la mitad inferior de la planta que no van a formar buenos cogollos
Día 46 (27/02) Riego con 350 ml H2O EC 0,45
Floración a todo tren formando los erizos 💥💨😁
Día 47 (28/02) Riego con 350 ml H2O EC 0,45
Día 48 (01/03) Riego con 350 ml H2O EC 0,45
Preparación del PK Booster Compost Tea
Día 49 (02/03) Damos el stretch por terminado ya que estamos en día 21 de floración
Lollipopping y defoliación del día 21 para potenciar la floración!
Aplicación de 0,5 Litros de PK Booster Compost Tea de nuestros increíbles amigos de BIOTABS
🚀 Khalifa Genetics - https://khalifagenetics.com/product/lemon-blanco-v3/ @khalifa.genetics
💦 BioTabs 15% DISCOUNT code "GDBT420" biotabs.nl/en/shop/ @biotabs_official
🌱Substrate PRO-MIX HP BACILLUS + MYCORRHIZAE @promixmitch @promixgrowers_unfiltered
💡2 x Mars Hydro FC1500 EVO Led Grow Light (2024 NEW FC 1500-EVO Samsung LM301H 150W LED) - https://marshydro.eu/products/fc1500-evo-led-grow-lights/ - https://www.amazon.de/dp/B0CSSGN5D8?ref=myi_title_dp

Processing
Likes
3
Share


@camo420
Follow
NEW BOX: 130x60x120
DIY: storage shelf, solid sheet metal
ELECTRO ################################
thermometer top
thermometer bottom
hydrometer
wlan ip cam (+ir filter)
----------------------------------------------------------------
input: x2 USB PC fan
exhaust: x2 USB PC fan
circulation: x2 USB fan
----------------------------------------------------------------
led panel 1: 300W ASUNDOM LED (Veg/Bloom/Full)
led panel 2: 300W XHGrow Reflector-Series LED (Full)
----------------------------------------------------------------
studio light 1 (vegetation): 36W TaoTronics LED Gold
studio light 1 (vegetation): 50W Balai LED full
studio light 2 (vegetation): 8W VINGO LED blue ligh
studio light 2 (vegetation): 50W Balai LED full
----------------------------------------------------------------
studio light 1 (bloom): 36W TaoTronics LED Green
studio light 1 (bloom): 36W TaoTronics LED Gold
studio light 1 (bloom): 50W JADIDIS LED IR full
studio light 2 (bloom): 36W TaoTronics LED Green
studio light 2 (bloom): 36W TaoTronics LED Green
studio light 2 (bloom): 36W KINGBO LED Deep red 660nm
4x PLANTS ###############################
FastBuds Girl Scout Cookies
pots: 14L
soil: plagron grow mix
Likes
29
Share

@nonick123
Follow
Dia de la cosecha (63) para Lemon Cherry Cookies Auto
Una mezcla de emociones entre la alegría de cosechar estos grandes cogollos y la "tristeza" de que ya no formará parte de mi jardín
Una increíble pieza genética desarrollada por @fastbuds_official , ejemplo de como el cutting-edge development de las Autoflower modernas nos puede dar una planta lista para ser cosechada en menos de 60 días (recogida a 63 días por el gusto personal de los tricomas más ámbar) con un perfil terpénico impresionante.
Ella ha desarrollado cogollos duros como piedras y con un olor que se mueve entre bol de frutas, cerezas en su punto justo de maduración y un toque de leche cremosa.
Una cepa que todo el mundo debería cultivar alguna vez en su vida, y que sigue elevando a @fastbuds_official al olimpo de los breeders modernos de autoflorecientes.
Gracias por esta oportunidad de cultivarla FastBuds!
💦Nutrients by Aptus Holland - www.aptus-holland.com
🌱Substrate PRO-MIX HP BACILLUS + MYCORRHIZAE - www.pthorticulture.com/en/products/pro-mix-hp-biostimulant-plus-mycorrhizae
Likes
10
Share


@WorldPeas
Follow
Noticed some Nitrogen toxicity so decided to lower grow A + B to 2.5ml and add some cal mag.
She responded well to topping was umming and uhhing about whether to do it or not but the time felt right and didnt seem to stunt her much at all.
Absolutely amazed by the genetics of this plant with the insane internodal spacing and horizontal growth.
My intents with this plant were to just let her do her thing but couldn't resist the chance for a fat canopy.


Likes
1
Share


@Jmaninthemidde420
Follow
Smoke is amazing. Barely needs a cure to even taste good. I’m sure a nice cure would bring the sweet caramel flavor out as there is a hint of it in the smoke. But I’m low on weed so this would have to do.

Likes
14
Share


@Kakui
Follow
15 Noviembre:
-Hoy se instaló el sistema de riego "Drip to Waste" que me permitirá hacer riego de precisión, con protocolo "Crop Steering".
-Se instalaron sensores de humedad de suelo, para saber cuándo y cuánto regar, el sistema manda datos de humedad de suelo, temperatura y humedad ambiente, etc vía internet a mi celular.
-Mañana se comienza con el primer riego de precisión.
17 Noviembre: Segundo día de riego automático, 3.0EC y 5.9pH, las plantas crecen a buen ritmo, las raíces ya están saliendo por los orificios de drenaje a 2 días de transplantadas.
20 Noviembre: Se realizó una pequeña defoliacion de las hojas tipo abanico muy grandes.
