By continuing to use the website or clicking Accept you consent to our cookies and personal data policy and confirm that you are at least 18 year old. For details please see Privacy Policy and Terms
Accept
Likes
Comments
Share


@SopChop
Follow
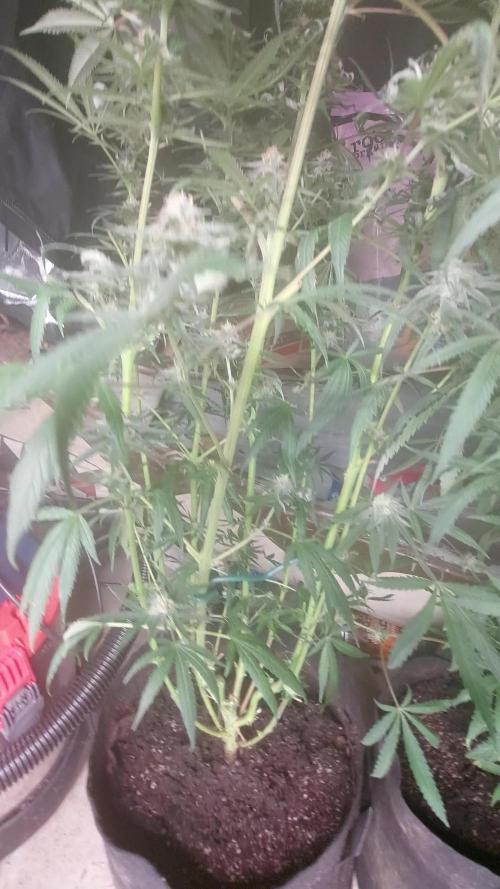
Keeps growing too close to light. Have now raised light as high as can get it. Doing HST to keep top of branchs at least 10" from light.
has now been stretching for about 5 long weeks. please make it stop.

Likes
98
Share


@DutchFarmer
Follow
Looks like she might have another week left started flushing this week.


Likes
Comments
Share


@DaddyPrime2
Follow
6/28/24
she was about 16 inches before I tried some lst. she wasn't as bendy as before so it turned into supercropping which is fine. after transplant, she wasn't happy at all and I couldn't seem to figure out what was going on. I believe her soil is too compacted and I tried using perlite on top of the soil to top dress easier but it just held a ridiculous amount of water underneath. it became like 3 inches of just perlite and I think she was drowning. she's starting to perk up and be happy again.

Likes
62
Share


@Reyden
Follow
🔸Davvero una grande notizia! Una nuova collaborazione con @Spiderfarmer è iniziata e sono felice di poter creare dei contenuti per una azienda seria come la loro!!! Questa mattina è stata montata questa bellissima #SF2000 nella tenda da coltivazione più grande dove dovrà lavorare per far fiorire tutte le signorine che passeranno di qui prossimamente 😁😎🔥
Voglio fare i complimenti perché siete riusciti a creare veramente una luce bellissima con materiali super leggeri ed esteticamente geniali ❤️🔥oltre che consumare veramente poco (2.7 Umol/J)per il raggio di copertura ( 4x3 in crescita )(4x2 in fioritura ) e intensità uniforme in PPFD
Mi piace molto anche il fatto che monta anche diodi IR utili per accelerare la fase di fioritura e aumentare la resa 💡
Ci saranno diversi aggiornamenti rimanete connessi e grazie ancora per essere passati a trovarmi 😃
https://www.instagram.com/reel/Cl_EEAbu_vQ/?igshid=YmMyMTA2M2Y=
Funzionalità principali
2022 NUOVA VERSIONE COSTI DI ESERCIZIO INFERIORI E RENDIMENTI DI QUALITÀ SUPERIORE: Le luci progressive a LED SPIDER FARMER SF2000 utilizzano la più recente tecnologia LED ad alto rendimento oggi: diodi Samsung LM301B, alta efficienza energetica con 2,7 umol/J, creano la migliore penetrazione della luce del baldacchino. Copertura vegetale 3 x 4 piedi, fiore 2 x 4 piedi. Potenza estremamente elevata ma consuma solo 200 W di elettricità, rendendola più efficiente delle tradizionali lampade HID e di altre lampade per piante sul mercato.
NUOVO DISPOSIZIONE DEI DIODI E DESIGN DIMMERANTE: Luci crescenti SF2000 aggiornate. Più perline leggere ai bordi, meno al centro. Aiuta a ottenere una PPFD più uniforme. e la manopola di regolazione della luminosità regola liberamente l'intensità della luce. Connessione multi-luce con regolazione unificata particolarmente vantaggiosa per un'ampia area di coltivazione indoor e piantagione commerciale.
IDEALE PER TUTTE LE FASI DI CRESCITA: Eccellente spettro completo: bianco, blu, rosso e IR (3000K, 5000K, 660nm e IR 760nm). Diodi 3000K che forniscono più luce rossastra e 5000K che forniscono più luce bluastra. La luce rossa e IR da 660 nm è particolarmente utile durante la fioritura, dove accelera i tempi di fioritura e aumenta i raccolti. Trasforma i tuoi semi nella tua scorta. E la luce sembra abbastanza naturale, quindi è utile per monitorare accuratamente la salute delle piante.
COSTRUZIONE BEN FATTA E SOLIDA: nessuna ventola senza rumore. Il driver ad alta efficienza, affidabile e staccabile ha un'ottima dissipazione del calore. Il dissipatore di calore in alluminio è spesso e robusto, coperture protettive per i cavi; Imballaggio intuitivo. Componenti di qualità significano che la luce dura più a lungo, SF Light si prende cura di te con un design più attento, puoi facilmente risparmiare denaro senza acquistare frequentemente luci.
In qualità di produttore professionale di luci di coltivazione a LED da oltre 10 anni. Spider Farmer ha sempre insistito per creare attrezzature per la semina domestica più efficienti, adatte e di alta qualità per la crescita delle piante e si impegna a diventare un partner fidato per ogni coltivatore! Riceverai una lampada da coltivazione Spider Farmer SF2000, un manuale di istruzioni, un paio di ganci d'argento, un paio di ganci neri.


Likes
14
Share


@Thckaos
Follow
09-11-20 Se cambia la solución y se realiza un lavado de raíces. Para bajar la conductividad de las raíces de 2.25 a 0.2 ms para que la solución nueva sea más efectiva. Se corrige el PH de 6.1 a 5.6. La solución tiene 2.1 ms y 5.6 PH. Se añade una pastilla de CO2.
10-11-20 Se corrige el PH 6.00 a 5.6 Conductividad 1.75 ms.
13-11-20 Se corrige el PH 6.00 a 5.6 Conductividad 1.72 ms.


Likes
85
Share


@420DeepGrow
Follow
Comienza la sexta semana de floracion, aqui aplicaré abono de engorde durante una o dos semanas y luego hare el lavado de raiz correspondiente.
Se ha convertido en toda una belleza 😍 💕
📅 Dia 36: Descanso merecido.
📅 Dia 37: Riego con nutrientes EC 1350 EC escurrida 2000
📅 Dia 38: Riego con nutrientes EC 1100 EC escurrida 1750, perfecto
📅 Dia 39: Riego con nutrientes EC 1100 EC escurrida 1850
📅 Dia 40: Riego con nutrientes EC 1100 EC escurrida 1850
📅 Dia 41: Riego con nutrientes EC de 1100 EC escurrida 1750.
📅 Dia 42: Descanso

Processing
Likes
8
Share


@Barham64
Follow
Lights are down to 28 inches, only running blue spectrum the first 14 days. Will begin nutrients and full spectrum beginning of week 3.


Likes
110
Share


@Green_Man_420
Follow
Day 43, The start of Week 7 the cold weather is here 👎🏻 moved the lights to 20/4 for a couple days until I can get a tube heater.
Happy with how these girls are looking. Moving on in the flower stage. Not a lot to report really. Watered last night with just plain water.
Day 46, Happy with how they are progressing. Buds are starting to form nicely, they have a very sweet smell. Water and feed tomorrow. Tube heater and ink bird all set up and working just fine. ✌️
Day 48, couple bud shots from the girls.
Once again thank you to James @ RQS for supplying these seeds for me to grow. And a huge thank you to everyone who has stopped by and shared the love ✌️
Below is a link to RQS if you feel you would like to grow this strain.
⭐️⭐️⭐️https://www.royalqueenseeds.com/uk/f1-hybrid-cannabis-seeds/621-medusa-f1.html⭐️⭐️⭐️
Have a great week and if you have time pop in to check on the updates ✌️✌️
Processing
Likes
7
Share


@Kushizlez
Follow
Day 31 - 38
(Day 32) I’m going to lower the humidity in the room to 55-60.
Still no bananas but I’m still quite worried about #3 fully popping and ruining my whole crop. Since there is a good chance it’s going to herm, I’m going to give it with a small feeding today and watch it like a hawk this week.
I think the boost actually made a decent difference in #5 from last week. I’m seeing slightly fatter main colas but that could just be from less topping/smaller plant or less nitrogen. I’ve decided to push my luck and give a boost to each plant. These things just aren’t filling out like they should. They look like they are on day 23 not 33. I’m going to top dress 3 tablespoons of 1-4-2 Destiny launch and later tonight I’m going to water in a low strength feeding of 0-0-15 kelp extract.
I’m going to give a final heaping tablespoon of nature’s pride bloom to #5 so it can stretch to the end.
I’m also going to lower the lights by a few inches. The tallest cola is now about 13 inches away and the rest of the canopy is at about 18–24. If I see signs of light stress I’ll raise it back up but I’m sure it could use the extra light on the lowers.
(Day 33) I’ve been reading that bigger plants just take longer to mature and that’s probably why my plant hasn’t fully filled out or is about a week behind. I still could have done a better job defoliating some of the smaller larf branches on the bottom which just robs the good branches of energy. The more I think about it, the more I think I did a very poor job of defoliating the middle canopy. I’m still seeing lots of larf and small buds on the inside not getting much light. I’m still really worried about herms after finding that branch so I don’t want to stress them anymore. Removing suckers now is pointless. I missed my window of opportunity and now I have to deal with it.
I’m going to slide an old DVD player underneath #6 to bring it up to canopy level. It’s lower buds are definitely not getting enough light.
(Day 34) Ever since lowering the light, the canopy has gotten a few degrees warmer.
I’ve noticed the buds don’t feel as sticky on top compared to the lower tucked branches that feel almost wet with resin. Outdoor weed grown in my climate will never reach the temperature where it degrades resin luckily.
(Day 36) The buds are definitely swelling but not to the degree I want. Call me picky but I prefer my nugs as chunky as possible. I’m seeing lots of pistils but not much nug matter. Ive heard too many pistils can be caused by the overuse of alfalfa, kelp and seaweed extracts because of the natural PGR’s in them. I’m definitely going to reduce the amount of that stuff I use next round. I hope I’m just wrong and this tent is going to really fatten up this week but I have my doubts.
(Day 37) A purple fade is starting on the underside of every plant except the bush who still is super dark green still. Last watering I got a nice amount of runoff so I’m just going to leave her until the end. I’m seeing a bit of yellowing on #5. I’m going to give it one final full strength feeding plus some rock dust and oyster shell tomorrow and that’s a wrap for nutrients. I might as well hit everything else with a final low strength 0-0-15 too.
(Day 38) I’m amazed at how much this stuff smells compared to my last round. It smells very earthy and floral with a hint of pine. Definitely not that gassy smelling pine but more of a sweet pine.
Likes
16
Share


@ertaverd
Follow
Still resisting the rains. I couldn't water it but lucky I ve put them some coco. Changed the weather and now we have very few hours of solar light. Very low temperatures from now on, lets see if its dyed in some purples...
Likes
39
Share

@AestheticGenetics
Follow
4/9/25
Welcome to another week. Week 5 since the flip of 12/12 just ended. So today is day 36 since 12/12. The begining of week 6.
About halfway done with flowering. Time to start packing on weight.
also its important to note that it took a week or so after 12/12 to have pistils show up. So its closer to 28 -30 days of Flowering.
I have a foxtailing pheno thats mostly green with thin buds.
I have a super chonker green pheno with ridiculously chunked up golfball sized nugs everywhere.(R3)
I have a sativa style but thicker buds with nice long connected colas (R2)
another smaller pheno with traits of some of the others and also green.
and then a singlular pheno that looks gelato dominant and its purple pretty much everywhere to the point that i didnt notice its coloring until it was next to all of its sisters that are straight green.
Very beautiful plants and a nice display of phenotypical expressions
Top dressed
2tsp bloom
2tsp microbe charge
1tsp bloom booster
A Special thank you to Zamnesia and
Likes
175
Share


@love_2_grow
Follow
Day 36
First day of the final week of vegetation. Originally I was planning on vegging another few weeks but since the right girl already has a bigger bush than a 70s pornstar I'll flip soon, before space will be an issue. Preferably I'd veg the left girl longer as she is still lagging in size but it's too big of a mission to set up my second tent and move her over there.
Super easy day today, all I did was to give the right girl 3 liters of pH 6.1 water as well as tightening a few LST wires.
Day 37
All I did today was to tighten some LST wires, removing some more leaves down low on the plants, and watered the girls with pH 6.6 water. The left girl got around 2 liters and the right one only got a liter since she wasn't all that dry considering that she was watered yesterday. I also started brewing some compost tea to feed to the girls tomorrow. I used the same recipe as previously: worm castings, rock dust, biochar, lime, bentonite, neem meal, kelp meal, and some molasses.
Day 38
Open the tent today and was met by a surprise - one of the tops on the left girl had broken off. I tightened the LST wires yesterday and all was ok when I closed up the tent but I guess that I had tightened a bit too much so the top eventually broke. Sigh. Wasn't planning on topping again this week but yeah, gotta roll with it. Maybe I move one of the girls to the second tent after all. We'll see.
All I did in the tent today was to feed the girls some compost tea. Each girl got around 0.5-liter tea as a foliar spray and then an additional 2.5 liters in the pot. True to form I naturally forgot to pH the tea. No idea why I always seem to forget to pH my compost tea but I really should make an effort to remember it next time.
Day 39
All I did today was to give the right girl 3 liters of pH 6.6 water. She is so much bigger than the small plant so she drinks a lot more. Currently, I'm watering around 10% of the pot volume per day.
I'm pretty sure I will move out the petite girl and put her in my small drying tent and keep the right beast in my main tent as I'm kinda curious to see the yield I will get from her when she can spread out properly. I have already ordered another grow light and it should arrive tomorrow.
Day 40
Today was a busy day in the tent as one of the girls moved out to her new home. Before I go into details, I should take a step back and explain my setup.
I have this tiny tent that is 40x40x120 cm big (16x16x48 inches) that I use as a drying tent. It has a circulation fan, an extraction fan, a carbon filter, a temp/humidity monitor, and an inkbird humidity controller to control everything.
I have been considering turning it into a small grow tent to fool around and see what I can grow in such a small space. I've always been fascinated by small challenges, to see what you can accomplish within strictly set (and small!) boundaries — both in size and in budget.
I was planning on setting up this tent after the summer, but as I'm running out of space in my main tent, it seems like a good idea to do it now instead.
The only thing the tent lacks to start growing is a light, and I already have a ViparSpectra P600 light, but it is currently used for my chilis and tomatoes while they are waiting to move outside.
So I bought a new low-budget light to use with the veggies and move in the ViparSpectra light into the tent. The P600 is also a budget light, but I'm hopeful that it will still work well in such a small space. After putting in the light in the tent and measuring the PAR level, it looks like the ViparSpectra is more than up to the challenge as I had to dim the light not to fry the canopy below.
The entire build with everything in it (tent, light, fans, carbon filter, etc.) is well below 250 euros. So about half of what one of the lights in my main tent costs. lol.
Once the light was installed in the tent, it was time to move the left girl. First, I carefully removed the scrog net, and it was pretty easy as the plants hadn't grown into the net yet. The small tent has a tiny door that it was a challenge to get the girl in but with some help from my girlfriend and some brute force; the plant went in. It is very tight in there, and I will have to do some selective pruning for sure, but I'll do that over the weekend.
In the main tent, I moved the girl into the center and put back the scrog net. I will have to train her further to fill up the space entirely, so maybe I do another week of veg after all. I'll work on her over the weekend as well and see where I'm at on Monday.
I adjusted the lights to read similar PAR levels at canopy level in both tents, but once I go into flower, I'll bump up the main tent as I have CO2 in there, so the girl should be able to handle more light and heat.
Finally, I gave each girl 3 liters of pH 6.1 water.
I had to use the ultrawide lens on my phone to capture each plant in the photos. Fun to finally use that lens :)
Day 41
Today I moved the small tent back into its stealth location, another IKEA wardrobe. There's no real risk that anyone would discover my grow but I still prefer to keep everything as hidden as possible. Watered the girls, each one with 3 liters of pH 6.5 water. I also removed all LST wires from both plants but attached some new ones for the right girl. (I'm going to keep calling them left and right even though they aren't in the same tent anymore.)
Finally, I defoliated the bottom of the left girl. That's it. All in all, a really chilled day.
Day 42
Today was the last day of week 6 of vegetation. I know I said earlier this week that this would be the last week of vegetation, but I might veg the right girl another week. To give her a bit more time to fill out the tent. I'll decide that tomorrow, but in any case, I'll flip the left girl as her tent is so tiny, and I don't want her to get any larger.
The left girl is now 38 cm tall, and the right girl is 46 cm tall.
The right girl got 4 liters of pH 6.1 water today as she is sooo thirsty right now, but the left girl didn't need any today, so I left her alone.
I started brewing some compost tea (worm castings, rock dust, biochar, lime, bentonite, neem meal, kelp meal, and molasses) as I want to do one final foliar feed tomorrow before sending the girls into flower.

Likes
23
Share


@Ctrellis90
Follow
Great week for the little lady in week 2!
We have nice steady growth and shoots are starting to come out from the lower branches which is fantastic.
Her color and leaves tell me everything is alright as far as her medium and her nutrient uptake, so yeah, I'm really loving this living soil thing.
Thanks for stopping in. See you next week!


Likes
285
Share


@Tropicannibis_Todd
Follow
👉Alrighty Then👈
So we are at DAY 42 of Flowering with the Sugar Larry 👈 And she's doing fantastic 👍shes finally done with her stretching 👌 and building Budz 👈
😀 decided to showcase pheno #2 , definitely has different traits then #1 very interesting 😀 thoe both are killing it 👈
Hedgehogs in full bloom 👈 I did a major strip , defolation is complete 👌
Except for some slight watering , ive been doing some defolation as well as some LST manipulation to pull branches to the side 👌
👉I had to Top her during the middle of 4th week 👍 Happy Growing
👉Soil Provided by ProMix.ca
👉Nutrients Provided by Agrogardens
👉Lighting Provided by MarsHydro.ca
Thanks my friends for the great support over the years 🙏 Happy Growing

Processing
Likes
33
Share


