By continuing to use the website or clicking Accept you consent to our cookies and personal data policy and confirm that you are at least 18 year old. For details please see Privacy Policy and Terms
Accept
Likes
Comments
Share


@herewegrow
Follow
Day 15 - Transplanted WWxBB 1, and SB 1 & 2 to Roots Organics Original in 5 gallon pots. It went smooth and they all perked up pretty quickly. WWxBB2 could use some more time to develop its roots but no more than 2 days until she gets transplanted too.
Day 17 - Transplanted WWBB2 this morning so now all 4 ladies are in 5 gallon pots. Watering .5 L every about every 3 days but will need to gradually increase the watering amount with the root development. Keeping an eye out for topping time!
Day 19 - Starting to see some slight discolorations on a few leaves. Seems too early for the soil to be running out of nutrients and my pH has been consistent as far as I know. Thinking about trying a light does of some FF nutes if it persists. WWBB1 is almost ready for topping.

Likes
5
Share


@Fefa128
Follow
Ok Growers! Check it out. Week one, you can tell it's a slow start due to the light that I have. Not much to say about this week, DONT WATER! unless you plant it's definitely asking for it.. try not to over water the firsts weeks. Again, they might be some Spanish in the videos 😅 let me know if something like this but in English would be good around here.

Processing
Likes
28
Share


@Budcrack
Follow
New update for week 12, concluding week 8 of flowering:
Hi(gh) Folks! Thanks everyone for your input on my second grow question. I’m going for HighTV’s answer, the SOG with 9x4 main buds. Very nice to get everyone’s input on this, appreciate it!
So another week done! They got their last nutrients Tuesday and on Thursday the 5 early ladies from Hempire got their first round of plain acidulated water. I flushed them a bit on Friday and Saturday to. Now they can dry out for a couple of days. I will flush them for the upcoming week and let them dry out before harvest next weekend. Im counting on them to swell up even further during this week.
As for the rest of the 4 plants from Hempire, 4 from Royal Queen Seeds and 3 from Hy-Seeds, I will treat them as if this is another week 8, and they will get another dose of Flowering nutrients and PK. Then next week I will start to flush them also. I will have 2 full weeks to flush and let them dry out until my planned harvest on Saturday 5 January. I’m not even sure that will be early enough for the 4 RQS’s since they look like they have even more bud-growing to do, before they can start swelling! I will keep an eye on that.
The 5 tall ladies, 2 from Hempire and 3 from Hy-Seeds show the nice thick Kushy buds i’m craving for, can’t wait to see the becoming nice and heavy! On the photos you see the slight diverence between the pheno’s, the left 2 plants grew the popcorn-buds on a stem, and the right ones have nice thick popcornbuds against the stem’s. The other to remaining Hempire plants also show these, apart from the early ladies offcourse. The early birds show a little stretching buds and nice purple colours.
So next week will see the early ladies harvested, I hope?
Look out for my next update and don’t forget to like!
Thanks and see you!


Likes
47
Share


@AsNoriu
Follow
Day 43. Light is on max output, heat enormous and they RUN !!!! thought intensity will stop them a bit , but i think i do only worse ... We have +30 heatwave in UK, i live in attic , so for 4 more days everything will be out of control.
Watered today. 6.3 phed water.
I love simple and affordable Mars Hydro products, if you can cope with heat TSL2000 can do magic in your tent !
Will update after heat wave us over. Should be in 4 days back to +20 ;)))
Day 45. They GROW !!!! Distance is insanly small, but i have 30 cm of space left, wont move light for a week, then i will try to have 20 cm at least again.
Planing last top up, need two more waterings before it, so it should be on last day of this or first of next week.
Thinking to take down all LST at that time, need pots to breath better, too thin fabric, they dont keep form.
Day 47. Drink every two days !!! 4 liters goes to nothing !!! Huge, still streching, tops almost rubbing TS2000, heat 30 inside, humidity 65-68 ..... will need heavy clearing again !!! Most stacked Cookie i ever grew, fills in very nice !!!
Happy Growing !!!!

Likes
26
Share


@Nistnov
Follow
I finally had some time to harvest everything, left her for 2 days in the dark in a vase.
The smell was so intense in comparison to the painkiller. Since it rained a lot there was some bud rot but I guess that was inevitable.
The honey cream still grows strong has no bud rot since the buds seem fluffy enough for a good airflow.
Likes
21
Share


@Smokey89
Follow
Ok guys so for this grow I'm using 7 dwcr 20l pots with a 20l reservoir water temp is 20c air temp is 24.5c humidity is 64% I'm using canna coco a&b nutrients 200ppm led lights 2x1000w. Now for the plants I'm using cuttings from two plants I've got the sunset sherbet and the gelato 41 as you can see in my pictures I've also tried a coco mix 70/30 for 2 of my plants (one of each) just as an experiment as I've not grown in coco before let's see what we get
Day 2
All clones are now starting to have a nice light green colour to the fan leaves and are now standing correctly. I've added one scoop of great white root enhancer to my nutrients to give the roots a better ability to take in the stuff it needs. All in all not looking bad but still early days
Day 3
Now the clones are starting to thrive in their environment I've added some mycorrhizac for root growth,liquid silicone for added growth to overall plant,cal mag strengthens stems,and some fulvic acid to give them that extra boost. All clones are looking well however I can notice a big difference between the ones in the dwc and the ones in coco. I'm watering the coco whenever it feels dry roughly about 2l a day with run off. Still early days but I'm impressed at how well the clones are bouncing back after being shipped overnight
Day 4
New pictures uploaded. Just general garden management at the moment
Day 7
Changed the water in my reservoir cleaned the filter and outlet pipe. Added nutrients to same scale as previously used and ph is now 6.5 backed the lights off and turned on both veg and bloom functions. While changing the water I noticed a few roots starting to show out of the net pots will upload some pictures soon didn't have my camera on me at the time. Coco experiment is going well been feeding g once a day roughly 2 l with run off. They are noticeably smaller than the ones in the DWC but are still growing nice

Likes
23
Share


@Master_weeda
Follow
Bonjour à tous les padawans et maîtres jedis
Pour la germination j'utilise la technique du sopalin
Pour faire germer vos graines dans du sopalin, vous aurez besoin :
Un Tupperware avec couvercle
Du Sopalin, ou autre quel papier de cuisine qui soit épais et qui retienne l’eau
Un verre d’eau
Si c’est l’hiver, vous placerez le Tupperware près d’une Box ou d’un Modem pour donner un peu de chaleur
Étapes de la germination:
faire germer vos graines de cannabis dans du sopalin
La première chose à faire est de tapisser le fond du Tupperware avec du sopalin, 2-3 feuilles suffiront. Si vous ne mettez qu’une feuille, elle captera peu d’eau et pourra sécher, vous mettrez donc plus de feuilles que pas assez.
Une fois les feuilles placées, versez l’eau du verre dessus, mais pas trop, juste de quoi imbiber toute la surface couverte par les feuilles. Vous aurez ainsi l’eau suffisante pour faire germer les graines sans avoir besoin d’essorer la feuille de papier.
Une fois les feuilles humidifiées, mettez vos graines par-dessus, et recouvrez le tout avec une autre couche de quelques serviettes. Une fois en place, humidifiez cette nouvelle couche.
faire germer vos graines de cannabis dans du sopalin
Lorsque vous graines seront placées entre les 2 couvertures de feuilles, fermez le Tupperware hermétiquement pour que l’eau reste bien dedans et que l’ensemble ne sèche pas malgré la chaleur.
Si vous êtes en hiver lorsque vous mettrez vos graines à germer, ou que les températures sont inférieures à 20°C, vous placerez le Tupperware sur votre Box ou modem jusqu’à germination, mais toujours en évitant le contact avec la lumière. Si vous êtes dans une zone au climat tempéré ou chaud, vous n’aurez qu’à placer le récipient avec les graines à l’ombre dans une armoire ou une caisse de rangement. Toutes les 24h, vous devrez vérifier l’état d’avancement de la germination. Si quelques-unes sont sorties mais pas d’autres, prenez celles qui ont germé pour les planter, laissez les autres dans le Tupperware et vérifier de nouveau le lendemain.

Likes
67
Share


@BarneyRumble420
Follow
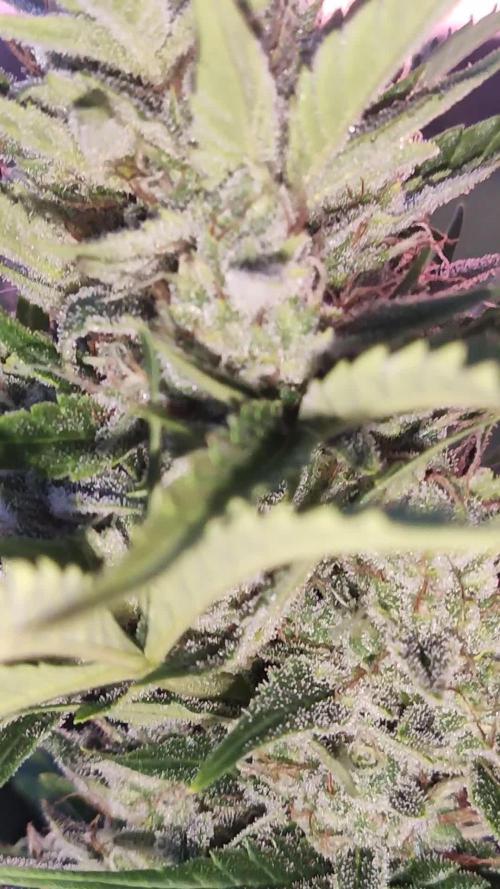
Hi guys welcome back🤙🤙This week has been cruising along with alot of trichome production, I can tell she will be coated in frost ❄️❄️ starting to smell absolutely beautiful and looking even better, I have used some tire wire to perform lst on four arms to bring the colas out to receive more light, I have been watering daily, this week I added some bud candy from advance nutrients to the mix. Wish I had a better phone camera because the pictures don't do justice, I am absolutely loving fastbuds genetics you guys know what sup💪🔥 and will definitely be running their genetics alot, thankyou for stopping by everyone 💪💪🔥 till next time, thankyou fastbuds
www.2fast4buds.com

Likes
25
Share


@Ratch33
Follow
Terple x Deluxe Sugar Cane - Vegging 8 weeks
Topped x 3
LST x 3
Lollipop
Pre-Flower Defoliate
Hydrogen Peroxide Foliar spray
_________________________________________________________________________________________________________________________________________________________________________________________________________________________
Jet Fuel x Deluxe Sugar Cane - Vegging 6 weeks
Topped x 1
LST x 2
Lollipop
Pre-Flower Defoliate
Hydrogen Peroxide Foliar spray

Likes
7
Share


@Horizon_Grow
Follow
Due to construction and revamping of our space, we had to leave all seedlings in their germination dome for approximately a month before getting them into veg. In order to not run into any space issues within the small dome, these young plants were kept under a low-wattage fluorescent tube to avoid any growth which may have been "too vigorous."
VEG WEEK 1:
03/09/2021: (Image 1)
Each plant was potted into, and fed with the following nutrients during transplant:
1. 5l FF F1 medium
2. GHF: Biogrow - 15g worked into medium
3. Wormcastings (workd into medium and astop dress)
4. Organics Matter Mycoroot Supreme -placed at the bottom of the planting hole.
5. Watered each plant with a Silicon Plus feed solution .
07/09/2021: (Image 2)
- All plants are now in 5l pos with Freedom Farms F1 medium, and are in their new veg home under a 3500K 320W Quantum Board.
- The 3 weakest seedlings of the total 19 seeds (1x Crit and 2x PC) were placed on the left side of the tent, and in different pots, as they are obviously struggling and may not even make it into our final flower room.


Likes
32
Share


@Bossman
Follow
So they still have more ripping to do. I only harvested the main colas on 3 plants still a lot more bud to go at least the same amount I'll update total weight etc. When it's all finished cant wait to test it out.


Likes
14
Share


@MUSRIME_supreme
Follow
Всех тепло приветствую.
Начинаем свой репортаж, погнали!
17 добрых автоцветов от компании Errors Seeds.
Южный Урал, теплица.
Обо всем подробнее в следующих постах!🤟
Начинаем как всегда, с семян)
Они отправились в ватные диски на прорастание, далее переедут в торф-таблетки под лампу APOLLO 6.
Переезд в теплицу будет осуществляется в нашей готовности, в готовности самой собственно теплицы и САМОЕ важное, когда будет готова рассада🌱
Likes
6
Share

@SkunkyDog420
Follow
Hallo zusammen 🤙.
Sie wächst sehr schön und macht keine Probleme.
Rabattcode für den BIOTABS-Webshop https://biotabs.nl/en/shop/ GDBT420, damit erhalten Sie 15 Prozent
Likes
58
Share


@Mr_Motalovah
Follow
Hey Growers & Tokers!
Sorry for the delay with the weekly updates, some things I had to attend to but i'm back and at it!
Alright, so this week 21 days had passed since the 12/12 switch.
So there was a little defoliation done.
Taking away all of the big fan leaves and some of that extra bottom growth I didn't want, that tiny twig I left behind in hope that they'd grow.. but they didn't 😑
I won't be taking anything else away from here on out it's just feeding and caring.. maybe pluck a leaf here and there.
She's growing nicely, bud sites are stacking up correctly, very happy I didn't give on this one when she was struggling as a seedling.
Good color, very healthy. Good to see there are no deficiencies or signs of stress which is just awesome!
Besides the defoliation there really hasn't been any news.
Feed: 1,5L every other day.
Hope you all have a good one!
One love!
Likes
39
Share


@flako
Follow
Im really charmed with this community, so much friendly and helpfull, ill make a new diary For us,
thank you all for your help and understanding, although my English is not so good LOL.
See you soon00

Likes
2
Share


@Backyardnewbie
Follow
Flower moving along. Added big bud from advanced nutrients to res on day 32. EC is 2.9 DLI is 60.

Likes
41
Share


@Ieiogrow94
Follow
Eccoci qui!!!
Finalmente il raccolto... Sono davvero entusiasta del risultato di queste due bimbe..
Strain 1 è Viola nelle cime mentre Strain 2 è dei colori del diavolo!!!
Grazie a tutti per il supporto e a @Fast_Buds per la collab
Ne vedremo delle belle!!!
Likes
1
Share


@SessionMeister
Follow
Switched to 12/12. No Problems with any of the strains so far. Upped the wattage to 400 all plants but the LSD liked it. LSD showed little sunburn but got used to it quickly. Feeding every once in a while and adding some Bloom Nutrients early.


Processing
Likes
7
Share


@Ruuddata
Follow
#Crop King Seeds
Planting 3 Seeds Using 2 Different Techniques to germinate the Seeds
- The First 2 Seeds were germinated (Jul 2nd) using the water / paper towel technique
* The seeds were dropped in a half glass of bottled water (It stayed afloat) and kept in a closed dark area.
* After 12 Hours the 2 seeds were pushed down to reach the bottom of the glass using my finger.
* After 24 hours the 2 seeds were transferred / Now using the paper towel method to complete the germination
- The last seed was germinated (Jul 3) using just the paper towel method
* This method took longer to break the seed surface.
On Jul 6 Decided to transfer all 3 seedlings into the Aerogarden.
* Seed G1 had about 5cm roots. Some flowers already sprouting
* Seed G2 had about 3 cm roots. Still had seed top.
* Seed G3 had only just cracked . No length


