


By continuing to use the website or clicking Accept you consent to our cookies and personal data policy and confirm that you are at least 18 year old. For details please see Privacy Policy and Terms
Accept
Likes
Comments
Share


@BelgianBudtender
Follow
Heyo growmies
Flipped to flower! Obliviously the plant is still transitioning and there are no signs of flower yet this week.
Roots are nice and healthy and absolutely loving Hydroguard, there is no more muck collecting around my pumps or roots.
Overall my training in veg could have been better, I could have followed a guide like nebula haze, but instead I sorta just winged it, it remains to be seen whether or not it pays of in flower, I'm looking for dense nugs, and not a lot of popcorn.
My cooling isn't sufficient, but I have some DIY tricks up my sleeve to keep this bucket cool.
Hoping to see some color on this girl, I've only grown green weed so far and would love some pretty flowers, that's all for this week, thanks for stopping by.
Stay safe and keep growing.

Likes
82
Share


@BigBadLion
Follow
Another fast update! 😃
Hey guys! I hope everything is going well for everyone. This is the 2nd week of flower and I'm here again to share what happened last week!
My babies now get thirsty really easy, nothing like how it used to be (and you can actually see them stressing over it in my photos) but gladly nothing that some water can't fix. The main colas are also starting to grow more and they are full of small developing flowers (they look super pretty! 😍)
Some side stems are also outgrowing the main branches... and I'm kinda unsure what I want to do (or if I should do anything). Maybe LST or supercrop them? (I might screw things up by doing it in flower and I have never done it before 😭) I don't know. I also want to trim some leaves away since the foliage is very dense but I fear I might end stressing them! I will probably make a grow question to know what others think.
I'm back on a normal nutrient schedule. I'm no longer "overfeeding" them and I water them 4 times a week (but with little water). Next week I'll try doing 3 but with more water and see if they like it more that way.
So far I love how the plants are developing! The small flowers look great and they look bigger everyday! 😃
Thanks everyone! See you all next week! 👋

Likes
38
Share


@Cariboo_OG
Follow
Utopia Haze is a rare heavily sativa dominant hybrid (90% sativa/10% indica) strain created through back crossing Brazilian Sativa strains. This tasty little bud took home 1st Place for Best Sativa in the 2008 High Times’ Cannabis Cup and for good reason – with its potent 18-22% average THC level and long lasting cerebral effects, Utopia Haze is one powerhouse smoke. The Utopia Haze high comes on soon after you finish your first toke, hitting you with a strong cerebral lift that infuses you with a sense of hazy relaxation.
Type: Feminised/Photoperiod
Cultivation: Indoor/Outdoor
Flowering Time (days): 70-75
Indoor Yield (g): Up to 650
Feminised Outdoor Harvest Month: October
Feminised Outdoor Harvest Month Week: 3rd-4th week
Aroma: Citrus, Woody, Pungent, Mint
Effect: Cerebral Lift, Hazy Relaxation, Sleepy
Welcome Everyone to the Final Entry of my Utopia Haze Grow !
There is so much to discuss ! I have been extremely busy as of late trying to get this Harvest together, but i am happy to have it here for you now !
I Seriously under estimated the amount of time, help from others, and my own necessary skills to pull this off.. and i still kind of screwed it up lol !
But its worth noting i have never actually done this before and trying to document it during....was extremely hard.
It is next to impossible to work an iPhone with rubber gloves on !
First I want to discuss everything step by step so before you jump straight into the comments on how the end product is so small in "quantity"
Rest assured i am happy with its"quality"...and thats all that matters to me because Life is a journey not a destination! and i have learned so much from this grow that I couldn't be any happy even if i messed some things up :)
But at the very least I hope you read through this entry in its entirety with an open mind and focus more on the process, rather than just the outcome!
I ran out of Ice & i was only able to wash three times..(normally I've heard you should go sometimes 5-6 washes)
Preparation is Key & things will be much better next round :)
Photos 1-22
These are pretty self explanatory but for those of you just tuning in now.. this is what happens to a very happy plant when you don't have the necessary tools to monitor key components of growing cannabis.. Ph, as well as EC levels play a very key role in the outcome of your grow lol that being said I was just able to save this plant by purchasing both tools but that doesn't mean the plant didn't suffer because of the prior events.. This was a Huge reason behind me choosing to turn this harvest into what i would consider
"Solventless Hash Rosin" from "Ice water extracted Bubble hash".
Pictures 23
The idea here is the process of using "fresh Frozen Cannabis" this has been discussed many a time online on such sites as instagram and here on grow diaries as well.. I personally have Never tried the process so i decided to try it out and make a judgement for myself..
Video 24
The Cannabis has now been in the freezer for 72 hours making it very well frozen.. as you can tell i struggled getting it all into the 25u Screen Wash Bag. One thing of note i would do differently is i will de-stem my next batch as i also believe this played a part in the amount of plant matter that escaped through the sieves.
Photo/Video's 25-28
The idea here is "ice water Seiving" & especially with the bags that I am using here that are only have screen material on the bottom portion of the bag it is very important to have spaces in-between the screens to allow the water to pass directly through the screens into the bottom bucket with the least amount of resistance.. because the hash is so extremely temperature dependant if it gets warm on the side of the bag.. it will stick there and not make it to the bottom to become use able product..
29
You do not need to use as much Ice as i used here lol... the idea is to keep everything very cold..i certainly achieved that but at the sacrifice of using so much that i ended up grinding product and producing "contaminants" but in the end they are just plant matter that i would be smoking when i rolled up my joint either way so.. I'm not super disappointed..
But it should be noted that what you want to achieve here is a Layering effect where you have the wash bag between two small layers of ice while the "water current" washes the Trichomes away allowing them to be separated by the screens setup below :)
Before Starting the machine you should allow some time (i.e.;10-12minutes pre soak to allow the product to become saturated) before the first cycle.
By video 32 I have just ran out of ice lol..
Video 33-34
Here I have a tip for you.. to separate the screens that you sieve through.. cut 5 gallon buckets to stretch them across nice and tight.. it'll make scooping your Bubble that much easier ! i learned this from the many "Frenchy" videos I have watched :)
Picture 35
Here in lays the problem for most people.. drying your hash without loosing vast amounts of "Terpenes" whilst also stay ever vigilant against mold !
Thanks to all those videos I've watched on youtube.. id like to think this was one of my most successful parts of this process..
Things to Note; Terpenes start to seriously evaporate at temperatures 68F or 20C
you need to stay as cold as possible whilst bringing the Relative Humidity in the space down into the 40-30% to stay away from that nasty mold !
I used my cold storage room in the basement.. with a dehumidifier running to keep the space at 45% RH & staying at a constant 15c.
All while spreading the hash as thin as possible across parchment paper, on top of the white screens with a fan moving air across both sides of the paper.
Pictures 36-38
These are some macros i took in the middle of my drying session I fell in love with the colour.
Yes i know the black spots are plant material but they will get caught when i bag the hash & squish the oil out.
Thing to Note; at this stage it is important to ensure you 'micro plane" the hash down as fine as you can whilst staying weary of the temperature... any "chunks" will hold pockets of moisture.. that lead to potential problems..ie; mold ...
Picture/Video 39-41
Successfully planed bubble hash ready to be bagged and Squished !
Picture 42
Ive decided to follow Pedro.. from Pedros Grow Room and double bag to be on the safe side so i don't have any blow outs.
So thats One 25u bag inside one 160u bag ! :)
Pictures 43
This is almost 3 grams of the bubble hash from above, already melting in the bag.. this is where i ran into trouble again lol things started getting to warm in the house and i was only able to get one of the three squish's i did on video :( things started getting sticky.
Picture 44
This is basically just a photo of the equipment I'm using; 3x5 LowTemp Cage in the frame I built myself, with a 20Ton bottle jack.
Something to note here is this is an older Lowtemp model with only a single heating zone which is which i have it closed here heating Both sides of the press :)
As well as the importance of having adequate pressure on your plates.. my rig is very overkill for the size of hash bags..lol
Video 45
Here is the lovely press video.. its didn't quite work the way i wanted either lol my directional folding wasn't quite tight enough for a big "drip" :)
&the Press was set to 65°c
Photo's 46-50 are pretty self explanatory :) I had a blow out.. but still managed to pull an 80% return from the hash once squished...& yes it tasted amazing :)
Was it worth it in the end... that could be debated.. for some..i understand..its not your thing, but for those of us that are interested in making our own concentrates.. free from Solvents...
I wouldn't make it any other way :)
If even ONE of you reading this diary finds it helpful to reference for ANYTHING.....even if its "what not to do" ill consider it a success !
Thanks again for tagging along on this garden adventure.. its been one heck of a journey !
Much Love from B.C. Canada,
Until Next time,
Cariboo

Likes
14
Share


@GoldenWeedGrower
Follow
The heat stress is always a problem in my grows but now I have a new climatization system that can really help me !
Likes
16
Share

@Bncgrower
Follow
Following the plan, we've reached the end of week 12. Apparently, everything is fine with this girl and all the others, nothing to worry about. This girl in particular already has a very pleasant smell, excellent bud structure, and beautiful color. Looking forward to the next few weeks! ✌️🌱🌿🍁
Happy growing, everyone!

Processing
Likes
11
Share


@Chimney_Chief
Follow
Plant has shown slow but healthy growth since its arrival, LST continues and I've managed to keep the plant at the same height it was last week but now at a horizontal angle.
I did up the nutes for one feed to a slightly under recommended dose but in the days following I noticed the plant looking a little 'droopy' and since she has been with me she hasnt been drinking very well so I opted to flush her for a feed, since then she has seemed very happy :) whilst drinking much better (possible nute lock was imminent). Now back down to half doseages with the exception of CalMg (to help after flush) but will be increasing them in the following days.
As of next week I will be transferring her and another plant my partner is nurturing into single bucket DWC set ups. Fingers crossed I will see some hearty results for making the crossover to hydro.
Likes
5
Share


@DRO420
Follow
They are about a month old and in vegetation stage . I am very happy to have these rare strains . The first is Purple Panty Dropper by Humboldt, at the moment I can not find for sale anywhere and actually be able to checkout but my friend that run a hydro shop got one and clones it , so I was blessed with one . Same goes for the Cheetah Piss which is a Cookies special strain . Let’s watch them ladies grow.

Likes
Comments
Share


Likes
16
Share


@Gizzzzy
Follow
Very fast germination on these 3 ladies. They've been planted into pellets and placed on my heat mat.
Three days later and and 3 plants have emerged from the soil 🙌
All surfaces cleaned using The Hydro Company's Clean X Plants potted up and fed their first feeds with thehydroco nutrients. They will be staying on my heat mat and under my LED light until there ready for the tent 💖🌱

Likes
57
Share


@nonick123
Follow
Día 27 (20/05) Riego con 250 ml de Té de Compost
Auto Northern Dragon Fuel está creciendo exponencialmente!
Día 28 (21/05) Vuelven a tener sed! Las riego con 250 ml sólo H20 pH 6.2
Auto Northern Dragon Fuel se ha recuperado muy bien de la deficiencia de Mg
Día 29 (22/05) Riego con 750 ml H2O+ Regulator 0,15 ml/l + CaMg-Boost 0,25 ml/l + Startbooster 0,25 ml/l + TopBooster 0,2 ml/l- pH 6.2
Auto Northern Dragon Fuel vuelve a recibir aplicación foliar de sales de Epson (4 g/L) porque presenta de nuevo ligera clorosis
Día 30 (23/05) N/A
Día 31 (24/05) N/A
Día 32 (25/05) Las plantas no paran de crecer! 😍
Día 33 (26/05) Riego con 750 ml H2O + Regulator 0,15 ml/l + CaMg-Boost 0,25 ml/l + TopBooster 0,2 ml/l- pH 6.2
💦Nutrients by Aptus Holland - www.aptus-holland.com
🌱Substrate PRO-MIX HP BACILLUS + MYCORRHIZAE - www.pthorticulture.com/en/products/pro-mix-hp-biostimulant-plus-mycorrhizae

Likes
88
Share


@NAS_Garden
Follow
🍋🍊 Lemon Orange #1 - #4 🍊🍋
First time diving into the Lemon Orange grow, and the excitement is real! 🙌 As a huge fan of Green House Seed Company, choosing this strain for the first cultivation is a dream come true.
Strain Information:
Lemon Orange (Super Lemon Haze x Clementine)
Genetics: Super Lemon Haze x Clementine
Type: 70% Sativa - 30% Indica
THC: 29.50% | CBD: 0.20% | CBN: 0.36%
Effects: Balanced euphoria with a sweet head buzz, courtesy of citrusy terpenes and an earthy background.
Flowering (Indoor): 9 weeks, High Yield
Harvest (Outdoor): 4th Week of September, 170 - 200 cm height, 800g/plant yield
Awards: 2nd Place Homegrown CUP 2021
Super thrilled with the progress so far—this Lemon Orange plant is growing like crazy with no issues.
Germination & Veg Timeline:
🍊 Day 1: Seeds hit the scene, into cotton pads for that cozy germination kickoff.
🍊 Day 3: Transferred to small rockwool cubes, enjoying a splash of RO water at a perfect pH 5.5.
🍊 Day 6: Celebration time! Started feeding nutrients by Terra Aquatica with the first true leaves emerging. Used 80% of the recommended dose. Noticed a hint of calcium deficiency, so switched to dechlorinated tap water.
🍊 Day 9: Upped the game, into large rockwool cubes (15x15 cm). The roots are spreading their wings.
🍊 Day 12: Nutrient dance continues. Adjusted the ratio to the Growing phase, still giving 80% of the recommended amount. pH is grooving at 5.8.
🍊 Day 24: It's topping day! Right between the 4th and 5th nodes, shaping the plant for greatness.
🍊 Day 27: Time for a scrog net to guide those branches into a harmonious canopy.
And now, the grand finale of veg 🍊 Day 36: Last day of veg. The Lemon Orange #1 - #4 has been a joy to nurture. Ready to witness the flowering stage unfold. 🌸💚

Likes
7
Share


@jonesy_grows
Follow
Hey All!
These seedling dome vents have been fully open for a week, and are now ready to go under a veg light!
I cleaned out my 2x2 today and set the light to 60% power
Happy growing!


Likes
2
Share


@JuanP
Follow
In to week 2 of flower, screen starting to fill in nicely. Nothing much else to report, everything looking healthy with no signs of any deficiencies, really stepped up a gear with growth now. I’ll be doing some more tucking to fill the screen completely over the next few days, final defoliation and clean up below the screen next week and that should be the training finished till harvest.

Likes
79
Share


@JUNGLE_B4RNS
Follow
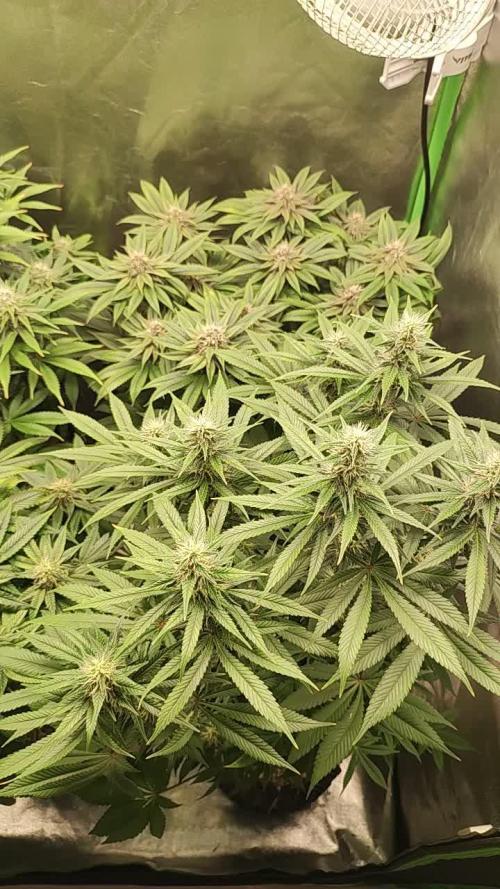
Week 15, week 5 of flowering.
SpliffSeeds is definitely a recommendable seed bank. I’m very happy with all the plants, they are all making dense and nice buds. See the pictures and the video, they talk by themselves.
Last week at max feeding. Next week I will start to reduce the nootz solution slowly and might give the last feeding just before starting week 7 of flowering, it will depends on the flowers development and the tips of the leaves, we’ll see.
Buds are getting heavier, needed to add bamboo sticks and to tie some tops. Particularly the Lemon Cream Kush. Do not defoliate a canopy at this stage, plants are laying and holding on the leaves of each other !
From now, as I mentioned, I keep an eye on the flowers development and the leaves, particularly the tips of the leaves. And will readjust nootz and watering from these indicators.
That’s all for the week folks 😊
(I’m looking for a job in the Cannabis industry as Master Grower, Mineralogist, Quality Control)

Likes
10
Share


@TiRobotProds
Follow
Forte odeur de fruits exotique se dégage de ces dames, elle sont bien givré etle rinçage a commencé.

Likes
12
Share


@VeeDro203
Follow
These 2 have slightly different structures. One more purple and heavy jelly smell! The other a lot more pale green purple and a creamy jelly smell. Similar to one of my Miami Miami with the cream

Likes
2
Share


@Ninjabuds
Follow
Skunk apple runtz I'm probably only going to keep 1 of these guys seeing the 2nd just has really bad growth so far. I'm sad about this I made this cross out my last grow and was hoping for the better end of things. The other plants is decent but we will see I hope it has the growth pattern of the lit farms Rick bobby and the bud structure of the obama runtz I grew
It's looking like a good start to a week the plants are strong they are getting to the point I can let the dried dry out completely. I'm thinking by the end of this week the plants will be starting to be sold.
Last week I put all the plants into my bigger 2x4 tent with my medicgrow mini sun 2 the 500w version. Only a few of the plants were ready for that light. Seems like the only plants that really have good resistance and have a strong start are the weedseedsexpress.com seeds. Shout out to weedseedsexpress.com for the strong plants.
I ended up putting all the plants back into my 2x2 tent with the 55w amazon light it has alot more blue light in its spectrum. It's kinda weird b4 I switched the plants to the 2x4 tent they were getting 220umol under my amazon 55w led then when I put them under the 500w light 25% strength about 50in from plants and they were getting only about 195umol in that tent but it was stressing most the plants. I assume a larger light has more side lighting hitting the plants. I think when useing larger lights it's good to measure umols from the top but also coming from the sides. I think durring seedling stage they only need about 50% the umols coming from the side the plants as the top is receiving.
When I put the plants back in the small tent about the same umols as they were getting b4 the switch and they were still a little stressed. So for a few days I put the small light at the top the tent giving them 100umols for a few hrs then 130umols the rest the day.


Likes
Comments
Share


@BIYEI
Follow
Vegetativo 29-11-2024 a 05-12-2024
Semana 2
29-11-2024 La planta manifesto un crecimiento considerable, se ve sana y fuerte.
01-12-2024 Se realiza cambio de solucion nutritica y recipiente hidroponico.
03-12-2024 La planta crecio desmesuradamente durante estos dias, pero noto que necesita algo de CALMAG.
05-12-2024 Sorprendente evolucion.
Parametros Utilizados
Temperatura del ambiente 22 C°
Extraccion de aire 4 pulgadas
Humedad 65%
Potencia de la lampara 75%
Ec Original 0.4
Ec Nutriente 1.3
Ph 6.0
Horas de Luz 18/6
Likes
5
Share


@84ruk
Follow
Está 5 semana de vegetación la planta dejó de estar en indoor y fue puesta en el patio, aquí recibe el sol de 11 am a 4 pm, al parecer se está espigando un poco pero en mi indoor estoy cultivando plantas automáticas correctamente desde el principio para mejorar la producción.

Likes
5
Share


@CanarianGrow92
Follow
Week 2 vegetation for the gorilla cookies from fastbuds 420.
All good at the moment, we are testing the xpert line with these girls.
1ml of master grow A+B
1ml of master root
We removed the 2 lowest sets of leaves and branches. We do this because we have the girls in 7 liters and quite some plants together, so i prefer to concentrate on the main bud and only some side buds
