By continuing to use the website or clicking Accept you consent to our cookies and personal data policy and confirm that you are at least 18 year old. For details please see Privacy Policy and Terms
Accept
Likes
Comments
Share


@NanoLeaf
Follow
Overall great strain to grow, and the smell is probably my all time favourite for this entire grow. Almost cookie dough - like!
Smoke is smooth and very uplifting.
I felt like I was a moon rock floating in space :)


Likes
Comments
Share


@TexasJack0418
Follow
Day 30; Both plants showed signs of going into bud stage so I top dressed & feeding. 1st, 24hrs before I prepared worm tea. I put 3tbsp Molasses, 5ml/gal Cal/Mag, 10ml/gal Seaweed/Fish extract, .5ml/gal Orca, 2-packs Green Tea, 1-1/2cups worm castings. aerated 24hrs. 2nd, Prepare coir for top dressing, remove all LST ties & stakes, Scoop out cedar chips from surface. Add 1/4cup Dr. Earth Organic 4-6-3, 1/4cup Bone Meal, 1/8cup Bat Guano, 1/2cup Coffee Chaff, 1/2cup Worm Castings to surface. Hand mix in dressing into top 2" of coco coir. Re-apply Cedar chips, do LST. 3rd, Top Feed 3/4gal per plant, Bottom Feed 3/4gal per plant. By day33 plants had doubled in size so I re-LST & light leaf removal, sprayed Neems Oil on both ladies, the stretch was on... Day35, watered 1-1/2gal ea. 5mil/gal Cal/Mag, 5ml/gal seaweed/fish extract. Lil LST and light leaf removal.

Likes
8
Share


@Manijuana
Follow
Alright! I'm updating the journal a couple days early bc my birthday is this weekend!😁 Ms. Hypnotic is growing beautifully! Shes a little leggy so I'm going to create a bean pole out of a toothpick as I've done before to give her additional stability! I've still been feeding roughly around every 2 days but she really doesn't need much at all. Next week I will take her into bloom like he sisters if she holds steady this week! Please drop likes, comments, constructive criticism, encouragement and or Happy Birthday wishes! Happy growing!


Likes
12
Share


@Francokc
Follow
Comienza lo bueno! 😂
Primera Fase de Vegetación que realizo al ser mi primer cultivo, super satisfecho, estuve viendo y estudiando muchos videos. Hoy en día muchos cultivadores realizan EN VIVO en Instagram y nos ayudan con todas las inquietudes o dudas que tenemos, vayan a seguir a RAMO420TY. Excelente material, siempre dispuesto a contestar los mensajes y preguntas que hacemos en vivo, además de ser un gran cultivador, se aprenden muchas técnicas, datos interesantes también.
A lo largo de estas 6 7 semanas, quiero dar mi opinion sobre algunos productos y técnicas que use...
Orca Microraices: Excelente producto, me lo recomendaron en delaferia viña del mar y uff. Las raíces que se formaron son increíbles, por lo tanto asumo que tengo un buen sistema radicular, a la Sr Nesbit que es la planta mas joven por así decirlo ya que fue la ultima que plante se le escapaban las raíces por los orificios del vaso, se ven sanas y gruesas. Por ultimo, cometí el error de solo medir EC Y PH de entrada, el cual fue el mismo durante 6 semanas, pensando que la EC Y PH de salida seria la misma, no fue así ya que al medir PH este estaba en 6.8 y la EC 4.4 😵 comento esto porque las plantas en ningún momento mostraron alguna carencia o problema, creo yo que mucho tiene que ver el producto ORCA ya que tener un buen pan de raíces y sistema radicular sano es clave!!
BioBizz Grow, Heaven, CalMag, Bloom, PH UP; PH Down: Biobizz es mi linea de fertilizantes, productos orgánicos, por lo que lei con los productos minerales se pierde sabor y aromas, aun que aun tengo mis dudas, y la verdad es que me llama la atención, seguro en un futuro pruebo con esos productos. De todos los productos de Biobizz que utilice, el que mas me gusto y note al momento de utilizar fue BioBizz Heaven, pasaron unos 5 min o menos de su aplicación y las plantas se pusieron rígidas, sanas, se levantaron hacia la luz como nunca! También tengo TOPMAX pero no logro encontrar reseñas buenas en general, por lo tanto estoy pensando en no utilizarlo y usar Bi Bloombastic de ATAMI, estaremos evaluando al momento de que salgan las flores.
Mammoth P: Bacterias beneficiosas para el cultivo el general, no tengo claro como ver si realmente obtuve beneficios de este producto, por ahora no comento...
Eso seria un pequeño resumen, ya en flora!!!
Saludos a todos!

Likes
23
Share


@TOTEM
Follow
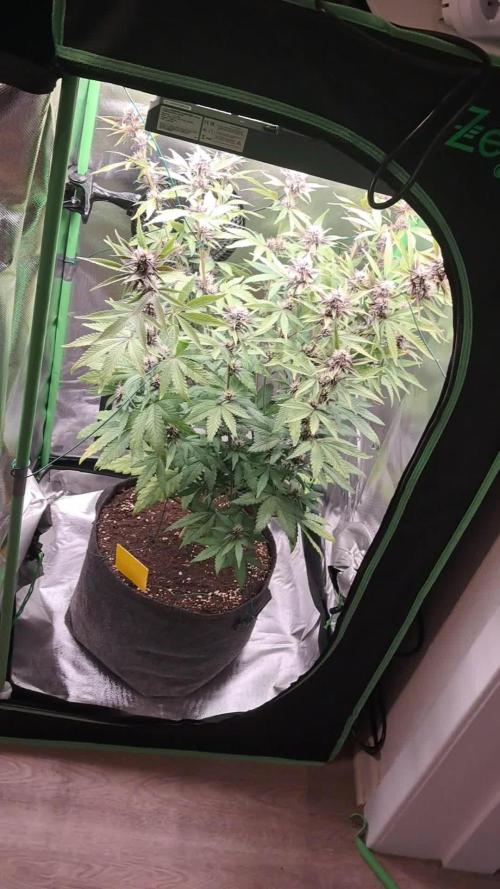
Ouch, I can’t take serious photos with this plant. She’s growing regularly, with no much space to express herself. If her smoke is pleasant, I’ll grow her again with the proper training 😉

Likes
12
Share


@sensistar9
Follow
Overall grow cycle was easy,strain reacts very good to topping and will work great in a scrog,smell tastes and effects are on point,more sativa to it.

Likes
Comments
Share


@Trichoma
Follow
@ 1.5 kPa
Plants are really thirsty right now already missed optimal watering windows because of that.

Likes
Comments
Share


@Unpluggy
Follow
Decided to transplant the ladys because they werde Not so happy in their small cups.
Now they got plants of space in their new 55l pot🍋🍒🍦
Plant in back needs more nitrogen

Processing
Likes
21
Share


@YourStonedBuddy
Follow
Very hardy strain, put her through alot in the beginning and she did really well! Started throwing alot of nanners so i had to pull her slightly earlier than i wanted to, even though i was 13 weeks in flowering.
Likes
39
Share


@MyStery21
Follow
2-3 more days till harvest... some flowers need a little extra time. trichomes are 40% -50% amber.
6/19 17 weeks, baby it's about to be harvested, how she looks?... i just put this plant inside my room with the AC ON. THE SMELL MAKES ME SMOKE WEED TILL SUNSET , VERY VERY SWEET 😲


Likes
36
Share


@OGTrauma
Follow
Hi Potheads,
VEGGING WEEK THREE:
17 days of vegging, only 14 remaining if everything goes smooth as butter , the menace was controlled by the use of aceite springhill + glycerine soap. Plants had a bit on a rough patch because more aggresive plague control means stress , yes, it has its throwbacks but at least plagues were 90% controlled ,with small quantities of flea survivors. Instructions (to evade toxic reaction !) states that next application should be 2 weeks from last spray. thats also fits that's intended to not spray products during flowering stage. Overall , they can still be considered healthy according to their different growing speed and ages.
For plant placement inside the tent , u can use week 1, pic 1 for reference.
G13 Hashplant : They were the ones that received more pest control doses , so they can have some burns and more darker color but still growing at great steps while they almost finished required LST and the pots are almost at 100%.
Santa Bilbo: These one are growing wild and also more tend to be taller than the others on the grow. They are all growing steady, even the one that shares a pot and that was criteria for the next homies.
Eleven Roses: The 4 most healthy topped plants were chosen , transplanted and trained . Because i want to put to have the most colonized soil in JUNE, i put 2 plants per pot, making a total of 12 plants, 4 of each variety.

Likes
17
Share


@Lazuli
Follow
The smell is insane.
Purple colors.. sooo much resin
The quality is very high on this beautifull plant


Likes
8
Share


@Salokin
Follow
Week went again very uneventful. The plant does what she is supposed to be doing (gaining weight) :). Still lots of new pistils appearing overnight, I am checking the Trichomes daily, however, everything remains milky, with only very little % of amber trichomes. Once amber colours start increasing I will start flushing.

Likes
22
Share


@Betagemini
Follow
Day 82. (1.8.) She have very nice smell like berries, spicy and flowery. I bough multipurpose magnifier today. Some trichomes are still clear so I'll give her 10 - 14 days.
Likes
121
Share


@ctm_dzagi
Follow
Dried with working ventilation until the moment when the weight stopped falling
harvesting a dried bush took about one and a half hours, because tried to keep the branches intact
A picture taken from below is the quintessence of all my experience.
That option which in my opinion should be considered the "golden recipe" of microgrow.
No temporary loss, ease, flexibility and ease of scaling to fit any size.
With the final weight, an awkward situation, although the branches began to break, and everything is very dry. It turned out too much to be believed even by myself. I evacuated bumps in four containers of 0.8 liters each (I had to tamp it down).
00000
Likes
17
Share


@m0use
Follow
This was a fun project that was a few years in the making and a year later to see if they would last a season for this upload to happen. Before any of this I would bike aorund town grabbing up all the old Ikea solid pine bed slats that I could find and storing them in the basement. I have a lot of wood down there, any size worked as long as I have enough of them. The hot days to find them were the first and last of the months because that's when people where moving in/out. I also kept an eye on the free section on local online classifieds as well. The entire purpose of this was to recycle as much off the streets as I could before buying anything to finalize the project. In the end I only bought sealer, screws and some takeaway/beers. All the wood was 100% free and salvaged off the streets of Toronto saving it from the dumpster bin.
After collecting all the slats for about 2 years I was playing aorund with them on how I wanted to make this work. I had previously done a little project like this before but I messed it up and the boxes where crap. did not last longer then 2 seasons, they where thin and shallow as well could not grow much of anything in them. I Was talking to my friend who is renovating their house and we brainstormed some ideas on the boxes, I found some designs I liked online and said lets make something like this out of what I have here. We tossed out a few of the design features when looking at them as it would have been wasted wood and extra work not needed. If I had more wood them maybe it could have been an option but simple was the name of the game. They taught me what I needed to know like how the miter saw and sander worked, plus all the other tools I was using. They did help out with a table saw and creating the triangle support joints in the corners, They used some pine left overs they had while making a staircase indoors. I did not feel up to the task of using a table saw given all the relatives I know who have lost a finger to them.
In the end we decided the design would be three boards high and take an alternating pattern on corners. layer one short, layer 2 long, layer 3 short. Went with a galvanized and painted deck screw so it can take the weathering. Ran into some problems like making everything level as some of the boards were warped and other ones had undesired aspects like knots and tacky sticker goo I could not remove. So I used them for the base that will not been seen so much. Clamped everything down and called it a day.
Once it was all done and over with, I then brought them back home from my buddies work garage and started to seal them. I went with a boiled linseed oil as its a food safe option should the wood degrade into the soil I will plant in them. I will need to reapply it to the boxes year after year but the main coat is the most important one and I put it on 3 layers with a good dry in between coats. the inside of the boxes that where coated did not degrade at all as the sun did not hit them so it will not need a new coat just the outside. Overall the end result was very impressive for myself, I've never taken a woodworking class ever and It was a near perfect outcome for me. Heavy Duty Planter Boxes for all my gardening needs. I made a last min decision to add in a plastic liner to preserve the wood even longer and stapled that into the frame. it has held up quite well and may need replacing end of 2nd or 3rd year out in the sun. Used a thick moisture wrap plastic with UV protectors in its formula.
Lets see what I can grow in them this year!
m0use's haus of projects - garden box edition


Likes
66
Share


@BostonGirlGrows
Follow
Now we’re catching up. Thank goodness. Things are filling out underneath and I can’t wait to see what the next few weeks bring. I hear they get super frosty. 🌱 👊🏻
