By continuing to use the website or clicking Accept you consent to our cookies and personal data policy and confirm that you are at least 18 year old. For details please see Privacy Policy and Terms
Accept
Likes
7
Share


@HylianGrass
Follow
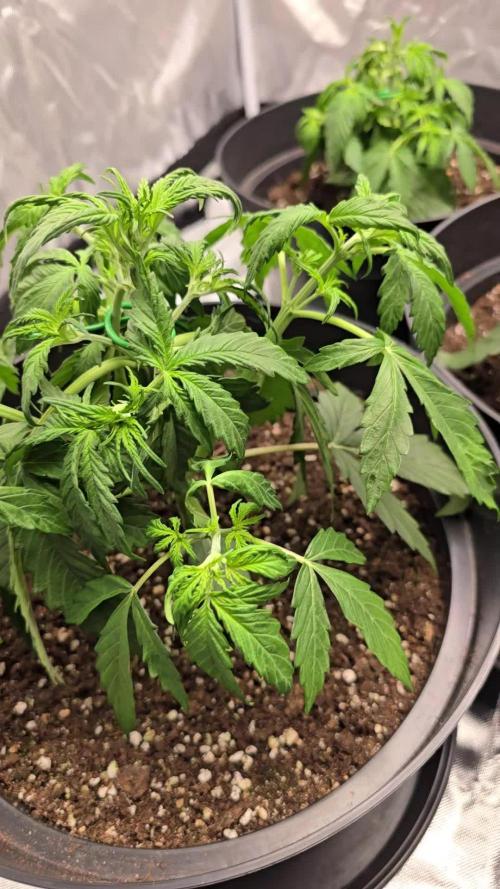
Week 6 went by smoothly, since fall have coolder temps my setup is now at its best, the preflower streech is starting and the rootzone is getting preeeeety damn gorgeous also last week using the b1 seaweed based nutes
Likes
20
Share


@GERGrowDesigns
Follow
Dear Growers ,
Welcome to Week 8 or Flower week 5 // Day 56-63 from Kannabia Baby Boom Auto .
Incase of Moving to a New Home . I Decided to skip some Weeks from every Diarie of the 12x12 Automatic Project . Everything should be Normal in the next Weeks .
Whether you're a beginner or an expert, you are warmly invited to join, ask questions, and share your own experiences along the way!
Project Setup & Conditions:
• Brand/Manufacturer: Kannabia Seeds
• Tent: 222cmx150cmx150cm
• Light: 2x 720 Watt Full Spectrum
• Humidity: 50%
• Soil: Narcos Organix Mix
• Nutrients: Narcos Products
• pH Value: 6
If you want Germinitation results like mine , check out Kannabia Seeds with my link [https://www.kannabia.com/de?ref=61966] and grab the germination device or the strains I used . Trust me – it’s worth it for sure !
Get another 20% Discount at all products using the code [GGD] at the Checkout .
Stay curious and keep up Growing —we look forward to welcoming you back for the next chapter soon!
Likes
20
Share


@VnknowN
Follow
The BIP started fading. The buds are pretty hard and dense. The smell is already Stunning 😮💨😵💫. Beatiful genetic From Perfect Tree
Likes
18
Share


@cheetah844
Follow
Getting very tall, I thought this one would stay shorter?! This is my go-to night time pain relief with good sleep strain. She will be staying indoors for safekeeping so hopefully I can guarantee to have some flower from her.
Likes
65
Share


@Dendegrow
Follow
Week 2 of the flowering phase flew by 🌱💨. Unfortunately, I may have overdone it with potassium or kept the water level too high – the classic signs of clawing leaves were evident. Thankfully, they seem to be recovering now and are back under control 💪🍃.
My IR night experiment is showing clear results 🌌: The plants exposed to infrared radiation at night stretched significantly more. This might be especially beneficial for this indica-dominant strain as it leads to better canopy distribution, improved airflow, and reduced risks of mold and disease. Plus, the light distribution is much more efficient now, which I’m excited to see pay off.
On the downside, my Orange Sherbert turned hermaphroditic 😔. It’s hard to pinpoint the cause – overfertilization seems unlikely since I’m using only organic nutrients. I suspect it might be linked to an E-field experiment I’ve been running. To confirm this theory, I’ll conduct a new grow with a similar strain next year to see if the electric field negatively impacts cannabis development.
Stay tuned for updates! Drop a like and follow along for more grow insights 🌿✨. See you next week!
Woche 2 der Blütephase ist wie im Flug vergangen 🌱💨. Leider habe ich wohl etwas zu viel Kalium gegeben oder den Wasserstand zu hoch gehalten – die typischen Anzeichen von Adlerkrallen waren sichtbar. Zum Glück scheinen sich diese jetzt zurückzubilden und sind wieder unter Kontrolle 💪🍃.
Mein IR-Nachtexperiment zeigt bereits deutliche Ergebnisse 🌌: Die Pflanzen, die nachts mit Infrarotstrahlung bestrahlt wurden, haben deutlich stärker gestretcht. Das ist besonders bei dieser indica-dominanten Sorte wahrscheinlich von Vorteil, da es zu einer besseren Verteilung des Blätterdachs führt. Dadurch verbessert sich die Luftzirkulation, das Risiko von Schimmel und Krankheiten wird minimiert, und die Lichtverteilung wird effizienter. Ich bin gespannt, wie sich das weiter auswirkt!
Leider hat meine Orange Sherbert gezwittert 😔. Woran das genau liegt, kann ich schwer sagen. Eine Überdüngung halte ich für unwahrscheinlich, da ich nur biologischen Dünger verwendet habe. Ich vermute, dass mein E-Feld-Experiment eine Rolle spielt. Um das zu bestätigen, werde ich nächstes Jahr einen neuen Durchlauf mit einer ähnlichen Sorte machen und prüfen, ob das elektrische Feld tatsächlich eine ungünstige Rückentwicklung der Pflanze verursacht.
Bleibt dran, lasst ein Like da und folgt mir für weitere Updates 🌿✨. Bis nächste Woche!
Likes
4
Share


@blackrain
Follow
Took some fan leaves from the second branches off that were covering lower branches and tied higher fan leaves down a little, I'll LST more throughout this week.
Likes
11
Share


@sweetkaya
Follow
Day 58 - Adding Big Bud Coco to the nute mix, seems that it's doing its job 😁
(Yes, I need a bigger closet 😅)
Keep on growing 🙏😋
Day 63 - Haf some problems with my EC pen the last days, it wasn't clean so I overfeed a little bit but I noticed almost immediately so I've cleaned it and re-done the nute solution. Just a few tips of Gelato's leaves were burnt, nothing to worry about. I think 4 weeks from now and the Purple Lemonade will be ready for harvest, so other 5 days of Big Bud and then I'll switch to Overdrive for the final boost before ripen and flush 🙏
Processing
Likes
1
Share


@Teddy01500
Follow
Bonjour à tous, ces derniers jours ce sont bien passé pour mes petit bébés elles grandissent doucement mais sûrement.C’est la première fois que je travail avec cette gamme de produits (je vous est mis des photos des produits 😉) pour l’instant j’en suis satisfait après, il faut voir le résultat final ce qui est moins facile 😂. Mes petit bébés commence leurs 5ème semaine (je me suis trompé d’une semaine 😕 désolé 😉) trop pressé!!! 😂 de mettre de nouvelles photos 😜. Je vous dis à là semaine prochaine vivement 😉 bonne journée à tous. Je vous remercie 😉.
Likes
11
Share


@VagueReaper
Follow
I'm very happy with how my plants turned out and can't wait to get going again. They're now hanging in my tent so hopefully dried and ready to trim by Christmas day at the latest.
I will update on weight when dried and on the smoke when cured.
Likes
2
Share


@Mr_nugs_lover_David
Follow
Very sticky snd dense nuggets,tons of resin in this autoflowering strains, they are high quality, as you guys can see both wedding cakes auto by original sensible seeds have the exact same resin production, very frosty both, very sticky and big fat main colas with all the buds from the lower plant are also fat, dense and sticky, just a dream come true 💎 very good automatic strain, doesn't even looks like an auto, super sticky and a very pure and strong aroma, she's been fed with only organic dry amendments by guanokalong complete organics and seaweed powder and florganics that's how I prepared her soil. Thank you so much everybody hope you like another diary of frosty cookies 🍪🤤🍭🌸✌️💚❤️
Processing
Likes
1
Share


@Ferenc
Follow
Light schedule 20 hours on 4 hours off and the same with ventilation. Humidity approx 50 percent, water intake raised up 125 ml per plant per day. Fertilization continues on Monday, Wednesday, and Friday with Biobizz family and Tuesday, Thursday, Saturday bat guano and Epsom salt. This week will change that shit lamp and replace with Marshydro 600W.
Day 46, 2 days no update all good they are flowering nicely waiting for the new lamp. Critical Orange Punch nicely developing and the rest of them is coming as well. Today I set the new 600W Marshydro. I also set the light schedule for 18/6.
Likes
12
Share


@Tattooflashandweed
Follow
Flipped to 12/12 today at day 52. Defoliated alot and pinched almost every top. Lets see how much they stretch.
Another defoliation in 2 weeks , will also topdress then.
Likes
17
Share


@Sergio_721
Follow
So far it seems to be fine even if the high humidity worries me even if the temperatures are still high then they have stopped growing and will finally focus on the flowers and slowly we recover these small deficiencies
Likes
3
Share


@Mr_nugs_lover_David
Follow
This lady is such a beautiful bush full of heavy flowers, stinky as hell guys, very terpy, for all the sweet indica hybrids there you have authentic gold. Very sweet and the tops are absolutely wonderful, it's beautiful to see those fat nuggets. She's 100% organic and prebiotically grown using living soil FLO that contains a lot of different strains of mycorrizae and endomycorryzhae, a lot of beneficial bacteria, worm casting, and acid and humic and fulvic acids plus Silicium Flash by biotabs that contains npk 100% from natural sources like bug shit 🐛. My soil just bubbles every day that I water it, it's awesome to see the beautiful organic alive soil I've build. Loving the pure aromas man 🤩👃🍭🥧🍪
Likes
26
Share


@Bakeryguy420
Follow
Sorry guys havent updated in awile
Gg4 harvested
Tangiematic harvested
Ogesus #1,2 harvested
Gluebeerry just main cola harvested
White rrussian harvested
Sweet creme harvested
In.the run.left is rhino rryder, royal haze, amnesia gold , amensia haze , forgotten cookies and gluebeery and the new girls
Update on 3rd grow going Start a new diary for them today . My cat knocked down the seedlings 3 times zero stunt life which is shocking crazy crackhead ..
Quality is amazing for them all yield wasnt aa, much as I wanted believe emerald harvest is as garbage as foxfarm.
Likes
Comments
Share


@SidekickGrowie
Follow
Huhu 👋🏻
Neue Woche neues Glück….
- Den Befeuchter befülle ich alle 2 Tage neu, wichtig ist! (Immer mit destilliertem Wasser)
- Ende der Woche habe ich dann umgetopft, sodass wir noch genug Zeit haben bis zur Blüte den Topf zu 70-80% mit Wurzeln zu befüllen
Tag 23:
- gegossen mit 250ml (Düngermischung)
Tag 24 :
- kurz bevor es dunkel wird einmal IPW angewendet (2,5ml auf 1 Liter)
Tag 27 :
- umgetopft in 19 Liter Topf
- „angegossen“ mit 3 Liter (Düngermischung)


