By continuing to use the website or clicking Accept you consent to our cookies and personal data policy and confirm that you are at least 18 year old. For details please see Privacy Policy and Terms
Accept
Likes
Comments
Share


@bioaccessory
Follow
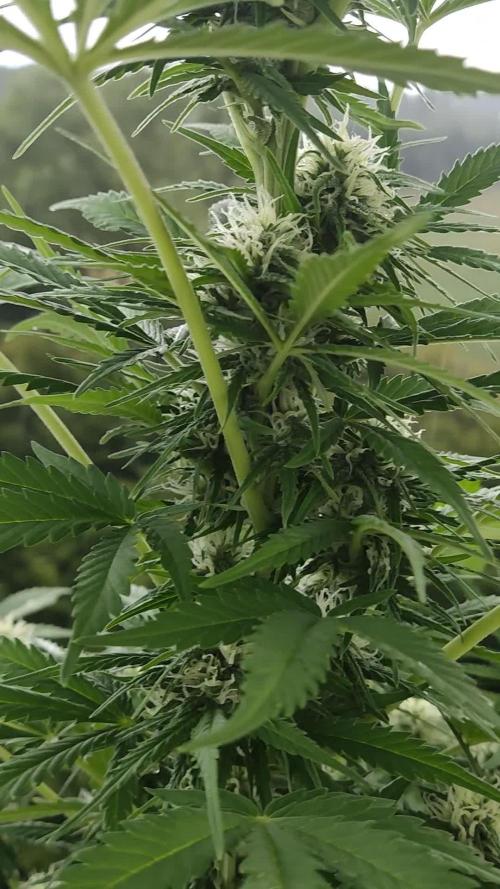
Наступил мой самый любимый период цикла - период формирования структуры куста. К этому моменту обычно я уже имею стратегию по дальнейшим действиям: определяюсь с техниками тренировок, примерным сроком перевода светового режима на цветение, и т.д.
На 23-м дне сделал topping на 4-м этаже, и через три дня убрал всё ниже 3-го этажа. Верхние ветки развёл в стороны эластичными проволочками, нижний этаж пока не трогаю - пусть догоняет. 👆😊 И уже по-тихоньку мне нужно прикидывать высоту монтажа сетки.
А на какой высоте вы обычно ставите ScrOG? Буду рад любому мнению в комментариях 👍
Спасибо, что заглянули, и будьте здоровы! 🙏
Продолжение следует ...😶

Likes
7
Share


@Mr_nugs_lover_David
Follow
The seeds have germinated after around 59 hours to be exact very strongly I started to germinate the seeds on January 12th however it was 00:00 Am so it's almost like saying January 13th, the 2 out of 2 seeds have germinated very well without any problem! Quick germination, let's go for it! Stay tuned, this is a strain I love for her absolutely amazing terp profile!! Don't miss it👨🌾💚🔝♥️💛


Likes
7
Share


@Nofeckingclue79
Follow
Made sure the run off was 0.5ms, the water that I feed with has a reading of 0.3ms so I'm looking forward to when she has dried and cured so I can update with the smoke review

Likes
16
Share


@Daddyhancocc74
Follow
I'm using a 2x2x5 spider farmer tent and technically I start germination on 1/17/23 at 9pm and in the picture I'm using Rockwool but also a small pot with fox farm soil to hold it upright

Likes
3
Share


@AdirondackGreen
Follow
Week 4 is transplant week! The plants have established solid roots in the solo cups, and now we move them over to the larger and final pots. I am using Autopot Spring XL pots. Training and topping might start next week!

Likes
61
Share


@Mrs_Larimar
Follow
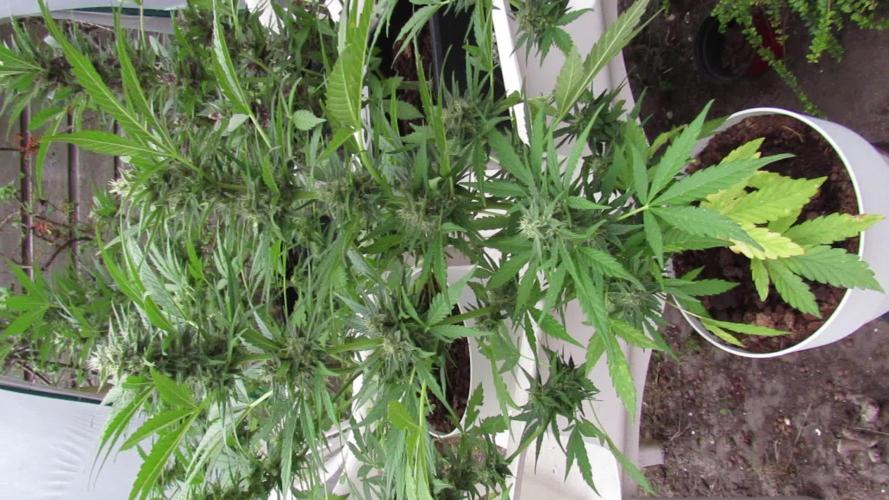
May, 15th 2021
I need to start Feeding them, because they are alittle yellowish
But i think iam Transplanting them anyways...
Smooth running
Waterings daily, and Spraying with " Fast Plants Spray"
Lights are still dimmed back to 50 Percet, Plants developas they should
having nice internodial Spacing, and develop nicely
Shopping Link for the LIghts:
Amazon US:
XS1000 10% off: it10mlarimar http://yx-8.cn/0y-6
XS1500 5% off: it15mlarimar http://yx-8.cn/0yA
XS2000 5% off: it20mlarimar http://yx-8.cn/0y2Y
XS4000 5% off: it40mlarimar http://yx-8.cn/0y5k
Amazon Canada
XS1000 10% off: it10mlarimar https://amzn.to/38udUVe
XS1500 5% off: it15mlarimar https://amzn.to/3esVUyr
XS2000 5% off: it20mlarimar https://amzn.to/3l5zAfg
XS4000 5% off: it40mlarimar https://amzn.to/3l7k5Uj

Likes
9
Share


@JuicyFruit
Follow
Day 72 - 07/01/20
This one was the only survivor of my 4 x RQS diary. my blueberry auto, jack herer auto and GG auto didnt sprout but the diesel did and here is her harvest!
I added some nice photos of the plant and the yield was 325g wet weight.
Should be over an ounce once its dried.
Update -
Dry weight was 30g although much of the bud is small :)
Ive been curing for a few days and its insane how the flavour and burn changes throughout curing :)
Update - Day 78 - 13/01/20
The sweet diesel smell and taste is coming through. buds are becoming more and more enjoyable to smoke as days go by. :) il post a few pictures later tonight!
Added the photos of some buds and a video so you can all have an opinion on how my buds turned out visually. let me know in the comments :)
Il do a few more curing updates to let you know how the second week of curing goes!
Day 86 - 21/01/20
I finally finished the NYCD after about 2 weeks of curing.
It smokes fairly well and is definitely the best thing ive grown so far :)
Buds developed quality and a sweet earthy diesel flavour/aroma over the 2 weeks of curing. one major improvement i would make is to source high quality soil as i really struggled to flush this properly.
even still without lab quality conditions ive never felt so depression free since ive been taking this medicine regularly.
to finish up i will say that I liked the NYCD diesel taste but i still preferred sour diesel. The plant grew to a reasonable height around 60cm and produced an ounce of average bud. and I might not have won any GD competitions, but im still a winner! :'D
Lucky for us I just started an Sour Diesel Auto from fastbuds so you can check that out to see what i thought of it compared to this one :)


Likes
120
Share

@Hologram
Follow
OK, im doing an update now becouse my breakup cake is going tranny!!(hermie)
I already have noiticed she was not growing as strong .. but u can blame that on anything , especially when growing outdoor..
but this morning i saw that she was g(r)oing 'bananas'!😢
I have put her aside from the rest (in the back of garden) but think gonna have to terminate her asap!..(and i will, right after this post👍)
The weed she will give will be filled with seeds and those seeds will be hermies too, so wothless..
and if i dont throw her away quick she can infect the rest.
So goodbye breakup cake..😢
who wants to eat a cake when they are breaking up anyway..😒 (just hiding my pain with lame humour 😳)
happy growing for all ✊

Likes
13
Share


@Luv2Grow
Follow
Day 30 - Into week 5 and calling this the first official week of flower. She’s definitely started to explode a bit with growth so I continued the LST a bit and gonna let her go a bit for now. I did tie down the main stem again to try and get the canopy as even as possible. She’s already starting to show her red/purple colors and look forward to see it as she gets further along.
Day 31 - She’s already turned back up to the light after tying her down again last night. She’s really starting to show her colors now and she’s getting close to her first feeding of bloom nutes. Thought she’d be ready today but still needs another day or two before she’s ready.
Day 32 - All is still good, she’s finally starting to stretch a bit and get a bit bigger. It will probably be another few days before she gets her first feeding, the soil is still pretty wet. The damn colors on this thing are already amazing and she’s just starting to flower.
Day 33 - Nothing major to update today, all looks good and she’s almost ready for some water and nutes but not quite yet.
Day 34 - Her pot is pretty much dry so giving her one more day and will give her the first feeding of nutes tomorrow. Other than that, I’m just watching the colors shine.
Day 35 - The end of another week for this girl as well and she’s looking great. Very spaced out so all sides of her are getting good light. She finally got her first feeding of bloom nutes today so we’ll see how she’s doing tomorrow.


Likes
27
Share


@MrJones
Follow
OSS Cheese XXL
🔹⊱╮🔹╰⊰🔹 GROW Started 03.10.24 INFORMATION 🔹╰⊰´🔹⊱╮🔹
🌞Environment - Maintaining 80F and 65%Humidity
🌾Training - Nothing this week just letting the seedlings veg out.
⚱️2-Gallon 📊6.2 PH
💧 Feeding - Using Horti Grow 8-11-21, Bloom 5-15-26, Late Bloom 0-24-26, Cal 12-0-0
🌞Medic Grow Smart 8 760 Watts
🕷️ IPM - CannControl from Mammoth and Mosquito Bits as needed
🔹⊱╮🔹╰⊰🔹 PLANT UPDATES 🔹╰⊰´🔹⊱╮🔹
📝 Notes - Starting Dailiy Reduced Volume Fertigations with Hort-Grow @ 3.3 GRMS Per Gal, and Horti-Cal @ 2.5 GRMS Per Gal.
🗓️04.05.24 Today fed with Hort-Grow @ 3.3 GRMS Per Gal, and Horti-Cal @ 2.5 GRMS Per Gal.
🗓️04.06.24 At the beginning of week 2 I defoliated and now today the beginning of Week 3 I pruned and defoliated again, may look harsh but they will recover quickly!
🗓️04.07.24 Maintaining Temps and Humidity
🗓️04.08.24 Starting Dailiy Reduced Volume Fertigations with Hort-Grow @ 3.3 GRMS Per Gal, and Horti-Cal @ 2.5 GRMS Per Gal.
🗓️04.09.24 Fed with Hort-Grow @ 3.3 GRMS Per Gal, and Horti-Cal @ 2.5 GRMS Per Gal.
🗓️04.10.24 Maintaining Temps and Humidity
🗓️04.11.24 Fed with Hort-Grow @ 3.3 GRMS Per Gal, and Horti-Cal @ 2.5 GRMS Per Gal.
╰⊰🔹╰⊰´🔹⊱╮🔹╰⊰🔹╰⊰🔹STRAIN INFORMATION🔹⊱╮🔹╰⊰🔹╰⊰🔹╰⊰🔹⊱╮
Cheese XXL cannabis seeds are a special blend of Afghan Kush x Super Skunk producing the most pungent dank weed. Cheese XXL is the third commercially available edition released by Original Sensible using and developing these Afghan and Skunk genetics. The first release of these genetics was their Skunk Afghani. The second improved version was Stinkin' Bishop which had an improved and more potent THC content and was more pungent in terms of smell. Now the third and improved release on a similar theme is this Cheese XXL which has a similar THC content but with an improved heavier yield. The smoke is incredible with an outstanding flavour of pungent skunk and spicy, extra strong mature cheese created by the dominant terpene myrcene with its strong earthy scent accompanied by caryophyllene and pinene which combine to create a peppery acrid cheesy odour. THC levels are exceptionally high in this Cheese strain and the effect is well-balanced creating mental and body relaxation with a remarkable alleviation of stress and depression.
The strong pungent aroma starts early in the flowering period, if you're growing Cheese XXL indoors you'll need plenty of ventilation to disperse the stinky "road kill" aroma of these babies! Cheese XXL is a Cheese strain particularly suited to indoor setups but also thriving well outdoors these feminised marijuana seeds are incredibly resistant to mould and disease and produce a substantial harvest that both the professional and amateur growers alike can easily achieve. These Cheese weed seeds are outstanding, break open the buds ready for use and you'll see why, the stench will make your eyes water!
Cheese XXL from Original Sensible Seeds is a great choice to break into the commercial market of growing cannabis so if you're looking to buy something special with extreme yield, potency and flavour then Cheese XXL cannabis seeds are simply the best choice

Likes
26
Share


@pifflestikkz
Follow
Day 71
09/09/24 Monday
Feed today using de-chlorinated tap water pH 6 with calmag.
Day 72
10/09/24 Tuesday
Nothing, just monitoring mould.
Day 73
11/09/24 Wednesday
(END OF QUARANTINE)
De-chlorinated tap water pH 6 only today.
Now I have put them to finish underground a 600w hps under 12/12 schedule with the Divine Black opium.
Luckily no more mould has spread, and all plants look happy healthy and still developing. Overall very happy I saved the crop ✌️💚
Day 74
12/09/24 Thursday
De-chlorinated tap water pH 6 today with Plagron products.
Finally a video and pictures update
✌️💚
Day 76
14/09/24 Saturday
De-chlorinated tap water pH 6 only today.
Likes
2
Share


@SSKNFbyHAZE
Follow
Hi Growmies~!
What This Post is About
Today, I'll be recording how to cultivate soil microbes at home.
These microbes offer numerous benefits, and they are simple to make.
How I Came Up with This Technique
Since 2014, I’ve tried synthetic growing methods like DWC. While they gave quick results, I often ran into issues with consistency.
Nutrients would expire during breaks, meaning I had to keep buying new bottles.
I strongly felt I needed a change.
A couple of years ago, after taking a break, I started to research and switched to organic growing.
At first, it felt overwhelming with all the steps and prep work, but I saw real potential.
After experimenting with different methods, I came across Korean Natural Farming (KNF) and JADAM, introduced by Mr. Cho.
His simple, ultra low-cost techniques inspired me. They focus on letting nature do the work.
While growing,
I noticed that synthetic nutrient bottles were expensive, especially when trying to complete a full nutrient set.
Organic growing may require more attention and can be costly when investing in organic materials.
Preparing the soil in advance and top dressing with dry nutrients every other week - just these two methods were consuming space, time, and money.
Indoor farming is unnatural, while organic farming is a natural approach.
I had to bring these ideas together, but organic farming often seems geared toward large plots like farms.
Incorporating organic techniques into my indoor garden requires a lot of effort and careful calculations.
So this is one of my techniques for keeping my plants happy:
supporting their daily needs helps them snap out of deficiencies quickly, allowing them to grow consistently.
It took me a while to adapt this technique for indoor use.
I hope this helps, guys!
Supplies Needed
- Potatoes: Provide nutrients and food for the microbes.
- Sea Salt: Stimulates microbial activity and controls harmful organisms.
- Dechlorinated Water: Allows the microbes to grow and multiply.
- Compost, leaf mold, or worm castings: Contains natural microorganisms that are key for this process.
How to Make (1 gallon)
1 cooked potato (about 2 golf ball-sized)
1 pinch of sea salt
2 tablespoons compost or worm castings
1 gallon dechlorinated water
1. Mix Ingredients: In a clean container, fill it with the dechlorinated water, dissolve the sea salt, and add the compost along with the mashed potato.
2. Ferment: Optionally cover the container and let it sit at room temperature for 24-48 hours.
3. Strain (Optional): After fermentation, you can strain the solution if you prefer a clearer liquid.
Note: Watch the timelapse video to see how the microbes activate!
**WARNING**
Wear gloves if possible and/or avoid contact with open wounds
How to Use
IMPORTANT: Always dilute the solution before applying it to plants.
- Use when bubbles form a "pizza shape" on the surface.
- Dilute 5-10 ml per liter of water for bi-weekly feeding. (Test a small batch first to find the best rate for your setup.)
- Once the bubbles disappear, the microbes are likely inactive. You can either mix the rest with water as fertilizer or discard it.
Pros
Promotes Plant Growth
- Usually fixes deficiencies in as little as 6 to 72 hours.
- Improves nutrient absorption, and helps plants thrive.
Boosts Plant Immunity
- Works as IPM: Can be used as foliar sprays (no staining on leaves).
- Lowers the risk of powdery mildew and other diseases.
- Helps the soil ecosystem with beneficial organisms like predatory mites and springtails.
- Naturally reduces pest pressure (Less risk of fungus gnats and other pests).
Improves Soil Health & Supports Composting
- Quickly breaks down organic matter and nutrients.
- Makes growing organically in small containers, like 1-gallon pots, easy.
- Over time, soil becomes softer and richer, even in small pots.
Cost-Effective, Sustainable & Eco-Friendly
- No need for complex equipment like pH pens, air pumps, or other tools.
- Reduces the need for CalMag, N-P-K, or micronutrient supplements (just add a little bit of sea salt to every watering).
- No sugar sources needed in the soil.
- Works for all types of plants—houseplants, exotics, ornamentals, and crops.
Cons
- Limited shelf life; the solution will develop an unpleasant odor after a certain period.
1 Corinthians 10:26
Likes
8
Share


@Alien98
Follow
This week I harvested the top of one lady and the others are getting bigger every day, now I want to start the flush so I can harvest all of them next week or maximally in two weeks.

Likes
10
Share


@WeedTheNorth
Follow
Wedding Cake Auto is a vigorous growing strain with strong genetics. Do not forget your Cal-Mag. Caution on overfeeding I got lazy and didn't check the runoff the last month and the Ec reading was 2.8. Yikes, not good but lesson learned and quickly rectified with ample flush. Took to topping very well but I'd recommend some training as well to ensure an even canopy as I just let her grow resulting in me harvesting in sections to allow the lower nugs to firm up.
Likes
10
Share


@GoldenWeedGrower
Follow
📅 D22 - 05/09
📜Second day of rest for Lucy only tha daily water tracking. LST adjusted a little. Added 1 l of water with only pH-. Deactivated inside roots pump
✍️ 0.98 EC
♒ 6 pH
🌊 9,7 L (added 1 L)
📏 7 cm
📅 D23 - 06/09
📜 Lucy waked up a little droopy. I guessed it is due to the deactivation of inside roots pump, so I reactiveted it. EC and pH are both raising and Lucy still drinks good. I will make a correction of EC and pH today. Cutted lower leaves. Late update: I added 1 L of pure water with 0,5 ml of pH- to take under control EC and pH. Anyway she looks better now, maybe the inside pump worked ? We'll see tomorrow. Lights distance is set on 20 cm from now on.
✍️ 0,96 EC
♒ 6,1 pH
🌊 9,9 L (Added 1 L)
📏 8 cm
📅 D24 - 07/09
📜 Lucy seems ok today, she is drinking and feeding ! Today I adjusted the LST on top branches and I will give some days of rest to lucy in the new configuration. EC and pH are both stable.
✍️ 0,96 EC
♒ 6,2 pH
🌊 9,1 L
📏 8 cm
📅 D25 - 08/09
📜 All is working good. Lucy is now completely recovered and she's drinking and feeding very good. I stressed up a little the LST for the manifolding. Also I gave her 1,5 liters of water with EC 0,9 and pH 4,8. I think she's almost ready for the new topping of the 2 main branches. I will perform it on Saturday and then change res.
✍️ 0,96 EC --> 0,92 EC
♒ 6 pH --> 5,7 pH
🌊 8,4 L --> 9,9 L
📏 8 cm
📅 D26 - 09/09
📜 Finally I decide to take the risk to make the topping today, despite the advices of @GrowCN and @Ukfarmer420 (thank you guys). As they say, she is an autoflower so too many close to the pre-flowering. So I've almost changed my mind, but finally, looking at Lucy, I decided to get all or nothing! So I topped her on the two main branches and I completly changed the res. The new EC is 1,4, very high.. Both the moves were a gamble, but failing is learning, so it's ok for me. Let see the aftermath of this push.
✍️ 1,4 EC
♒ 6 pH
🌊 10 L
📏 8 cm
📅 D27 - 10/09
📜 Lucy looks good today. It seems the topping and the res change is going well until now (finger crossed). The pH track was a little strange as the value is over 6,6, I already added 1 ml of pH- in 10 L and I think I would add some more today. I didn't change the values here, 'cause I will put the new values the next week. I'm considering what to do now to make the branches stay down, I'm not sure if I have to use SCROG or other LST. I will look other diaries to find out. Update: I opted for LST.
✍️ 1,4 EC
♒ 6,4 pH
🌊 9,5 L
📏 9 cm
📅 D28 - 11/09
📜 Last day of third week, and no changes made on Lucy today. EC is still high, but Lucy apparently can manage it. I made some little update on LST. Addded 1 L of water, pH5 and EC 1,39, tryng to lower the pH.
✍️ 1,4 EC
♒ 5,8 pH
🌊 9,5 L (Added 1 L)
📏 9 cm
Likes
15
Share


@Korinthius
Follow
Just a few minor notes as everything appears to be going good so far. 2 Weeks into veg, 3rd node is forming nicely. Another week or two, and the first topping will occur.
3/2/2021 2nd Node Complete
3/4/2021 3rd Node Appearing
3/7/2021 3rd Node Complete
The Camera is now taking time lapse photos, so I am trying to be even more careful not to change the position of the plant while checking on it. Or getting caught in the photo lol.
We did lose a days worth of Time Lapse shots due to a glitch with the camera system during a power outage. I will have to look at adding this to the UPS.