By continuing to use the website or clicking Accept you consent to our cookies and personal data policy and confirm that you are at least 18 year old. For details please see Privacy Policy and Terms
Accept


Likes
2
Share

@pareto
Follow
What a roller coaster of emotions. Was a litle early to harvest but since I also got some pollen thats totally fine!
Total Runtime: 88 days


Likes
50
Share


@AsNoriu
Follow
Day 9. All is running very nice. Happy with light performace a lot.
Girls missed wind a bit, but i cant make it faster, because of neighbours and sound, so i took humidity dome away.
TSL2000 runs 40 cm away and on 40% output.
Girls get daily shower , try to keep some wet cloth to maintain humidity.
Happy Growing !!!

Likes
12
Share


Likes
4
Share

@MadeInGermany
Follow
Flowering days 27
since time change
to 12 / 12 h
Hey guys :-)
The ladies look beautiful and are growing very well.
The sweet smell starts to blow through the whole tent :-) .
This week it was watered 3 times with 1l each (nutrients see table above)
Nothing else happened this week. Everything has been checked and verified.
A lot fun and stay healthy 💚🙏🏻
👇🏼👇🏼👇🏼👇🏼👇🏼👇🏼👇🏼👇🏼👇🏼👇🏼👇🏼👇🏼
You can buy this Nutrients at :
https://greenbuzzliquids.com/en/shop/
With the discount code: Made_in_Germany you get a discount of 15% on all products from an order value of 100 euros.
👇🏼👇🏼👇🏼👇🏼👇🏼👇🏼👇🏼👇🏼👇🏼👇🏼👇🏼👇🏼
You can buy this strain at :
Clearwater Seeds
Water 💧 💧💧
Osmosis water mixed with normal water (24 hours stale that the chlorine evaporates) to 0.2 EC. Add Cal / Mag to 0.4 Ec Ph with Organic Ph - to 5.8 - 6.5
MadeInGermany
Likes
6
Share


@Themindfulnug
Follow
Left seeds soling in water over night and then used paper towel method

Likes
3
Share


@ChefJimbo420
Follow
8/12/24 - 8/18/24
Start of Flower - 1st Full Week
Saw a potential for Nitrogen Toxcitiy. Dark green, almost black tips, downward pointed. #1 was 35 cm @ 8pm-ish.
#1 was 40 cm @ 8pm-ish.
#1 was 45 cm @ 8pm-ish.
"2:30 am-ish - Going for a ""flushing"" watering. Hoping to slightly lower the suspected nitrogen levels. Warning Watch: Runoff was 5.6 pH, EC 3.2, 1650 ppm500, 2250 ppm700 at the end. Might be high but another flushing watering will calm it. #1 was 51 cm @ 10pm-ish."
They looked great throughout the day.
"1:00am ManBear (friend's name) became the proud surragote father for #4. She became his to manage the way he sees fit. #1, #3, and #4 have not been watered since Day #20. I suspect they will need it soon. #1 in now 60cm at 1am-ish.
6:30pm: Flush watering of #1
#1 was 65"

Processing
Likes
27
Share


Likes
22
Share


@Beginnerbuds2020
Follow
Day 7 : I think this girl is doing very well I don’t know on how she will finish off I’m hoping for a high yield 🤞🏻 Im happy how she has stacked very close together and I just want her to fatten up abit more 🌱 any suggestion or tip helps overdrive for the boost tomorrow 💧

Likes
3
Share


@DoctorD
Follow
Overview:
As the fourth week of cultivation unfolds in "Schroedinger's Plants," our focus remains on the three strains: Tropicana Cookies, Gorilla Zkittlez, and Apple Strudel. This week, we concentrated on maintaining consistent environmental conditions, implementing light defoliation, and introducing low-stress training (LST) to encourage optimal growth and development.
Plant Progress:
1. Tropicana Cookies:
Growth: The plant showed significant progress, reaching a height of 37 cm by mid-week.
Health: The plants remained healthy throughout the week. No signs of nutrient burn or deficiencies were noted.
Interventions: Regular watering with 2 liters on alternating days and nutrient feeding with Alfa Boost at 1-1.5 ml/L. Light defoliation was performed on the 23rd to improve light penetration and airflow.
Environmental Conditions: Maintained a stable temperature range (25-27°C during the day and 20-21°C at night) with relative humidity levels ranging from 62% to 75%. Increased PPFD to 500 towards the end of the week.
Training: Introduced LST on the 27th to promote even canopy development and better light exposure to lower nodes.
2. Gorilla Zkittlez:
Growth: Continued healthy growth, with notable vertical development reaching 21 cm by the end of the week.
Health: Overall health was good, with no significant issues. A slight abrasion on a large fan leaf was monitored but did not worsen.
Interventions: Followed the same watering and feeding schedule as Tropicana Cookies. Conducted light defoliation on the 23rd to enhance airflow.
Environmental Conditions: Similar stable conditions as the other strains, with temperature and humidity maintained within optimal ranges. PPFD was increased to 500.
Training: LST was implemented on the 27th to encourage bushier growth and ensure even light distribution.
3. Apple Strudel:
Growth: Displayed steady growth, reaching a height of 21 cm by the end of the week.
Health: Maintained good health throughout the week with no visible signs of stress or nutrient issues.
Interventions: Consistent watering and feeding regimen with 2 liters of water on watering days and Alfa Boost nutrients. Light defoliation was done on the 23rd.
Environmental Conditions: Environmental parameters were kept stable, mirroring the conditions of the other strains. The increase in humidity to 75% towards the end of the week was monitored.
Training: LST was applied on the 27th to support even growth and improve light access to all parts of the plant.
General Observations and Actions:
Lighting and CO2 Enhancement: Continued to monitor and adjust the PPFD levels to ensure optimal light exposure for all plants, with a final adjustment to 500 towards the end of the week. CO2 levels were kept stable to support healthy growth.
Nutrient Management: The consistent use of Alfa Boost and Epsom Salt has been effective, with no signs of overfeeding or deficiencies observed.
Training and Defoliation: Light defoliation was carried out to enhance light penetration and airflow, reducing the risk of mold and pests. LST was introduced to encourage more even and bushy growth, promoting better overall plant health and yield potential.
Conclusion:
Week 4 has shown continued healthy development across all strains. The plants are responding well to the environmental conditions, nutrient regimen, and training techniques. Moving into the next week, we will continue to monitor growth closely, maintain stable conditions, and make adjustments as necessary to support the ongoing health and vigor of the plants.
Cheers,
D.
Likes
27
Share


@Chubbs
Follow
420 Fastbuds Week 5
Blackberry Auto
What up what up. Weekly updates on these two magnificent girls. They both are showing some really cool colors not only on the flowers but leafs as well. It's been getting cold a few day this week so possibly temperature manipulation. Both seem to be happy and healthy up to this point so continuing with the same routine should work fine. I think I'll add some nutes this coming week to boost flower production and give them a little helping hand. All in all
Happy Growing
Likes
7
Share


@Ms_Herbalist
Follow
After super cropping plant responded very well, growing faster and stronger.
This is my first time using this technique and it is the bestest way I found to have a nice looking yield

Likes
Comments
Share


@Atalant
Follow
26.5.
Harvest single clone.
Watering with tea 2ml organic PK
29.5
Watering on eye
1.6.
Watering on eye
4.6
Diluted tea
7.6
Watering 0.5L
8.6
Harvest day✂️
Creamatic
29.7g RQS
23.3 Reused
27.5 Biotabs
Total from 3
80.5g
18,3g Single clone (Digglet)
17.4g Triplets (Dugtrio)
Total
116.2
Likes
90
Share

@AsNoriu
Follow
Day 78. Kushes were finally ready and all postponed work was done. Girls will breath better, all lolitoped personally, now two tall Zkittalicious took all 4th row and both Kushes are in 3rd now.
Never did it so late in flower, took half of huge bin bag shoots, leaves and other crap away. Biggest branch trimming ever for me...
Changed feeding a bit, they all look very hungry.
Day 80. Plain water and girls are flying !!! Have very nice and super stacked Zkittalicious, looks like she will be my new love ;)))
Happy Growing !!!

Likes
12
Share


@SamDo
Follow
Hello, fin de semaine 4 de croissance.
Toujours une grosse différence entre les 5 plantes. Ce qui m’encourage à travailler la bouture pour les prochaines fois, pour ne plus avoir une telle différence 😞
J’ai donc réalisé un topping sur 3 plantes, les plus grandes. Et aussi une défoliation pour laisser la lumière atteindre les parties basses qui demande à grandir. Ce qui semble plutôt bien fonctionné pour l’instant. Pour le moment il n’y a plus rien à faire, juste les laisser récupérer et se développer.
J’avais poussé mon ec jusque 1.7, mais j’ai l’impression que c’est trop fort compte tenu de leur stade, je suis donc repassé à 1.5/1.6. Nous verrons si elles réagisse bien.
J’ai aussi changé la lampe. Je suis passé sur la slim600h à 50%, soit 300w à 100cm. Elles semblent apprécier.
Voilà c’est tout pour cette semaine...
Happy grow...😎

Likes
12
Share


@SnarkyGoat
Follow
Day one of the 14th week was October 24th. The trichomes on the small bud leafs are still clear resin. The hairs are about 70% dark and many are receding back toward the bud. Harvest time is getting close.


Likes
21
Share


@BudXs
Follow
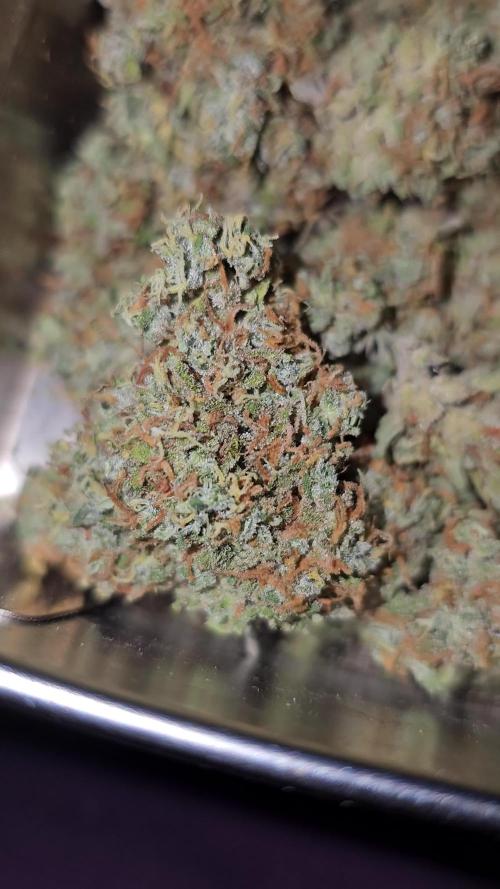
This plant was a breeze to grow, finished quickly, and yielded a decent amount of colorful, fruity and rock hard nugs. A crowd pleaser, this smoke goes down easy and hits hard. More indica leaning than sativa, use this flower before bed for a nice heavy sleep. Great bag appeal and taste. Excellent work by Fastbuds once again.
Grow this plant with one topping early and LST as required to open the buds up to Jah.
Thank you for following, thank you for liking. Thank you to the GrowDiaries team for continuing to deliver an awesome platform for us to document our work

Likes
14
Share


@ConspiracyFly
Follow
Gorilla Glue Auto day 69 - 4.3.2023
This week it stopped growing and is getting fatter, the smell is more active when I open the tent, it took more water than last week and I added PK 13/14
I also removed some leaves for better light penetration but I didn't undress it because it's cold :)
0,2 Bio-Grow
0,4 Top Max
0,4 Bio-Bloom
0,8 Calmag
2,0 PK 13 /14 Plagron
1.5 gr Pandora Powder MYCOTERRA
Gorilla Glue Photo
I made LST
Regards and see you next week


Likes
9
Share


@EBPbyEVD
Follow
Hello everyone!
🌱 Today, I'm excited to introduce our new product – a test plant grow light from the GrowMAMO project. This lamp is the result of hard work by our team, and as an experienced grower and breeder, I will start testing it. Let's take a closer look at what makes this light unique.
Technical Specifications:
Power: 60W
Main Spectrum: White light 4000K using Samsung LM301H EVO LEDs, which are 15% more efficient than the previous generation.
Additional Spectra: Red spectrum 660nm (Samsung LH351H) and ultraviolet ranges 367nm, 385nm, 395nm, and 405nm (Seoul).
Why these spectra are important:
White Spectrum 4000K: Ideal for general plant lighting, it promotes photosynthesis and ensures steady growth.
Red Spectrum 660nm: Stimulates flowering and fruiting, increasing yield.
Ultraviolet Spectra: Enhance the production of protective compounds in plants, such as flavonoids and anthocyanins, improving their resilience and quality.
Testing:
We will be testing the light on seeds provided by my friends at Doctor's Choice. The strain is Diesel Fast F1 BX Regular. 🌿 You can find all the test results and more detailed information on my Grow Diaries page.
I will regularly share updates and impressions with you, so stay tuned! I welcome your questions and comments. Let's make growing even better together! 🌟
