By continuing to use the website or clicking Accept you consent to our cookies and personal data policy and confirm that you are at least 18 year old. For details please see Privacy Policy and Terms
Accept
Likes
Comments
Share


Likes
77
Share


@DogDoctorOfficial
Follow
Week 10 Flower — The Beauty Before the Finish
This week marks a very special chapter in the Eternity Grow Cup. As we approach harvest, the garden is simply glowing with beauty. Every corner, every canopy, every branch tells a story — and this week, I’ve taken the time to slow down and capture that story as best I can through the lens of my camera.
All the photos you’ll see in this update were taken with care and intention. I use my Sony camera in full manual focus mode, and I don’t just snap and go — I spend time with each plant, each angle, waiting for that perfect moment when everything aligns. These are not just photos to document — they’re my attempt to reflect the feeling of the room, the energy of the grow, and the soul of each plant.
Just like with the videos, I don’t shoot randomly and decide later. I record what matters, and what I record, I use. It keeps me focused, organized, and deeply connected to the process — and I believe it helps me tell the story more clearly, whether through stills or moving pictures.
All five Runtz phenos are finishing beautifully. Each one expressing unique traits, but all carrying the same stunning quality — dense, clean, colorful, resin-rich flowers that fill the room with pride. This garden is finishing spotless, and I couldn’t be happier.
This week’s YouTube episode will reflect that beauty. If you’re seeing this here on GrowDiaries, I highly recommend checking it out in full 4K once it’s live — there are moments that simply can’t be translated in photos alone, even though I try my best. But for those who love the details, the full spread of pictures is right here, as always.
t this point in flower, the girls are not eating — they’re just drinking clean water with nothing but System Clean in the reservoir, at a rate of 0.25 ml per liter. This is part of a gentle, prolonged flush phase I like to implement, giving the plants a chance to metabolize and fade naturally. The goal is to promote clean, vibrant flowers that finish with optimal expression, without rushing the process. No forced flush, just time and care.
Lighting-wise, the spectrum has been tuned with precision — we’re currently running 40% on the whites, with reds and UVs at 100% to drive trichome development, resin production, and color expression in these final days. The plants are loving it — they’re soaking in the deeper wavelengths that signal the end of their life cycle and responding with a final push of energy.
And yes — we’ve been running 11 hours of light and 13 hours of darkness from the very start of flower. It’s not the usual 12/12, and it comes with its pros and cons. On the upside, it helps speed up ripening slightly, encourages more compact flower formation, and mimics the natural seasonal decline in daylight. On the flip side, it slightly reduces the overall DLI (daily light integral), so you need to ensure your PPFD and spectrum are dialed in just right to avoid sacrificing yield. For me, the trade-off is worth it — the plants are expressing themselves beautifully, finishing strong, and packing on the final magic.
Now it’s your turn — I’d love to hear from you. Which phenotype is standing out the most to you in this garden? Which one is catching your eye with its colors, its fade, its structure, or just that vibe that speaks to your soul? Is it the frost? The density? The posture? Each of these girls has her own personality, and I know many of you have been following closely — so drop a comment, let me know: which one is your favorite? Which one would you take home?
This run has officially earned the Dog Doctor Official Wax-Sealed Stamp of Approval. These genetics are beautiful — expressive, vibrant, clean. It’s been a joy to grow them, and an even greater joy to share this journey with all of you. Of course, we still have the final word coming after harvest, drying, and curing — that’s when the full picture reveals itself. But until then, based on everything we’ve seen and lived in this grow… this is the real deal.
To everyone following the journey — thank you. To the sponsors, the community, the silent observers, the passionate growers, the haters, the lovers — I see you all, and I appreciate every bit of energy you send.
This cup has been about more than just growing. It’s been about sharing. Connecting. Creating something beautiful together. And we’re almost there.
Next stop: harvest? provably yes lets see !
Growers love always 🌿❤️
DD
Genetics - Runtz https://www.zamnesia.com/6000-zamnesia-seeds-runtz-feminized.html
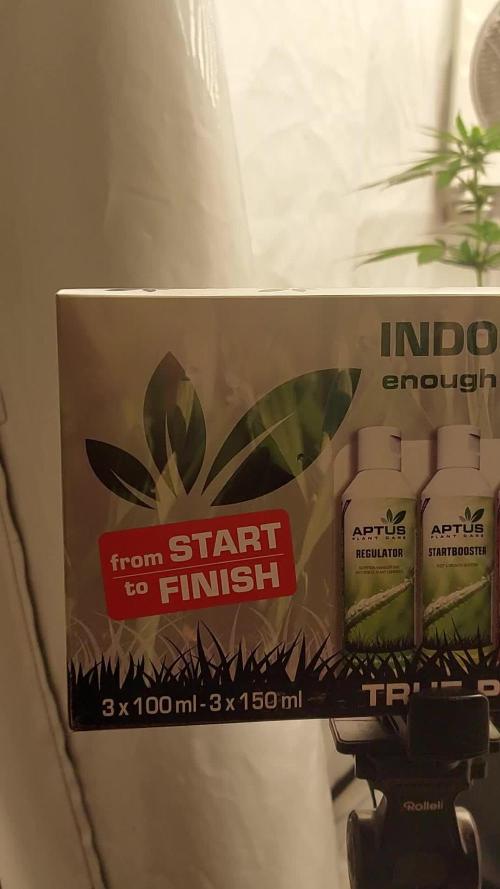
Nutrients - Plagron https://plagron.com/en/hobby
- Aptus Holland https://aptus-holland.com/
Controls - Trol Master https://www.trolmaster.eu/
LED - https://www.futureofgrow.com/en
LED - https://www.thinkgrowled.com
Soil - https://www.promixgardening.com/en
Germination - Cannakan https://cannakan.com/?srsltid=AfmBOopXr-inLXajXu3QFgKXCXXos4F1oEvScjMKIB5MR5dk8-GJ-F49
DOGDOCTOR 15% off
Smoking Papers - https://ziggioriginal.com/
Terpene saver - https://grovebags.com/
As always thank you all for stopping by, for the love and for it all , this journey of mine wold just not be the same without you guys, the love and support is very much appreciloved and i fell honored with you all in my life
With true love comes happiness Always believe in your self and always do things expecting nothing and with an open heart , be a giver and the universe will give back to you in ways you could not even imagine so
As always, this is shared for educational purposes, aiming to spread understanding and appreciation for this plant. The journey with nature is one of discovery, creativity, and respect. Let’s celebrate it responsibly and continue to learn and grow together!
Growers Love To you All 💚
#EternityGrowCup #RuntzHunt #GrowersLove #CannabisCommunity #AptusHolland #ProMixSoil #TrolMaster #Zamnesia #Plagron #ZiggiPapers #Grovebags


Likes
2
Share


@eldruida_lamota
Follow
Que pasa familia, vamos con la cosecha de estas Orange Sherbet Fast Flowering, de FastBuds.
Por dónde empezar, las flores son poco compactas pero van repletas de resina y unos aromas bastante dulces y citricos
Es muy sencilla de cultivar, es de ciclo corto aunque también si le dais una semana más no pasa nada agradecer se agradece al final.
Mars hydro:
Code discount: EL420
https://www.mars-hydro.com/
Agrobeta:
https://www.agrobeta.com/agrobetatiendaonline/36-abonos-canamo
Hasta aquí todo, Buenos humos 💨💨💨

Likes
9
Share

@GrowWithFlow
Follow
Flowering week 2 successful. One of 3 Panty Punch from Seedstockers was a hermie.

Likes
10
Share


@40Plug
Follow
Wow! Look at these amazing two plants. They both turned a bit purple.
The smell is insane.
Belive me or not but my entire room smells like a sweet ice cream restaurant. 😍
I had given this week only PH adjusted water and darkness for two days before harvest.
Going to dry for like 7-10 days and then curing for another month or so.
I will upload more pictures of the dried buds when the time comes

Processing
Likes
26
Share


@GrowGuy97
Follow
Day 7 & 2 of the NHLs still havnt popped, transplanting the one NHL that did pop today!
Day 12 think 1 of the orange sherbet have nute burn so flushing it out and dropping the dose a little hopefully that helps!


Likes
11
Share


@Microsun
Follow
Alright, the time is here, I’ve started the harvest but I don’t want to press the harvest button until I have all my info correct, but I’ll show some photos from my baby, we started a slow 6.0 flush about 2 weeks ago and finishing flush about 4 days ago. She was already fading but I had some problems since I fed her without thinking after having some drinks witch is obviously a very rookie move. But as I’m still learning it’s just another oof under the bridge, she was fading and I got some nice looking tricombs and I’m happy with the smell and size for her life cycle, I’m aiming for a slow dry and cure but my space is limited in my appointment and grow room so I have a drying tent set up but conditions could be hard to handle since the season change. Cheers. (And yes I didn’t wanna flush my auto but I figured it was the safest route.)


Likes
6
Share


@wheedtobeus420
Follow
Day 47 or so I haven’t measured her so the height can’t be right she’s huge! And getting so heavy. Took some photos of her in the dark while I pretreated the tent for mites or any other fuckers who like to ruin the day. Just in case. Since I recycled soil it couldn’t hurt. She’s beautiful I’m so excited for her to be finished.


Likes
12
Share


@Cannibalgardens
Follow
Not much to report this week she is getting more frosty buds and smelling so dam good right now it's crazy that fresh bowl of berries smell I love it .. she can't be beat that smell and her deep black on the leaves a very tasty looking girls .can't wait to see her plump ii over the weeks now ..cheers canna family .
Likes
5
Share


@TGriner420
Follow
This week went by quick but they grew a lot! I didn't do anything different than last week but just increase their water intake from 1L to 1.5L and then followed my same nutrient regiment. I use the Fish Poop then the next day I just water. Then I use the Real Growers Soil Recharge and then I just water the next day. Then I use the MaxiGrow and then I just water the next day. Then I use the Stash Blend and then I use just water the next day. You can pH (using soil) between 5.5 and 6.5 so I always pH my Nutrient Solutions at 6.2 and use my pH'd water which is a 6.8 (7.0 for soil) but I pH my H20 after adding my Nutrient Solutions. I use my H2O that's always 65 degrees! I find it's better and easier to have a bucket with pH'd water ready to go at all times. It makes it easier when watering and feeding your plants especially if you have a few to care of!
Likes
6
Share


@Fishcake
Follow
Thinking of harvesting the ones in the small pot sometime this week and also the one in the vid in about 1.5 - 2 weeks time let me know what you guys think
Likes
Comments
Share


@GrowDiaries
Follow
Best Autoflowering Strain 2025 AND Best Autoflower Breeder 2025
Double win for FastBuds, taking Best Autoflowering Strain 2025 AND Best Autoflower Breeder 2025, voted by our GrowDiaries.com growers! #GrowDiaries
@42youknow @spannabis_official @greenthumbjacobscraft
Likes
4
Share


@TwinExotics
Follow
Everything is doing good despite me not having ac at the moment! House has been staying at 85 degrees so the plants are happy at least. Plan on solving the ac issue by next week to start possibly flowering soon 🤞🤞. No health issues to report, just added another fx3 to the 3x3 to have 2 different phenos!


Likes
50
Share

@DogDoctorOfficial
Follow
This Girl is on fire, all and everything about this one is just amazing, i mean the bag apele on her is retarded beautiful , and not just them looks, the smells are so intense that i am so glad that i have great carbon filters , yes i do use several ones in here and with girls like her one kind a needs it <3 <3 <3
as the week goes she evolves and her colors are getting darker and darker with i love, i mean i love white medicine covered in resin but dark one is a different look that i am also very in to it and all the beauty that comes with it <3 <3 <3
her close up shoots show that she is almost ready for harvest, meaning that provably some point this week mb beginning the next one i will harvest this beauty that for now is keeping her melon bobble gum sweet smell with some vanilla notes i think, she is special one that is for sure <3 <3 <3
Lets see how it all goes and how she tastes and smell after cured , but if she keeps this profile i will be a happy boy <3 <3 <3
oh added a short edited video from her, man is so much more complicated d¡to do them short than is them long hihihi hope you all enjoy them videos , i know i love making them <3 <3 <3
As always thank you all for stopping by and for supporting me on this journey, i am super passion about growing and fell blessed to have you all with me on this new journey <3 <3 <3
Genetics - Fast Buds Tester 2311
Ligth - LUMATEK ZEUS 465 COMPACT PRO
Food - APTUS HOLLAND
#aptus #aptusplanttech #aptusgang #aptusfamily #aptustrueplantscience #inbalancewithnature #trueplantscience #fastbuds #dogdoctorofficial #growerslove
With true love comes happiness <3 <3 <3 Always believe in your self and always do things expecting nothing and with an open heart , be a giver and the universe will give back to you in ways you could not even imagine so <3 <3 <3
All info and full product details can be find in can find @
https://2fast4buds.com/ wen released
https://aptus-holland.com/
https://autopot.co.uk/
https://lumatek-lighting.com/
<3 <3 <3 Growers love to you all <3 <3 <3


Likes
8
Share


@CortezKush
Follow
Following med-teks feed chart. Feeding heaviest nutrients (2.7 EC) runoff currently just over 3.0. Going to need to do a small flush to and start reducing ec prior to actual flushing phase.
Advised by my local hydro shop to reduce EC down to 1 before hitting the plants with the heavier nutrients. Only started applying this method 2 weeks ago. Seems to be ok. Would appreciate some opinions but!


