


By continuing to use the website or clicking Accept you consent to our cookies and personal data policy and confirm that you are at least 18 year old. For details please see Privacy Policy and Terms
Accept
Likes
Comments
Share


@Kardo
Follow
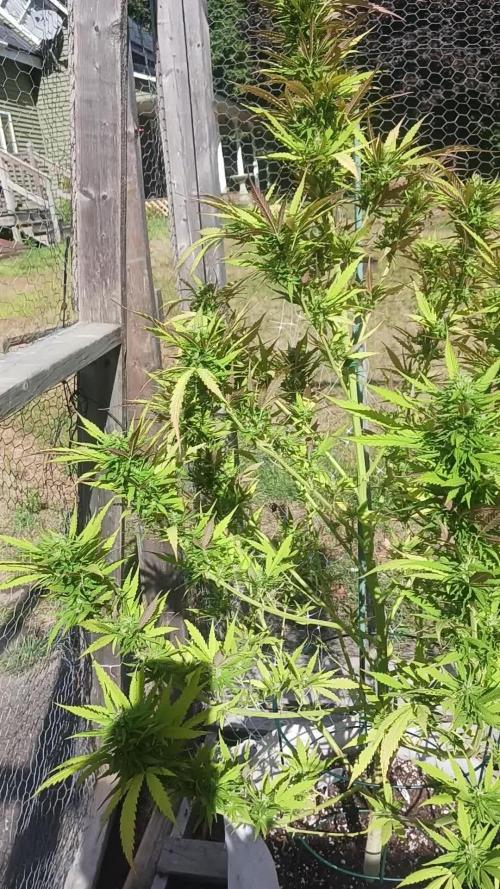
Die Lemonberry Haze kommt zu 100% nochmal also ich wurde garnicht enttäuscht von meiner Hoffnung wie sie sich entwickelt ist einfach krass die buds sind richtig dick und voll mit Zucker sehr schön zum angucken

Likes
36
Share


@Salokin
Follow
Hi growmies,
unfortunately I skipped a day checking on the reservoir and the plant must have consumed a lot more water than expected, probably due to the heat we are experiencing where I live, since I realized tip burn getting worse everywhere I checked the ec, which was close to 3 😳, topped up with RO water right away and this seems to have stopped it. Other than that I don’t think it bothered the plant too much either, as she keeps on swelling bigger and bigger. A&B fertilizer was reduced already and once, either next week or the one after I’ll start flushing, depending on the stage of ripening.

Likes
7
Share


@Pistil_Whipped
Follow
The girl grow pst the circumference of the 5 gallon pot. She is steadily growing on the top, fan leaves look thick and bright green. The stem is growing in girth.
I fed her some stump tea along with a gallon of feed water at the end of this week. Let's see how she reacts to it. I have been super cautious in increasing her feed. Since she is growing in soil, I waited until she is a month old before loading her with nutrients.
Concerns for this week: This plant is getting real bushy, the fan leaves are pretty big. Its gonna b casting plenty shade in a week ot two. Little bit concerned about light distribution to all parts of the plant. The fan leaves are so big, I am not sure how to begin LST on her. Need to read up more on it.
Onward and upward!!

Likes
29
Share


@nonick123
Follow
Día 27 (20/05) Riego con 250 ml de Té de Compost
Auto Northern Dragon Fuel está creciendo exponencialmente!
Día 28 (21/05) Vuelven a tener sed! Las riego con 250 ml sólo H20 pH 6.2
Auto Northern Dragon Fuel se ha recuperado muy bien de la deficiencia de Mg
Día 29 (22/05) Riego con 750 ml H2O+ Regulator 0,15 ml/l + CaMg-Boost 0,25 ml/l + Startbooster 0,25 ml/l + TopBooster 0,2 ml/l- pH 6.2
Día 30 (23/05) Lemon Cherry Cookies Auto está sedienta de nuevo!
500 ml de sólo H2O con el pH 6.3
Día 31 (24/05) Lemon Cherry Cookies Auto está sedienta de nuevo!
Riego con 750 ml H2O + Regulator 0,15 ml/l + TopBooster 0,2 ml/l- pH 6.2
Día 32 (25/05) Las plantas no paran de crecer! 😍
Día 33 (26/05) Riego con 750 ml H2O + Regulator 0,15 ml/l + CaMg-Boost 0,25 ml/l + TopBooster 0,2 ml/l- pH 6.2
Lemon Cherry Cookies Auto tiene un olor increíble 😍😍😍
💦Nutrients by Aptus Holland - www.aptus-holland.com
🌱Substrate PRO-MIX HP BACILLUS + MYCORRHIZAE - www.pthorticulture.com/en/products/pro-mix-hp-biostimulant-plus-mycorrhizae

Likes
13
Share


@Vorghus
Follow
last week was very good, the plants grow a lot and all the colas are blooming as much as the main, this week ill apply neem oil again to prevent plagues, and experiment with the SCroG that last week didnt do.
Likes
17
Share

@masterofsmeagol
Follow
8/23 I WATERED THE NATURAL MK ULTRA AND THE 10TH PLANET IN THE BACK WITH A GALLON AND THE TWO TENS SPLIT A GALLON. It's hotter today and the wind is picking up. I wish I had gotten rid of that plant when I thought to. Oh well. I'm going to have to bite the bullet and treat things. Smell is increases as well as flower size. However I'm noticing more leaves that are yellowing and falling off. Smell has intensified. The special kush in late flower doesn't seem to be producing trichomes like it should. Or maybe it's still early. I see some but by this time I would think it would be frosty as hell! It's rained like once this summer. I've put tons of work into defoliating. I'm not sure if I'll try a controlled spray trying to avoid buds or if I should use a sponge and just hit every leaf. At least I'm seeing that the buds are still expanding and smelling despite these invisible Bastards. It's not like I see them. Even my traps only caught like one. I'll update as I go.
EDIT: WATERED THE TENTH PLANET AND THE LATE SOECIAL KUSH 1 GAL. PLAN ON FEEDING TOMORROW. I DID A SHIT TON OF DEFOLIATION. I DONT SEE ADULT THRIPS BUT I SEE THE EGGS AND SHIT IN THE CREVICE AND SOMETHING IS COMING AND EARING SMALL LOWER FOLIAGE. I RIPPED TWO INTERIOR BRANCHES OFF THE PLANTS I TREATED BEFORE WITH CITRIC ACID BECAUSE I FOUND A COUPLE STOPS OF MOLD ON THE STEM. AFTER RESEARCHING THRIPS WITH A.I. UNTIL IT LITERALLY CHANGED PROTOVAL AND STOPPED HELPING ME SAYING IT DANT HELP CULT8VATE CANNABIS AFTER GIVING ME SEVERAL DIFFERENT INSTRUCTIONS AND OPTIONS. I SCREENSHOTTED THEM THOUGH. I USED THE SAME MIXTURE OF CITRIC ACID AMD DAWN ONLY HALF STRENGTH AND HIT THE 10TH PLANET AND PINK KUSH THAT ARE PATIENT ZERO. THEN I TOOK A SPONGE AND EITHER DEFOLIATED OR WIPED THE LEAVES WITH A SPONGE AND SAME CONCOTION ON THE SPECIAL KUSH IN THE TEN. I DEFOLIATED MORE AND THEN "SPOT TREATED" A FEW LEAVES ON A BOTTOM BRANCH OF THE 10TH PLANET WITH MITE X. I'M WAITING UNTIL THE MORNING TO SEE THE RESULTS AND BEFORE I MOVE FORWARD. I HAVE ORGANOCIDE BEE SAFE AND I KNOW IT WORKS GOOD BUT IT SMELLS LIKE SHIT. IM HOPING ILL FIGURE THIS OUT.
8/24 Didn't have time to do a video or take any pictures. I pit a lot of work in the garden yesterday. I removed a couple small branches that had mold on the stem. If I had listened to my intuition and moved that plant (instead of listening to my dad) I probably could've negated this mess. Windy as hell yesterday. Maybe that's why I don't see mich damage from the thrips. The runt in the 50 has some silver ingredients on it. I'm considering using spinosad. Those are way earlier in flower and that shit WORKS. WATERED TODAY;BIG MK ULTRA 1.5, THREE IN THE BACK ROW, CHEMDOG AND TENTH PLANET ALL GOT 1 GALLON. THE TWO TENS SPLIT A GALLON. I THEN FED EVERYTHING WITH A QUART OF FOOD. I'll keep an eye out on the dosage and see what the can handle. I left out plant doctor as I'm dealing with thrips. Took a leaf that looked like sep off the pink kush in the 50 with half used soil. I didn't have much time to look around but I will when I get back and I'll put some vids/pics up. The plants that I treated with citric acid looked no worse for the wear and actually BETTER than they hadcthe day before. The other 10th planet and the Pink kusg in the ten are the worst. If I can't beat it I may junk them. I'm planning on treatingvtge plants I didn't yesterday tonight. I may use a different treatment I'm not sure.
EDIT: Went back over and took a few pics and a video. I defoliated a SHIT TON of leaves. I can just tell the ones that the thrips have been sucking and laying eggs. It's windy as hell. Plants are going crazy. I'm wondering if the wind will hurt the thrips. Maybe I should've just stood with the wind at my back and throw a buNch of D.E. in the air and have it coat the plants. I'm scared of using d.e. because it absorbs so much water. It's like 80%! The year I had fusarium I put a bunch of d.e. on the soil and it retained water like a mofo. The plants I treated showed no I'll effects. I'm th8nkobg I'm going to remove patient zero and isolate it. And I'm considering using spinosad on the pink kush. What would you do? If you had to use something in the middle of flower or loss your crop which would you choose? I'll probably just use citric acid or the rubbing alcohol. I don't know. I'll keep it updated.
UPDATE: WENT OVER AROUND FIVE AND DEFOLIATED. I CHECKED THE PLANTS I TREATED AND THE ONE IN THE TEN HAD A FEW LEAVES THAT LOOKED LIKE SEP. ITS EXTREMELY WINDY SO I DECIDED AGAINST SPRAYING TONIGHT. I LOOKED ONLINE FOR PREDATORS BUT IT APPEARS TO BE TO LATE OR EXPENSIVE. I MAY LOOK FOR AN OVERNIGHT SHIPMEBT OF LOST COAST PLANT THERAPY OR SOMETHING BUT WILL THAT WORK SUBSTANTIALLY BETTER THAN A DIY VERSION? ILL EITHER ORDER SOMETHING TONIGHT OR PICK UP THE LAST FEW INGREDIENTS I NEED TOMORROW. LOOKING THROUGH THE GARDEN THOUGH EVERYTHING LOOKS GREAT! I WISH THE TRICOMES WOULD DEVELOP A LITTLE FASTER ON THE EARLY SPECIAL KUSH BUT IT IS WHAT IT IS. THESE GIRLS HAVE BEEN THROUGH HELL AND BACK ARE REAL TROOPERS.
8/25 I thought about putting the late flowering special kush in the barn because it looks cloudy and we are supposed to get rain. I chose to wait until I got back but it started raining already. It's not raining right now but it will probably start again. I'm just worried because I haven't staked the branches. It's a strong plant though. I'll check on her when I get back. I'm looking for some Castille soap this morning and the rest of the things to make a diy lost coast plant therapy. The plants look good though and the flowers are really stacking up. I don't see that silvery shit so it doesn't look like it's spreading real fast. The pink kush is in early flower and I'm considering spinosad for them. They have a long ways to go. I'm not sure. I may just use the diy spray. I'm not sure.
EDIT: WENT OVER AFTER SUN DOWN AND MIXED UP THE DIY GREEN CLEANER/LCPT. I USED RUBBER GLOVES AND TREATED THE HUGE MK ULTRA, THE TWO TENS AND THE REVEG 10TH PLANET. I ONLY TREATED FOUR PLANTS. I HAD A PRETTY GOOD METHOD BUT IT WAS SLOW. I PUT THE LEAF BETWEEN MY GLOVED HAND AND SPRAYED THAN RAN THE LEAF THROUGH MY FINGERS TO AVOID FLOWER. ON PLANTS WITH SMALLER FLOWERS I WAS ABLE TO JUST FOLD THE LEAVES UPWARD AND GET THE BOTTOMS. ILL CHECK AND SEE HOW IT WORKED IN THE MORNING AND GO FROM THERE. WE GOT SOME GOOD RAIN TODAY. IM WORRIED ABOUT MOLD THOUGH. THATS WHY IM HESITANT TO SPRAY BUT SOME FLOWER IS BETTER THAN NONE.
8/26 IT POURED last night. Sheet rain. The storm had passed and it was like a 14% chance of rain at night. Oh well. The girls seemed to have loved it! The looked great this morning. I shook everything off and got soaked in the process. Inspected for damage and luckily didn't find any. I'm feeling optimistic about my diy green cleaner lcpt. I'm seriously considering spunosad on the pink kush as it's earlier in flower and I think it could handle it. I might just use this spray first and see how it goes. Buds are swelling and seem bigger everyday. I looked at some old diaries and I can see ive had thrips before. I also have some insect (ear wigs or pillars) that target lower branches and kinda lollipop them. I hope it's not earwigs because I've had bas luck dealing with them. I'll have to check at night.
EDIT: WENT OVER AROUND THREE TO CHECK THINGS OUT. PLANTS LOVED THAT RAIN AND SEEMED TO LOVE THE TREATMENT AS WELL. THAT RAIN AND WIND DEFINATELY DISRUPTED THE THRIPS. THE SPRAY I USED SHOULD KILL ON CONTACT AND SUFFOCATE EGGS AND LARVAE. PLANTS LOOK THE HAPPIEST IVE SEEN THEM IN A WHILE. I CANT TREAT THE OTHER PLANTS TONIGHT BUT I SHOULD HAVE TIME TOMORROW NIGHT TO GET WHAT I MISSED. IF ITS NECESSARY. ILL KEEP AN EYE OUT.


Likes
15
Share


@chupacabra80
Follow
привет ребята,вот срезал мой куст, вроде не плохо вышло?! посмотрим сколько будет весить когда высохнут )))) амнезия мой любимый сорт,как только высохнут отпишусь какой будет результат )))
30,06,2021
вот и результат почти 90 грамм,на весах 40 грамм но это моя доля урожая ,я выращиваю в месте с другом так что моя половина 40 грамм сухих шишек и мы еще и покурили пока шишки подсохли, так что приблизительно у меня получилось 85-90 грамм сухих шишек,шишки выросли толстыми но они не плотные,потому и такой результат, посмотрите мой апельсин у него хорошие плотные шишки , он начал цвести в 60 дней , растение без проблем,кто не любит ждать этот сорт не для него )))
09,07,2021 мой урожай пересох, +35,3 с было очень жарко и я не мог контролировать температуру (( я ожидал результат лучше но не вышло, надеюсь дальше все нормализуется
Processing
Likes
13
Share


@gigixx
Follow
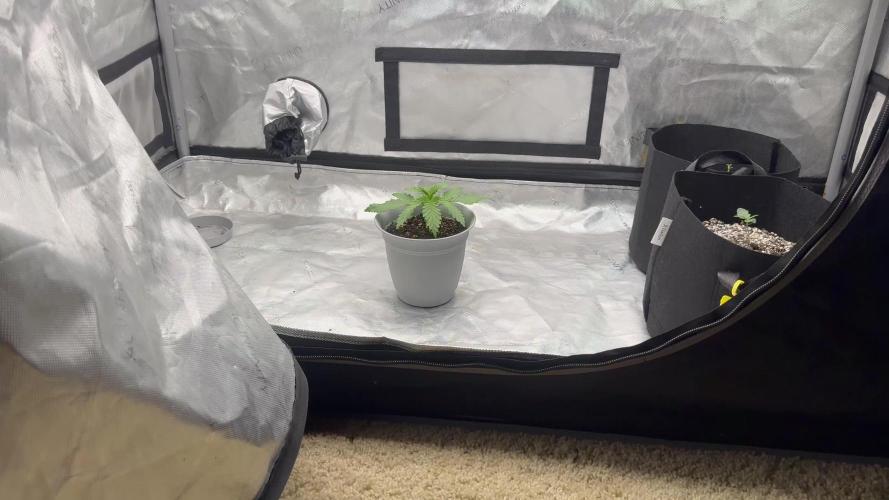
First plant, chose Blody Skunk by SweetSeeds.
I have a Mammoth box (40x40x120cm) with a 300W Led, "Odor Sock" filter, "Air-Pot superoots" 12L vase.
For the germination I' ve putted the seed in a glass of water for 24 hours, then in a plate covered with humid toilet paper for 2 days, then in the vase.
-
DAY 1
1.5 L of water with low pH (6.3)
Lights for 24h
After germination of the seed I' ve putted it in the vase
-
DAY 2
No water
Lights for 24h
Nothing new
-
DAY 3
No water
Lights for 22h, now I have a humidifier working almost 24h/day
A small bud is out, approx 1/1.5cm height
-
DAY 4
No water
Lights for 20h, humidifier on for the whole day
Bud reached 2cm
-
DAY 5
Noticed that temperature and humidity are too high (28°c, 85%) so I' m trying something to fix it in order to have at list 26°c and humidity at 60-70%.
Bud still at 2cm
-
DAY 6-7
I' m leaving for some days so I' ll not be able to update the diary

Likes
18
Share


@Staffedition
Follow
Привет друзья. Моей растихе сегодня 43 дня.
Начал применять LST технику на 19 дне и продалжаю применять её через день, а 18 августа добавил ДЕФОЛИЗАЦИЮ
С 20.08 ДЕФОЛИЗАЦИЮ делаю каждые 3,4 дня
С 20.08 LST технику делаю каждые 4.6 дней
На сегодняшний день влажность 70%
Чувствуется по листьям много влажности.
Буду что решать с этим вопросом, ведь впереди цветение.
Не смотря на высокую влажность растение растёт хорошо. генетика радует.
Всем мира и добра!
https://t.me/smail_seeds
#Smail_Seeds
Likes
4
Share


@DivinePineMan
Follow
I have my Electric Sky 180v2 now in instead of the cheap 40$ for 4 lights i bought on facebook. Which were growing but nothing like this thing has been doing the past week. Im still blown away by the light but back to the plants. Doimg great i took some clones. First time ever so hopefully they root. I been sprayin em 4 -6 times a day. My 3rd g6jetfuel i took out of my tent with es180v2 and put in closet by itself with the 40$ cheap leds. It hasnt grown a whole lot compared to the tent plants g61 and 2...i thought maybe it may of had a male or hermi part but honestly i dont think it did bc i cant find it now. But its still in there bc i decided to throw it on 12-12 in closet to find out sex forsure. Ive been foliar spraying in my tent 3 timez a day. And 2 times a week i get 2 little drops of fox farm grow bif in my 10oz spray bottle of water.
Likes
14
Share


@Posterboy
Follow
Week 5 of flower has been interesting. The one I thought that would herm ended up popping some nanners so I plucked them and threw her/him outside to finish off. I'll keep pulling off nanners as I find them but I am now focused on the 3 inside.
The frosty one ended up getting even more trichomes so I cut off two branches to reveg and keep her going for next round. I have the other clones from the tall girl that are all really healthy. I'll put some more of them in soil tomorrow and compost the rest.
Added some Incredible Bulk and Kelp it Real to the feed this week. Just a light mix to start around 250 PPM
Likes
11
Share


@PanGrower
Follow
Do not pay attention to the temperature on the thermometer in the middle, it lies by a couple of degrees. I have a good thermometer on top of the box that shows the temperature.
Day 29: After a terrible fracture, we see that the plant is beginning to recover. I'm honestly disappointed because it makes it very difficult for me to train mainlining and it will also increase the amount of time it takes to grow.
Day 30: It looks much better already, I could superprune the right branch, but I don't want to stress it. I will try to bend the right branch harder, I will bend the left one a little in the morning the next day, maybe early.
Day 31: This morning I cut the lower leaves, photo in the evening and continued the LST training after the injury. Photo in the evening.
Day 32: I am completely sure that the plant has moved away from the stress, but we can see on the left circle, the right bud (and side) slowed growth.
Day 34: I saw traces of salt on the tips of the new leaves, so now I pour water with regular 15 PPM.


Likes
2
Share


@LoganatorDude
Follow
I absolutely love to watch them grow! Especially that moment they hit their first growth spurt.
I started with RO water that is remineralized for drinking purposes. The ppm is only 18! My tap is 156! So considering they don’t need much water, I’ve been stealing some of our drinking water. The RO water starts at pH of 7. After I add the nutrients, ppm of 249 @ pH of 5.8 while soil is still sweet @ pH of 7
I think my days are off as a new week begins on the last day of the previous week. I am going to leave that for consistency.
04/21 - Noticing some possible nutrient issues with the Fruity Pebbles for several days now. Going to see what she needs. Up front I’m thinking maybe just a super small amount of Amino Acids with a little Epsom Salt. Maybe she is struggling to access the nitrates from the neem cake. IF it’s a issues with nitrogen. We will see. Maybe she would benefit from some extra calcium?… Any ideas are greatly appreciated.
Day 22 and I am noticing how these girls have been burning up a lot of potassium lately, dealing with the wind and sun 💨 ☀️, getting pushed around all day.
I plant to top dress with some Kelp Meal pretty soon.
Day 24 -> 4/22/22- a quote from the weather on today’s red flag warning and dust storm warning.
“ HAZARD...Less than a quarter mile visibility with damaging wind in excess of 60 mph. SOURCE...Satellite imagery. IMPACT...Dangerous life-threatening travel.”
I’m keeping the girls inside today.
Day 26, I was planning to check the runoff on some of these girls, especially the fruity pebbles, however I messed that up as I also top dressed WAY too much of the seaweed bliss. So I flushed with plain RO water at pH of 7 until there was only slight coloration in the runoff. I didn’t check the runoff as a lot has changed with all that flushing. So next watering/feeding I will make sure I check the runoff on multiple plants.
So the seaweed bliss with its 17 on potassium, seems to be the most likely culprit for why there is a bronze-ish color on the inside of the new growth. Hopefully a foliar feed of Epsom salts can correct the problem. Inside tent, lights on LOW. Noticing similar pattern in all of them to a degree, most noticeable in the fruity pebbles.


Likes
11
Share

@HillCountryHempCo
Follow
This plant came from a random seed I found in a dispensary bag and since we have dozens and dozens of bags I don't know which one it came out of...so the strain is unknown. I’m not sure whether it’s a photoperiod or an autoflower, but I’m assuming it’s a photoperiod for now. I started it indoors in a tent, germinating the seed using the paper towel method before planting it in a small quart-sized pot.
It’s been growing for a few weeks in Fox Farm Ocean Forest soil, but the leaves have just started to fade, so I’m preparing to transplant it into its final home—a 50-gallon pot outdoors now that it’s spring.
The 50-gallon pot is filled mostly with standard potting soil, mixed with Fox Farm Ocean Forest and perlite. A few weeks after transplanting, I’ll begin feeding it a combination of liquid nutrients including Advanced Nutrients, Fox Farm, CalMag, and Mikrobs Microbial Superpack. I’ll also top-dress with worm castings and other amendments as needed.
If the plant turns out to be male, I’ll harvest the pollen or any seeds it produces. If it’s female, I plan to grow it as large as possible—which is why I’ve chosen such a large pot and moved it outdoors.
Likes
67
Share


@Roberts
Follow
Been flowering very well. I backed off nutrition a little. Minor nute burn on tips. Beside that it took to lst training great. Flowers are looking dense and potent. Will see in a few more week. Thanks again for likes and follows. Support means a lot. Happy growing


Likes
4
Share


@4F1M6
Follow
Man these ladies are stacking javelins! Colas galore throughout their canopy. Sexy and healthy! 1 lady got a touch taller than the other 2. Shes been super cropped again to reduce her height and even out the canopy a bit. But the other 2 are getting quality exposure none the less.
They got treated with Dr zhymes as a preventative. That will basically wrap up their treatments ...possibly once more with lost coast.
Upped the pk intake as they are blooming strong now. Gotta keep those engines well fuelled. Response was stellar. Happy happy happy ladies.
Unti next update. Happy growing and stay lit fam.

Likes
6
Share


@rvabudman
Follow
Cant take my eyes off my plant. This is my second round of growing and I am the type of person who learns through failure (not gonna upload the pics of the first round plants lol). The buds are thickening up very nicely. Hoping to get between 3-4oz , the strain is high yielding but I have a smaller tent. My auto yielded 2oz with the same space (2 plants in one tent splitting the space), but the buds definitely didn't develop as well as these buds.
Processing
Likes
15
Share


@DailyhighclubNLyara
Follow
Okay so the result of my LST surprised me like a lot. The plant looks great under the light, it’s still my second grow so I hope to learn a lot about the beautiful plants and how they respond. I want to experience everything to learn from them and know how to respond.
I think this week went good but the dry wet cyclus is something I really needed to learn this week. I first tried watering every day but i noticed that the soil wasn’t dry at all, so I thought no that’s maybe just the soil. *Ive learned this cycle in the next week* spoiler alert: it wasn’t
I still give around 1 tbsp of the molasses because the plant is really responding good to it.
The small plant is also looking healthy so perfect, just keep giving her love.
I did a big oops:
So, the plant grew bigger and bigger and faster then I could keep up. So I decided to lst some more, Olga went perfect and I build a lot of confidence from that. So... busy with the other “big” plant and I started doing the head top, but the band was just to tight, but I noticed that to late *SNAP*. Did I just snapped the biggest branch of the middle plant? Yes, I hated myself for 4 days until I thought: there are no mistakes, just happy..... (fill in with your brainpower) well see what happens

Likes
11
Share


@Hamsterdam
Follow
17/04:
- Started LST.
- My plan is to wait until the plant outgrows the top tie and start tying the main cola around the pot, counter clockwise.
19/04:
- Adjusted LST and tucked some leaves. I'm trying to give the new growth as much exposure to light as possible.
20/04:
- 420 is here and the plant is looking fantastic. I'm leaving the LST ties as they are for now.
21/04:
- Tensed the main tie a bit more and I might settle for this instead of going with the round shape I had in mind.
- I'm tying some leaves so they won't block the new growth. Learned this reading other people's Q&As
- Keeping leaves to a safe distance from the soil so they are not damaged by fertilizers.