The Grow Awards 2026 🏆 


Likes
Comments
Share
@StrontiumGrow420
Follow
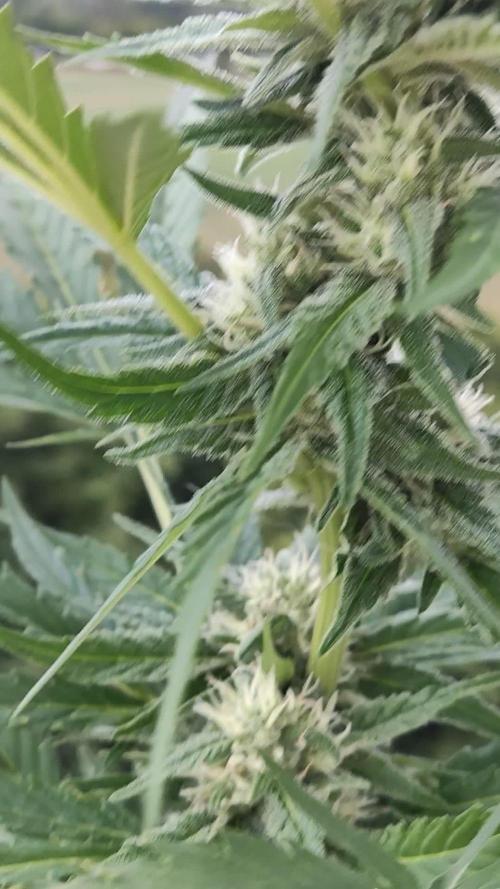
Into week 10, well past the estimated 6 - 8 weeks to harvest time from the online stats, looks like i have a few more weeks to go until they are ready. There has been some expected leaf drop from the lower canopy, the signs of it autumning off are appearing, but all is going well and the buds are developing nicely so far. I started a timelapse a couple of weeks ago in the tent and i've left it to run untill the end of the grow, will be interesting to see how it turns out, i'll upload that on the harvest page.
20/11 Had a slight misshap as i was inspecting the plants and bent a stem over 😱 I utilized two matchsticks and some masking tape to splint it up again, the repair is holding nicely 😬 I've documented the repair and uploaded the video for posterity.
23/11 Fed 2 plants 1/4 tsp molasses 1ltr filtered water @6pH, ec200 with just molasses, just to see if there is any positive effect.
Trichomes are just starting to appear.
Defoliated the lower canopy, cutting all the smaller buds not getting any light and upper fan leaves to allow more light and energy to hit the main buds.

Processing
Likes
11
Share
@Sctanley007
Follow
9/30/18. She still looks great. No burn and no deficiencies so far. I fed her a liter and a half . The pot is now heavy but not totally soaked. I did not water to runoff but the lower portion of the pot is wet. I don't like soaking the pots because the bottoms take ay too long to totally dry and I have had issues watering schedules.
10/5/18 Still doing perfect with minimal attention. Bumped up the amount of Grow Big last feeding with no ill effect.
Looking ahead and having weeks before the auto is done I didn't know how to face the upcoming issue of vertical space. Shes too big to LST and I did not want to top her because shes doing incredibly well and want to see what she will produce. I rigged up a scrog contained within the bucket. I did a mod years ago to a smoker which gave me the idea in the middle of the night. I might change out the screen itself since it was just what I had on hand but will see how it works.. The openings are 2.5" so it should suit my needs. I have it set at 8 inches above soil but it is fully adjustable up and down by the nuts on the threaded rod.
I plan on keeping the main stem under the screen to induce the plant to keep producing shoots and fill the area. Im pretty excited about trying this and Stay Tuned.

Likes
12
Share
@StonedandSteady
Follow
AutoBlueberry 10th w/ 5th W/ Flower breed by #DivineSeeds #DivineSeedsSquad #DivineSeedsBreedingCompany
3rd feed of #NukeHeads Nutrients #PlutoniumBloom and a look at my #Opium by #DivineSeeds at her 4th day of Dry! Can't Wait to Blaze!!! This AB is Flowering out and her Smells are Super Strong of Gasy and Candied Blueberries! I recently Trained down her branches to expose more Bud sites and Removed the Biggest fan leaves to expose the Bud site's to this Glorious #OsreeQB1000w Full Spectrum Grow Light! I've also Super Cropped, Topped um, Defoliated, Leaf tucked, and Implement the 3D's method like my Broski #TigerfishOrganics to remove the Dead, Dying and Diseased leaves!
Origin:Afghani/Thai
Type:50% Indica/ 40% Sativa/ 10% Ruderalis
Flowering:56 days
THC:22%
Harvest:400-550 g/m2
Height:110-150 cm
They were Growing under the #Growatt600w and in my #TopoLite 24×24×48 Grow Tent but I've Upgraded and Updated it to my #OsreeQB100W I'm also using #TNBNaturals #TheEnhancer Co2 Despersal Canister and using thier Ph⬆️⬇️ for my Decolinated Tap Water!
Green and Growing Up Great! She's Growing into her 5th week of Flower! She's Growing in my special blend of ProMix potting mix, a 1/2 bag of Earthworm castings and 2 light handfuls of Diatomaceous Earth mixed Up well for before transplanted! Diatomaceous Earth: Diatomaceous earth is made from the fossilized remains of tiny, aquatic organisms called diatoms. Their skeletons are made of a natural substance called silica. WHAT IS DIATOMACEOUS EARTH?
In a nutshell, DE comes from the fossilised remains of small marine organisms called diatoms. Over a 30 million year period, these hard-shelled algae collected on the bottom of bodies of water, eventually forming into a type of sedimentary rock. Fast forwarding, it wasn’t until around 1836 that a German peasant Peter Kasten discovered the ivory-coloured, powdery substance while drilling a well in northern Germany. Ever since, the usefulness of DE for multiple purposes, including industrial and horticultural applications, has been well-reported. Just sprinkle some diatomaceous earth on top of your soil and watch mother nature's secret weapon work its magic.CONDITIONS THE SOIL
When it comes to growing cannabis, everyone strives to provide the best soil to grow the best plants—but there’s always a way to make it even better. Making the soil a better medium is called soil conditioning, which is exactly what diatomaceous earth does. It works by improving the retention of moisture in your potting soil, holding a large amount of fluid and drying at a rate that’s much slower. This natural soil additive also helps to retain nutrients and allows for better oxygenation of the substrate. NATURALLY CONTROLS PESTS
DE is an all-natural, safe-to-use substance that doesn’t harm the cannabis plant with toxic chemicals. The nature of diatomaceous earth makes it useful against most types of insect infestation you might be experiencing; and unlike chemical insecticides, insects can’t develop a resistance to the effects of DE. So once they’re gone, they’re gone for good. DE is an abrasive. and when used as an insecticide, it gradually scrapes away an insect’s exoskeleton, absorbs the fluids, and dehydrates insects and other critters to eventual death. IMPROVES PLANT STABILITY
When using DE in your soil, it can be especially beneficial as it frees up nutrients so that they are made available to the plants as needed. This works via the silica content of DE being absorbed into the plant tissue, which helps improve the plant’s ability to respond and receive more nutrients as DE activates. This in turn results in greater yields and better stability under small pH fluctuations!
https://divineseeds.net/
https://instagram.com/divine.seeds?igshid=osxe2v7en33v https://divineseeds.net/
Thanks Again to All my Friends, Family's, Teams, Sponsors, Followers and Subscribers!!! Your Genetics are Merry Magnificent, Mega Marvelous and Mighty Medical! Love um!!! I really Can't stress enough how Thankful and Grateful I am of All of you and what you've Shared with Us! Means the World!!! It's definitely a Pleasure being able to Grow with these Phenomenal Grow Lights! Please Enjoy! BudBrothers4-Life! Cheers Famz!!! Much Props and Much Topz!💯🔥 #Osree #GrowStarStore #Growatt #TNBNaturals #TNBTeam #GrowYourOwn #Bliss
https://instagram.com/osree.light?utm_medium=copy_link
https://instagram.com/as420.ca?igshid=1f116alw054wp
The Grow Bags: https://www.as420
https://instagram.com/tigerfish_organics?utm_medium=copy_link
https://www.facebook.com/Tigerfishorganic/
#TigerfishOrganics YouTube Channel Link: https://youtube.com/channel/UC6OSXTda1JYaVNoCxdcYqIg


Likes
8
Share
@Staffedition
Follow
Привет друзья мои!
Моё растение во всю цветёт и пахнет!
Этот малыш явно хочет жить и не сдаётся!)
Вот я понимаю стремление.
Кустик маленький но мне нравится.
Всем мира и добра и хорошей генетики!

Likes
21
Share
@Trickybis82
Follow
06/06 - purple lemonade looking very nice and icy with crystal looking tricomes.
Wedding cheesecake has alot of bud sites and is a few weeks behind but should come along nicely.
I Have taken of alot of leaves off to open up the plants up to light and the bud sites below the plants.
Purple lemonade height 80 inch
Wedding cheesecake 60 inch
Grape gushers 8s very slow and didn't like the defoliate I done and may have been shocked to much and probably stunted the growth.


Likes
9
Share
@crystal_garden_0
Follow
End of week 7. Everything is going great. Strong Candy smell, very sticky dense buds. Looking forward to smoking them. Fast plants, flushing has begun. Thanks everyone
Likes
2
Share
@SmokinRodge
Follow
These ladies are fattening up. No more stretch. Flushing one for now others will follow
Likes
27
Share
@valiotoro
Follow
Pheno 1 dark purple : On the nose, it reveals a sharp burst of fresh lemon, layered with a powerful eucalyptus aroma that’s both invigorating and camphorous. A truly refreshing and vibrant terpene profile😈🍋
Pheno 2 Green : this one is a real surprise! If I close my eyes, it’s like Nutella! It’s as if you’ve just walked into a kitchen where hazelnuts have been freshly roasted 🤤🌰
Pheno 3 light purple : It’s a mix of the first two with a hint of amarena cherry at the end🍒🍧
Likes
5
Share
@SkunkyDog420
Follow
Hallo zusammen 🤙.
Sie wächst sehr schön und macht keine Probleme.
Rabattcode für den BIOTABS-Webshop https://biotabs.nl/en/shop/ GDBT420, damit erhalten Sie 15 Prozent
Likes
2
Share
@Yeyup
Follow
These videos where took just before I harvested on the 14th of June making it around 11 weeks 5 days ish seed to harvest.

Likes
3
Share
@123Grow
Follow
This bean is during me CRAZY 🤣🤣🤣 I had some slow growth with my RuntZ, but they are on the go. This strain —- I gotta get the conditions right for it. It seems to prefer less water and more heat?? I am not flowering this strain until I can take 5-6 Clone’s off of it.
It’s been feed SST, LABS, bacteria, fungi, rain dances. Just isn’t responding like I assumed, but I am taking responsibility for the issues, NOT the cultivar.
11-3 And……we are back in the game!!! The inputs began showing the effectiveness. Leaves are larger, no stretching. The bean just took a second to “kick” in gear with some added help.
This is going to be a very long VEG…we are talking 4-5 months before I flower this. I want multiple clones off this strain so my summer grow outdoor is going to be SICK ( 6 ft tall ladies).
Likes
9
Share
@greenthumb86
Follow
day one of flush for most of these girls 😁 : update the only one not in flush is the afghan mass

Likes
4
Share
@AUTOBUDDHA
Follow
Slight defoliation this week. These plants are absolutely breathtaking. However, these will be low yield plants.
I normally yield an average of a qp on my auto flowers, I look for these to be around 2 ounces per plant. Maybe.
I normally grow in coco loco by Bush doctor. This grow is in FFOF.
But i also went to 5 gallon pots this time, usually i run 3 gallon. This leads me to believe for sure. That this is genetic.
Looking forward to the finished product here however, as this looks amazing, and smells like candy.
Likes
26
Share
@UkDank420
Follow
Shinning silver haze start of week 8 really starting to stink now :) can’t wait to taste it growing really well with no problems will definitely grow this strain again :)


Likes
15
Share
@Bread_n_Buds
Follow
Our Zamnesia Trainwreck automatic concluded its journey with beautiful, long colas. It was a super hot season when we finished, so we didn't have the best resin harvest of the year, but it was definitely worth it just to see these colas.
Of course, if we finished late in the hot season, it's only my fault. The strain is magnificent, I miscalculated the timing, and I was sure to buy a conditioner before being forced to relocate. From next season, everything will be super controlled.
** We remind all users that we grow two plants per strain; one worked with specific techniques, and the other left to grow freely and beautifully or worked with uncut techniques to preserve speed.
Description // This plant started with a few small problems; I was hesitant for a moment, but then it gave its best, feeling like its usual self. We performed a classic Manin lining with a first cut to create the mainfold at the third internode, then lowered the branches parallel to the ground until they reached the fourth internode on each side, which was then topped again. The branches that weren't growing well were eliminated, and we obtained beautiful, well-formed colas.
I highly recommend you try it.
Trichomes and maturation // No trichome analysis here; I was late with the move, but you can look at the other trainwreck to see them. It was harvested with about 90% pistils.
Fertilizers and soil // We used the Plagron organic fertilizer range, all the recommended additives, and Pro Mix soil, both unfertilized and organic. Calculate the dosage according to your needs on the website
------ https://plagron.com/
The nutrients are available in convenient packs on the Zamnesia website
--------- https://www.zamnesia.io/en/11457-plagron-easy-pack-natural.html
Take a taste of this strain, it's a cross of legendary strains
https://www.zamnesia.io/en/11055-zamnesia-seeds-trainwreck-automatic.html
Short Description Zamnesia // Trainwreck Automatic is the autoflowering descendant of the popular cannabis strain Trainwreck (a stunning cross of Thai and Mexican landraces). Much loved for its 70% sativa genetics and sativa-like effects, Trainwreck Automatic is as easy to grow as an indica (even in cold climates).
This autoflowering strain goes from germination to harvest in 11–12 weeks, meaning you'll be harvesting sativa buds in no time. It prefers warmer climates, but thanks to its short life cycle, it can also be grown in more northern areas (provided it is germinated a few weeks early when growing outdoors)
Trainwreck Auto offers delicious lemon and lime flavors that enhance the classic sativa profile of its parents. Furthermore, thanks to the spicy and earthy notes, the overall experience will be even more intense, regardless of whether you smoke or vape it. In terms of its effects, Trainwreck Auto is euphoric, uplifting and energizing. Fueled by a THC content of around 21%, this strain is perfect for socializing and best suited to smokers who prefer to stay active after consuming cannabis, rather than lazing around doing nothing.
The whole world of cultivation and much more is from Zamnesia: just take a look at the site and you will find "all the best that nature has to offer" in various shapes and colors.
-- // www.zamnesia.com

Likes
216
Share
@CRiSPrGrow
Follow
Well this was quite an experience, from the nice box the dutch passions come in to the germination , vigours sprouts came about, and took well to transplant. Potted each of these into their own soil and peat mix, layered seven of each i think with perlite. they got CELLMAX soil, best soil I've ever used for sure, it's horticultural soil so it's been steamed meaning no pollutants and no pests. The room itself this time i had reworked a bit, still loads of bends on the tubes though, but had a proper intake this time with a fine mesh filter so nothing got into the room. Had the pots elevated only by the time flower came around same for the CO2 so I only had a few good weeks with it. Didn't kill the plants though, so I'll review using it in my Six shooter diary, check it out . Anyway these plants veged out , and in the first weeks had the light too high for how strong/weak it was (it's crazy how close you need to have it actually!) and the little seedlings stretched some, so I LST'ed all of them. They all took to LST really well actually. The biotabs plant was the first one to sort of musle through her bindings, and i ended up feeling sorry for it and removing them thinking the bend was mostly done anyway. It didn't help that this was a corner plant and I just didnt really have access to it as nicely as the others. Anyway the LST wasnt done though and the plant fully redressed showing only a little bend towards its base at harvest time. The Mr. B's showed the best results on LST. It got bent 90° then grew out but managed to stick it's main cola out just in time i guess, so it had several mains maybe 3 maybe 4 and several side shoots. The Vertafort one took to LST the worst of the three (through no fault on vertafort's nutrient's part!) It basically got bent 90° but got held down too much by the bindings , and being a corner plant simply it got less light the whole grow, being overtaken by the other plants in the tent. Through veg though these grew to nice busheles, each in their own style, pushing out fat indica leaves , mostly being kept at appropriate VPDs. Note that the temps i've recorded are for maximum temperatures hey ! Anyway it I ended up with an uneven canopy by the start of flower stretch due to the different LST styles and the different growth rates, the vertafort one being basically stunted. During flower stretch these stretch ! lol doubled in size at a steady rate I can tell because the biotabs one was basically no longer LST'ed right? Anyway way blueberry styles not so much auto gsc styles that much I can tell you. The longer side colas a great too, they're much longer than the GSC's side colas and they have two or more flower nodes more each. By week 4 of flower the Mr. B's started to look pro, with a nice canopy and several distinguishable mains sticking out from the bush. The vertafort one was a corner plant so I just paid less attention to it - too bad for me ! Anyway the flowers themselves started to emerge with a calyx to larf ratio of 1:0 for the biotabs ones, and I started getting stoked. I could already tell from the squeeze that these would be nice and dense nuggy nug nugs just like I like them. The Mr.B's one was different though, the flowers grew all up and down the colas like they were all filled up. The sugar leafs themselves were like non-existant on Mr.B's but long and thin on the Mr.B's. Then the stacking began, last quite a while to finish up and rippen, i'd say from week 8 through 13. The trichomes reached out, filled up some, curled, in and were full white. I noticed some amber trichomes and it was time for the chop !
Throughout the grow I tried something new. From joining GD on my first grow I got loads of goodies from @Mrs_Larimar with the Mr.B's nutrients - thank you so much ! - and the biotabs contest , plus the Vertafort that came with seeds from the folks at Zambeza, Zamnesia, and RQS , all of these were dry nutrients, and I got those micro nutrients from my friends too. Great experience using dry nutrients, much more affordable on the whole, easier to measure too. That didnt stop me from messing up a few measures though ! So For most of the grow I planned to add my own micro. I had four micro powders made. One green one for early veg with all the "rare metals" in it at 2% , a bio cal mag, white powder for veg and early flower and a cal mag and mag sulfur I meant to use during flower. So I ended up giving a quarted dose of the organic cal mag most of the time then in flower still had them on a quarter dose of cal mag sulfur before i realised and switched up too late. My whole micro line up i think would cost 10 dollars retain and I had plenty of it left over i think it should last like 4 grows. Not that I'll use it again unless i can get a steady supply - a the travails of the underground micro nutrient market. Worked great though, pH neutral, i used it as spray too, next time I'll mix in humic acid directly in the same feed, because why not and because I would have massively helped. Sometimes in flower i used only calmagsulfur and maybe I didnt mix it in very well but i would dump everything on anyway , a couple time I would check after water and the clumps had formed like 3 inch crystal formations on the top of my soil... Anyone ever seen that before? maybe it's a good sign idk, i usually tried plain water to dissolve them asap. The biotabs worked great on the Colorado cookies though, that much I can say, no excesses of any sort detected, leaves weren't too dark green at all. Mr.B's turned out a BEAST , but that could be from the LST aswell... the vertafort one ended up being a very healthy plant that never lacked anything either. Around halfway through flower I started traing the colas upwards where they were drooping on the biotabs plants and the Mr.b's plant, glad i did because i think plants like to make colas going straight up right? Chopped these at the top of week 14 which is 95 days from the moment i dunked them into the water kept a calendar which I'll show you. Hung to dry for 10 days, then jarred with the 62% boveda, burped
inspected daily for a week, then weekly for two weeks. I weighted what I kept lol , no small buds this time, finally my grower dream realized ! So happy i got two (maybe three phenos) because I loved the flowers on the biotabs but I also loved the yielding of the LST'ed pheno. Plenty of wasted cola space though if I'm honest, should have defoliated more, maybe done that just at the edge of veg or something, maybe next time I'll try to flux like @silky_smooth so I can keep them in veg longer and make me a couple beasts.
Had to travel to for two halfway through, so what I did was to put perlite in the trays, get the pots off their grills and onto the perlite then i bottom fed plain water, the idea being that the perlite would keep the water from evaporating from the trays too quickly, just as i was loading up the trays , the nex day I saw three thrips but they were flying all wierd and all strange so i thought maybe the airflow was f-ing them up ... and i had to leave anyway. Got back and the pots were bone dry but the plants hadn't died, and the temps were way up. I think the remaining perlite absorbs heat... Anyway started top feeding them again but by this time they were showing signs of stress especially the biotabs one, the mr.b's kinda recovered, and the vertafort was healthy enough it just looked like a bit of magnesium issue. May this could be a good technique for other folks to try. Like i said the perlite might absorb heat, so remove it when you dont need it anymore (i had issues with heat).
Over all these gens are yielders, had some of my best work in here, and some less good work. I like having been able to use the GD platform as a companion app, was great fun really. it's great to be able to put all your pictures up and see them side by side, i tried to keep it organised so you and I can see some interesting things like the "three stages of LST" and other interesting nuggets of info. Speaking of nuggets I'll try to get some more and some better pics of the nugs in. Hope you'll visit this again 🚀
EDIT: made some bubble hash for the first time, grower's priviledge ! only used the stems stalks and leafs for it, and it came out really delicious, smells like perfume, burns like incense and tastes like vanila and spices/hash lol basically used some bubble bags , rand the water through once, got negligeable 120s 75s and 45s but got some 25 quite a lot. ran it again, same results with just about the same amout of 25s, i thought i could go a third one, but got negligeable everything lol. Two passes for whatever that is in bubble hash lol, it's still got to dry for another week - bubble hash is kinda of the grower's priviledge, definitely recommend doing it ! 🚀

Likes
14
Share
@Quintall
Follow
Die erste Woche ist da die Pfalze in der Mitte hat leider ihren Samen erst recht spät abgeworfen. Deswegen glaube ich das die bisschen gespargelt hat.
Die Pflnazen schlucken langsam immer mehr Wasser. Sie fangen sehr leicht an zu riechen.
Luftfeuchtigkeit immer zwischen 60-70 %
Temperatur 20-25 grad
Likes
6
Share
@GrowerGaz
Follow
Day 39 and the girls are stretching out nicely. The two Sweet n Sour smell really grape like when leaf rubbed. The cheesy also getting some smell , even though it's 10 days behind.
Just top dressed each plant with one full scoop of Biobloom and water.


Likes
16
Share
@Chocolopeison
Follow
Seguimos ultima semana con alimentacion de estas nenas, esperando ansiado por lograr esas frutas
No olvidar que tenemos 3 nenas en un armario y 1 en otro armario
Al día 43 haremos raleo masivo y sacaremos nuevamente gran mayoria de las hojas abanico
En Instagram @chocolopeison , pueden ver seguimiento diario de estas nenas!
Saludos

