


By continuing to use the website or clicking Accept you consent to our cookies and personal data policy and confirm that you are at least 18 year old. For details please see Privacy Policy and Terms
Accept


Likes
Comments
Share


@loyallion
Follow
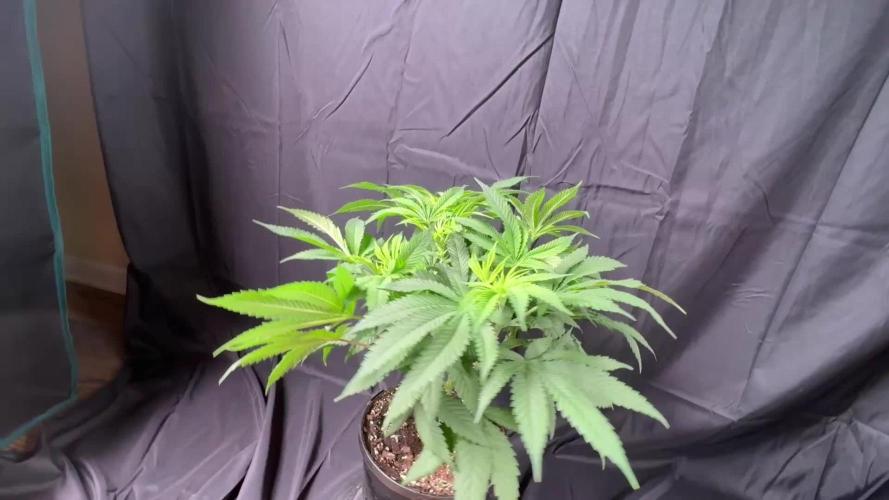
PPFD 300-400 PPFD
Start brewing compost tea 10/10 at 1500, for 24hrs.

Processing
Likes
3
Share


@CanapaBella617
Follow
Tried not to mess with them too much this week. Less stress for everyone!
Likes
16
Share


@Marijuanaisland
Follow
Alguns ataques de bottritis e corte no top Bud mais consegui controlar com desumidificador alimentando com( ripen ) GHE desde o dia 50 caminhando para a colheita

Processing
Likes
26
Share


@Growin
Follow
Holaaa
Hoy día 43 desde la germinación retomamos el seguimiento a estás señoritas.
Altura Sweet gelato auto 81 CM
Altura Cmxl1 62 CM
Altura Cmxl2 60 CM
Hoy se realiza riesgo de 1 Lt , la Sweet gelato ha demostrado más signos de mayor requerimiento de agua, por lo que aumentarle la frecuencia de riego para esta planta.
Me sorprende que la Sweet gelato auto ha crecido lentamente, alcanzando una altura considerable de XL, y ahora que ha entrado en floracion, se siente ese gran aroma dulce.
Comienza la cuenta regresiva para las Cream Mandarine, cada día se aprecian mayor tamaño de las flores .
Día 45.
Riego con 1 Lt por planta
Día 47
Altura Sweet gelato auto 89 CM
Altura Cmxl1 67
Altura Cmxl2 60
Dia 48
Riego 1Lt por planta
Aportes, sugerencias, favor comentar.

Processing
Likes
24
Share


@DaddyPrime
Follow
7/19 shes starting to fill out more around the top. I keep thinking about what she'll look like with buds on her
7/21 watered and took pictures
7/22 she has most her dark green color back. She was hungry for nitrogen for awhile and shes responded nicely


Likes
19
Share


@BLAZED
Follow
Week 15 Harvest
21-2
Temperature: 29.7 degrees (lights on) 19.9 degrees (lights off)
Humidity: 67% (highest) 44% (lowest)
Watering: None.
22-2
Temperature: 29.9 degrees (lights on) 19.9 degrees (lights off)
Humidity: 65% (highest) 41% (lowest)
Watering: None.
Today is the last day, tomorrow i will harvest her.
I removed all large fanleaves and took some pre-harvest pictures.
23-2
Today is harvest day! I left the buds on the branches and hang them to dry.
Temperature: 18.1°c to 19.9°c
Humidity: 57% to 72%
24-2
Temperature: 17°c to 18.8°c
Humidity: 56% to 64%
25-2
Temperature: 16.8°c to 17.9°c
Humidity: 57% to 69%
26-2
Temperature: 16.2°c to 18.1°c
Humidity: 56% to 61%
27-2
Temperature: 16.2°c to 17.5°c
Humidity: 55% to 61%
28-2
Temperature: 16.3°c to 17.6°c
Humidity: 57% to 64%
29-2
No info.
1-3
Temperature: 17.8°c to 18.7°c
Humidity: 56% to 61%
2-3
No info.
3-3
Temperature: 16.5°c to 20.3°c
Humidity: 46% to 62%
After 8/9 days of drying the buds are dry enough, so lets start trimming!
The buds are pretty airy and foxtaily, but very resinous, she smells good, but i think the buds are a bit overdried.
End results:
Trim: 18.12 Gram.
Popcorn buds: 37,11 Gram.
Normal Buds: 70,98 Gram.
Total buds: 108,09 Grams.
I will post the progress of me making bubble hash in this diary very soon, so if you are interested make sure to keep an eye out!
Likes
26
Share


@ButterfliesLittleFarm
Follow
Hello Diary.
Two new diaries. Hulkberry and Green Gelato, both Automatic. Many thanks to RQS for these strains, and I am very happy to be starting with the new storys.
WHY HULKBERRY AUTOMATIC?
HulkBerry Automatic is Royal Queen Seeds’ revved-up version of Bruce Banner #3 Auto. She’s one of the most potent autos you can get your hands on, easily outperforming many photoperiod strains in this area. Her compact and frosty flowers provide a THC content of up to 21%, enough to satisfy the most experienced of smokers. Expect a wave of euphoria to crash over you after a vape hit or bong bowl of HulkBerry Automatic. The strain is motivating, increases alertness, and gets the creative juices flowing. She makes a superb smoke when listening to music and watching films, or when indulging in your own creative endeavours. Overall, she’s an excellent strain for daytime use.
LET'S START FIRST WITH THE FARM SET-UP:
Box - Secret Jardin DS120W 120x60x178
Lights - MIGRO 200+
Ventilation - Blauberg Turbo - E 100
Fan - Oscillating Koala Fan
Humidifier - Beurer LB 45
Soil - BIOBIZZ Light - Mix
Pot - 11L Fabric Pot from RQS
Seed - Royal Queen Seed
Nutrition - BioBizz and RQS Organic nutrition
I apologize in advance for the detailed documentation, or the large number of photos, but I enjoy it, and I think it will help others around tracking their plants.
LET THE DIARY START OFFICIALLY:
10/06/2020. planting.
I have prepared everything I need for planting. The 11lit fabric pot I got from RQS, also Organic Boost Nutrition and Mycorrhizza from RQS, Soil is Light-Mix from BioBizz and of course the seeds of the new strain Hulkberry Automatic. After adding 50g of pellets from Organic Nutrition and 5g of Mycorrhizze, I mixed everything well in the pot. After that I watered well and soaked the soil, I dug a hole with a wooden stick about 2-3 cm, I first put 1g of mycorrhize and then put the seeds inside. I lightly covered the hole with earth and put the pots in their new home. I planted two Hulkberries and one Green Gelato Automatic. The temperature was about 25 degrees and the humidity about 65%.
14/06/2020. She sprouted.
After 4 days, Hulkberries came out. In the meantime, I sprayed the surface of the earth a little twice. The temperature is still around 26 degrees, thanks to the summer and the high temperature that enters the apartment anyway. I regulate the humidity with a humidifier, I maintain it around 60% -65%.
15/06/2020.
Their first photo shoot, I also watered their with about 2 liters of water, which I only regulated p.H. at 6.3 with Plagron, Lemon Kick.
19/06/2020. Day 1.
Hulkberries is officially one day old. On that occasion I took another photo shoot to celebrate this big day :).
24/06/2020. First Feeding
First feeding. Their got a whole meal from BioBizz, Root-Juice, Bio-Heaven and Acti-Vera, p.H of water I regulated with Lemon Kick from Plagron.
25/06/2020. Day 7.
End of the first week. For now, everything is great. It is developing nicely, its conditions are almost perfect.
Hulkberry #1 - Day 7. - 9 cm
Hulkberry #2 - Day 7. - 10 cm
I think that’s all for this week, I’m happy that it’s starting all over again, following its development and looking forward to what’s to come. See you next week.

Likes
3
Share


@CaptonianMoneymaker
Follow
Buds r slowly rippening mostly cloudy trichomes no amber yet checking daily split stems for final stress decrease in light hours extended dark for aiding ripening
Likes
7
Share


Likes
28
Share


@Luv2Grow
Follow
Update 20 Jan 2021 - Well starting the cure a bit earlier than I’d like cause I’m having issues getting the humidity up so she dried up quick. Working on rehydrating her a bit and have her in mason jars now. Ended of with 88 grams of rock solid buds. Still want it to rehydrate and cure a bit before trying her out.
What can I say, a very simple and easy grow. Had absolutely no issues during the grow and ended up with 380 grams of SOLID wet bud. Even some of the lower buds that didn’t get much light are pretty rock solid. Going by the smell and solidness of the buds, I got a feeling this is gonna be a too 2 strain, if not number 1. Looking forward to growing this one again and as soon as I harvest another plant, I’ll probably start another one of these.
Likes
1
Share

@Ninjabuds
Follow
It’s the 1st week of flower I flipped the plants to 12/12 a few days ago. There is a lot going on and a lot of cool and amazing things coming in the near future. Make sure to check out my YouTube page. I bought me a DJI gimbal this week. Might be my new favorite toy. The temps are starting to break for the summer. I don’t see it being very long until winter is here and it’s time to use a heater and not an ac unit. All of the plants are healthy. The plants have all grown so well I turned down the light intensity a bit today the plants didn’t seem like they was starting to strech very much. Hopefully the lower light intensity will make them strech out just a bit
Likes
92
Share


@DogDoctorOfficial
Follow
Week 10 - Second Week of Flowering 🌸
As week two of flowering begins, the garden’s growth is unstoppable! These ladies are thriving, stretching up while staying beautifully vibrant and green. Every inch of this tent is optimized—each plant is soaking up light, nutrients, and water precisely as they need, filling the room with energy.
Room Conditions 🌡️
• Temperature: 27.3°C
• Humidity: 62.6%
• CO₂ Levels: 800 ppm
• VPD: 1.36 kPa (excellent range for robust flowering)
• Lighting Intensity: 818 PPFD
Solution & Medium 💧
• Solution Temp: 21.5°C | TDS: 470 ppm | pH: 6.02
• Medium: Moisture 100% (recently dried to 67%), TDS 510 ppm, Temp 22.5°C
The “dry-out” to 67% was a strategic move, helping boost nutrient uptake and root strength. Meanwhile, our slight increase in reds seems to be having the desired effect, nudging these ladies further along in the flowering process.
Eye Safety & LED Lighting 🌞🕶️
With powerful LED systems like the ThinkGrow and ICL-300, eye protection is critical. LED grow lights emit high-intensity light across the full spectrum, including intense UV and infrared components that are not easily detected by the human eye. Long-term exposure without adequate protection can lead to eye strain, and in extreme cases, damage to vision.
• Blue Light Hazard: LEDs often have elevated levels of blue light, which can harm the retina over time if proper precautions aren’t taken.
• UV Protection: Even low doses of UV can accumulate and harm eyes, so grow glasses with UV protection are essential for any indoor gardener.
Investing in quality grow room glasses can help protect from glare, UV, and infrared rays, making plant care safer and more comfortable.
Lighting Enhancements: ICL-300 In-Depth 🔆
The ICL-300 is our newest addition, specifically designed for inner canopy illumination. This LED offers a targeted light boost under the canopy, enhancing flower growth in lower and shaded areas—ideal for maximizing yield and light efficiency.
• Dual Spectrum Technology: The ICL-300 provides a custom spectrum designed to penetrate deeper into the plant canopy, promoting robust bud formation throughout.
• Enhanced Light Distribution: With strategically positioned diodes, the ICL-300 reduces shadowing and balances light distribution to all parts of the plant.
• Energy Efficiency & Heat Management: This light is designed to be energy-efficient, running cooler and reducing the risk of heat stress within the grow space.
The inner canopy light gives the plants exactly what they need, particularly during the flower stage when bud sites deep in the canopy can benefit from more direct exposure. However, after noticing slight leaf burn on some plants, I’ll hold off a bit longer before fully integrating this light to ensure optimal adjustment.
Looking Forward 🌟
As we continue dialing in conditions, it’s all about balance, precision, and taking proactive steps to optimize every aspect of the grow environment. We’ll keep a close watch on the canopy height, and next week, I’ll aim to fine-tune the light integration even further with the ICL-300.
P.S. - ICL-300 and CO₂ Sensor 🌱
The TrolMaster CO₂ Sensor (MBS-S8) has been crucial for real-time CO₂ adjustments, ensuring the plants get exactly what they need without constant monitoring. Combined with the ICL-300’s spectrum flexibility, these tools make an unbeatable setup, allowing for nuanced control over plant growth and development.
As always, a huge thanks to the Grow Fam for the tips, support, and enthusiasm! I’m excited to see what these next weeks will bring as these plants reach their full flowering potential. Stay tuned for more updates, and don’t forget: eye safety first, growers! 🌞🌿
Discount Codes so you can save big on your next check out 💚💚💚
Kannabia - DOGDOCTOR 30% off
SeedsmanSeeds - DOGDOCTOR 10% off
CannaKan- DOGDOCTOR 15% off
terpyz.eu - DOCTOR 15% off
The Neutralizer - PORKIT5-DOG 15% off
As always thank you all for stopping by, for the love and for it all , this journey of mine wold just not be the same without you guys, the love and support is very much appreciated and i fell honored and so joyful with you all in my life 🙏
With true love comes happiness 💚🙏 Always believe in your self and always do things expecting nothing and with an open heart , be a giver and the universe will give back to you in ways you could not even imagine so 💚
Friendly reminder all you see here is pure research and for educational purposes only
Growers Love to you all 💚💚💚


Likes
46
Share


@LittleBigTrees
Follow
Defoliated and trimmed lower fluff from The plant day 20 flower ,
Lots of air and light can now get to the plant and hopefully grow some nice buds

Likes
1
Share


@HerrnLubitz98
Follow
Welcome to week 2 day 2!
Started the day with transplanting as the roots were showing - as Said 20L/5gallon pots Unfortunately one ripped so I gotta use one 7L again.
Started the transplant with .4g of microbes per liter and got them all 1L for the transplant.


Likes
8
Share


@Creme_De_La_Creme
Follow
All photos are fromDay 35 for Sour Jealousy from FB, the growth is absurd, she is already 5ft tall, no LST, no Defoliation at all!!
Pre flower stretch is going on, which scaries me, is she going over my tent size? hahaha
Likes
10
Share


@barlobruz
Follow
7/6/2021
- Trimmed lower fan leaves as they were being blocked completely, and a few tips were yellowing.
- Continuing to lightly bend the upper branches so the lowers can catch up.
- Bought some Gaia Green veg + bloom dry fertilizers as I expect I'll be flipping to flower soon.
7/7/2021
- Watered in a little bit of Gaia Green's veg fertilizer.
- Foliar fed w/ DIY kelp extract.
- Yellowing/browing on a new leaf, can't identify what it is.
- Staked down the branches on the upper mains this evening to open her up for more light penetration, she was gettin' real bushy.
7/9/2021
- Trimmed out middle to expose canopy

Likes
12
Share


@Philippovic
Follow
ich denke wir sind auf einem guten weg, bin für jeden tipp dankbar.
Das Setup wurde mit zwei Solarpaneele erweitert. So wird der Strom zu 90 % von den Panelen gedeckt.
10% werden nachts für die Lüftung vom Netz gesaugt


