By continuing to use the website or clicking Accept you consent to our cookies and personal data policy and confirm that you are at least 18 year old. For details please see Privacy Policy and Terms
Accept
Likes
Comments
Share


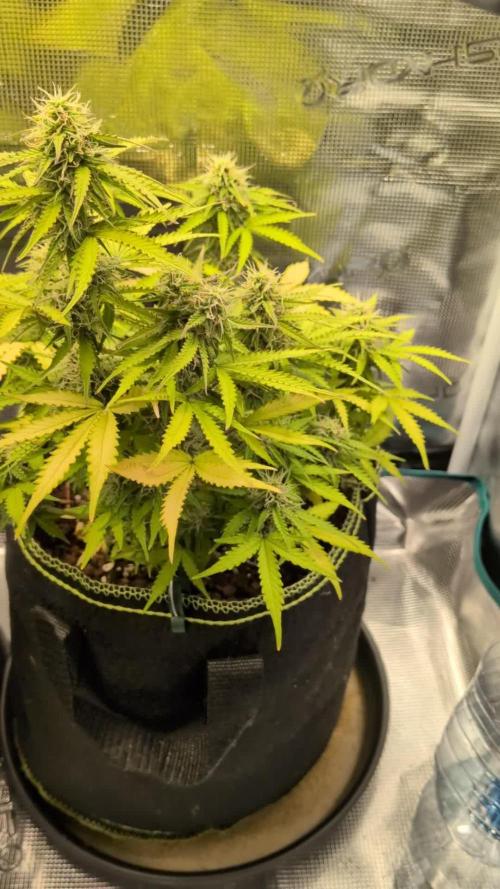
@PalmaGrow
Follow
No se cómo expresar mi felicidad después de casi 3 años sin poder cultivar consecutivamente he podido cosechar esta belleza gracias a @blacktunaco por la K.O una genética llena de resina con flores compactas. Cometiendo errores desde el principio se pudo obtener una excelente planta corrigiendo todo para así mejorar el aprendizaje continuo. Se dieron 12 días de lavado de raíz y 3 de estos estuvo expuesto a lluvia constante durante los 3 días por tal razón se decidió cosechar para evitar dañar las flores

Likes
22
Share


@wheedtobeus420
Follow
Literally she’s beautiful. I can’t even tell you how happy I am with how she turned out. The Rosin is crystal clear amber goodness. She tastes so creamy and sweet. The profile is just pure bliss. One of my all time favorite plants. Yields great. Dense as ever nugs. Tastes fabulous. Sweet seeds keep it up 💪🏻💪🏻💪🏻💪🏻

Likes
16
Share


@DaddyPrime2
Follow
7/10/24
testing testing. can i post updates now?
beautiful buds. the leaves are changing into a blue color. it reminds me of some of the blue city diesel i got from a buddy back in the medical days.

Processing
Likes
13
Share


@Canadian
Follow
Plant has been delightful to grow I've been growing in without any major incident other than the train nutrient lockout which has recover great from it .the buds smell very strong dark green look to them with Snow White trichomes everywhere they are very beautiful to look.
looking forward to harvest probably in one or two more weeks I will keep checking closely the trichomes i usually like 10% to 30% Amber .


Likes
13
Share


@Flowers_By_Irene
Follow
Ive been topping up with ro water since last weeks nutrient swap, which had gradually brought down the ppms from about 800 to 500. I pumped out the tank at the start of this week and replaced with ro water and final solution. Had to adjust the ph twice during the week and topped up with some more water.
Planning on leaving the lights on for a couple more days then into darkness for 2-3 days and chop these ladies down. Flush seems to have gone well and can see the plants canabilising their leaves for the remaining nutrients


Processing
Likes
54
Share

@wheedtobeus420
Follow
Into their second week of flowering and holy hell. The dark devil is going crazy !!! I can't believe at how fast it's flowering. The buds seem to double in size daily. I am going to boost the feeding to every other watering. Instead of the every third day feeding them. The dark devil i mainlined seems to be on the exact same schedule as the control plant her flowering period happened pretty quickly idk if i would mainline again.

Likes
21
Share


@Staffedition
Follow
Всем привет друзья!
Решил попробывать фотопереодный, поднять от Барни и не только, смотри профиль.
Это будет мой первый опыт с фотопереодными растенями.
#Smail_Seeds

Likes
2
Share


@Autower
Follow
End off week 10 start off week 11 gave them a feed today think this will be the last feed of nutrients maybe a week to two left what’s everyone’s thoughts start flushing now or give another feed of nutrients then flush the next feed thanks for viewing happy growing :)


Likes
6
Share


@MxGrow
Follow
<Frisian Duck🦆>
Se inicia germinacion de 3 semillas.
▪️︎El día 7 de Nov 22 en un recipiente con agua purificada..
▪️︎El día 8 de Nov se colocan en toallas húmedas.
▪️︎ El día 10 de Nov 22 se coloca 1 semilla que germino en sustrato.
▪️︎ El día 12 Nov 22 ya creciendo.

Likes
1
Share

@therealgrowmie
Follow
We’re in the midst of the bulking phase now, with a few buds stacking up nicely.
Unfortunately, the plant on the left has sparser bud distribution. Compared to other auto genetics, these three plants also show a broad variety in growth structure and phenological traits.
Also, overall plant health isn’t entirely satisfying, with high temperatures being the Main cause. The leaves are showing several stress-related issues like mild tip burn, nitrogen deficiency, and some cal-mag problems. But hey—we’re here to grow buds, not leaves! 😄
That said, the fade is to be expected as the plants start to cannibalize themselves for nutrients. The stretch is also in its final phase, so we’re likely 3 to 4 weeks away from harvest.
---
Quick rundown on everything else:
Watering: 1500ml every third day
Fertilizer: According to the BioBizz schedule
Light intensity: ~1000 PPFD
VPD: ~1.62 kPa
Temperature: ~28°C
Relative humidity: ~55%
Likes
10
Share


@HideAndFly420
Follow
Day 34 this lady is running, I can see flowers getting bigger every day, smell started really really soon this time so I already had to add the Carbon Filter.
I’d like to close the cycle in less then 80 days. It would be great
First flowering fertilisation
Ph 6.2
Ppm 631
Day 37 - 9 of flower 🌸
Started blooming fertilisation, I’m keep Giving all-in one from aptus, i think I lm substitute with super pk and I stop all in one.
Ph 6.2
Ppm 731
As I’m growing an solito in a 9.2 lt pots with all mix nutrients I’m slowing down with all in one and just giving base feedings, I ll decide later if I should give super-pk for the next weeks
Day 40, tomorrow will be feeding days. Sge’s going really well, resin is already showing up on flowers that are several as and colorfull, smell is already there 🤤
Tomorrow update with feedings parameters.
Day 41 feeding day
Aptus regulator 0,15ml/1 lt
Aptus all in one 1,25ml/1lt
Aptus Topbooster 0,3 ml
Aptus enzym + 0,5 ml
Calmag 0,3 ml /L
Ph 6,18
Ppm 756
Let’s see
Likes
72
Share


@Schnabeldino
Follow
_____ Week 12 | Day 85 - 92 | 5th week blooming 💮 ______
Day 85 🌞
oh yes... the smell when I open the tent becomes more and more intense. The buds also look more and more frosty...
I think the extra side light pays off, where normally there is little or no light, the buds look just as frosty as the top colas. I hope you can see that well in the pictures... unfortunately I don't have much space to take good pictures of the pages... Only LPH 2 & 3 can be seen well from the front.
Amnesia Haze: Amnesia, as expected, is much slower in development than LPH and Biscotti. Number 1 looks a bit wilder and scruffy than 2 and 3. Also from the development 2 and 3 are further and form already diligent trichomes
Biscotti: both biscottis look identical, same pheno I think. development is very good and already looks very frosty
Lemon Power Haze: LPH 2 & 3 look identical, with number 3 looking frostier and furthest along in terms of development.
LPH number 1 looks totally different, the buds look quite small, and it also looks different.
I have to think about something for watering. I love my plants but watering 8 pieces in such a small space is no fun hehe. At the moment I water them manually via a small water pump, the whole thing is very fast but I still have to dislocate myself every time to get to the back plants. this is not the yellow from the egg :D For the next grow, the plants have to be higher and I'm thinking of an automatic water supply. Actually, watering my plants calms me down when I do it with the watering can, but under different conditions...Possibly also fewer plants but more training. When the tent is empty again, I start to implement my plans. I'm also thinking about growing 1 or 2 plants in a DWC system. Whether I make something myself or buy something ready-made is not yet clear. If you have any tips, feel free to write to me.
Day 86 🌞💧
- Today was feeding time again, as announced again after the 3rd day. I mixed a little more than 25 liters and provided each plant with ~3 liters
Day 89 🌞💧
- Three days are over again and the plants are hungry again. 3 liter each Plant, small drain.
____________________________________________________________________________________________
Light - 12/12 h - 560 Watt
- 2x 200 Watt Toplight
- 4 x 40 Watt Lightbars
PPFD - 900 - 1000 µmol
Temp. avg. - 22,1°
Hum. avg. - 56,3 % RLH
Likes
70
Share


Likes
36
Share


@Ganjagrandaddy
Follow
Day 16 Veg: This week has dragged by watching these girls set up for their race. They are smaller than the other strains in general and the quickest to the end of flower so I will be very gentle with their training and height control. The LOS girl took her time to settle down but has now began to catch up and looks a lot better than she did. They have been put on their coco feeds at the lowest rate now so should be ready for their burst for flowering. I top dressed the LOS girl#1 with life-cycle to get her bennies moving quicker and have given the pots a decent watering too. They will get a fimming I think as I don't want to stunt their height at all as they are going to be shorter than the other strains. now begins the long wait till the next update.!. lol
Likes
92
Share


@DogDoctorOfficial
Follow
Week 10 - Second Week of Flowering 🌸
As week two of flowering begins, the garden’s growth is unstoppable! These ladies are thriving, stretching up while staying beautifully vibrant and green. Every inch of this tent is optimized—each plant is soaking up light, nutrients, and water precisely as they need, filling the room with energy.
Room Conditions 🌡️
• Temperature: 27.3°C
• Humidity: 62.6%
• CO₂ Levels: 800 ppm
• VPD: 1.36 kPa (excellent range for robust flowering)
• Lighting Intensity: 818 PPFD
Solution & Medium 💧
• Solution Temp: 21.5°C | TDS: 470 ppm | pH: 6.02
• Medium: Moisture 100% (recently dried to 67%), TDS 510 ppm, Temp 22.5°C
The “dry-out” to 67% was a strategic move, helping boost nutrient uptake and root strength. Meanwhile, our slight increase in reds seems to be having the desired effect, nudging these ladies further along in the flowering process.
Eye Safety & LED Lighting 🌞🕶️
With powerful LED systems like the ThinkGrow and ICL-300, eye protection is critical. LED grow lights emit high-intensity light across the full spectrum, including intense UV and infrared components that are not easily detected by the human eye. Long-term exposure without adequate protection can lead to eye strain, and in extreme cases, damage to vision.
• Blue Light Hazard: LEDs often have elevated levels of blue light, which can harm the retina over time if proper precautions aren’t taken.
• UV Protection: Even low doses of UV can accumulate and harm eyes, so grow glasses with UV protection are essential for any indoor gardener.
Investing in quality grow room glasses can help protect from glare, UV, and infrared rays, making plant care safer and more comfortable.
Lighting Enhancements: ICL-300 In-Depth 🔆
The ICL-300 is our newest addition, specifically designed for inner canopy illumination. This LED offers a targeted light boost under the canopy, enhancing flower growth in lower and shaded areas—ideal for maximizing yield and light efficiency.
• Dual Spectrum Technology: The ICL-300 provides a custom spectrum designed to penetrate deeper into the plant canopy, promoting robust bud formation throughout.
• Enhanced Light Distribution: With strategically positioned diodes, the ICL-300 reduces shadowing and balances light distribution to all parts of the plant.
• Energy Efficiency & Heat Management: This light is designed to be energy-efficient, running cooler and reducing the risk of heat stress within the grow space.
The inner canopy light gives the plants exactly what they need, particularly during the flower stage when bud sites deep in the canopy can benefit from more direct exposure. However, after noticing slight leaf burn on some plants, I’ll hold off a bit longer before fully integrating this light to ensure optimal adjustment.
Looking Forward 🌟
As we continue dialing in conditions, it’s all about balance, precision, and taking proactive steps to optimize every aspect of the grow environment. We’ll keep a close watch on the canopy height, and next week, I’ll aim to fine-tune the light integration even further with the ICL-300.
P.S. - ICL-300 and CO₂ Sensor 🌱
The TrolMaster CO₂ Sensor (MBS-S8) has been crucial for real-time CO₂ adjustments, ensuring the plants get exactly what they need without constant monitoring. Combined with the ICL-300’s spectrum flexibility, these tools make an unbeatable setup, allowing for nuanced control over plant growth and development.
As always, a huge thanks to the Grow Fam for the tips, support, and enthusiasm! I’m excited to see what these next weeks will bring as these plants reach their full flowering potential. Stay tuned for more updates, and don’t forget: eye safety first, growers! 🌞🌿
Discount Codes so you can save big on your next check out 💚💚💚
Kannabia - DOGDOCTOR 30% off
SeedsmanSeeds - DOGDOCTOR 10% off
CannaKan- DOGDOCTOR 15% off
terpyz.eu - DOCTOR 15% off
The Neutralizer - PORKIT5-DOG 15% off
As always thank you all for stopping by, for the love and for it all , this journey of mine wold just not be the same without you guys, the love and support is very much appreciated and i fell honored and so joyful with you all in my life 🙏
With true love comes happiness 💚🙏 Always believe in your self and always do things expecting nothing and with an open heart , be a giver and the universe will give back to you in ways you could not even imagine so 💚
Friendly reminder all you see here is pure research and for educational purposes only
Growers Love to you all 💚💚💚


Likes
11
Share


@KushManF
Follow
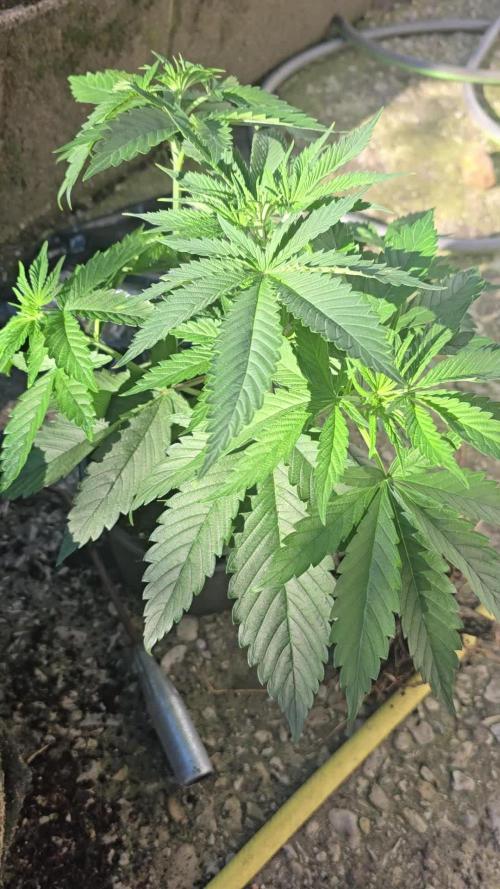
Beautiful growth on the plant without nutrients for now. Added a top soil using my new soil and it is packing with amendments and nutrients, so for now will depend on that. Maybe in about a week or 2 will start a nutrient feeding. But overall happy with the growth, and still hoping it’s a female.
Just did a fimming for today (10 December 2021). Let’s see how it goes!
Likes
13
Share


@Lickey
Follow
Week two starting. The delux slurbet (rhs) are really stretching. The GSC (lhs) not so much
At end of week (day 14 from flip)had a nice haircut so the air and light can penetrate


Likes
Comments
Share


@Card1Cultivations
Follow
Growth is amazing and the girls already need to be transplanted into their final 5 gallon pots.
Transplanting went well, I could have waited another week and I think it would have been better.
Anastasia is having issues with the main stem growing straight so I added supports to encourage straight growth. Drizella is too but not as severe.
During the transplant process. I also sprinkled Great White Mycorrhizae on the roots for better root health and to reduce transplant stress.
Nutrients still hand watering every other day to run off.
5.8 ph / 1.63 ec / 74.7 degrees
I reconditioned my coco coir from my first grow that was originally 1 bag of royal gold tupur blend which I believe produced some nats due to the forest material mixed in with the coco coir. This one original bag was enough to fill two 3 gallon pots and transplant them into two 5 gallon pots with a little left to spare.
I hand cleaned that first grow medium to remove all large root debris and then rinsed it thoroughly in Ro only water before letting it dry for several weeks leading up to this current transplant. I then soaked it in a solution of Sensizym and calMag to break down any remaining dead roots into nutrients while ensuring the medium is still well buffered.
The girls were started in the 3 gallon pots using a new bag of roots organics brand 70/30 coco coir/perlite. That medium had to be buffered well with calMag to avoid common Calcium and Magnesium deficiency that surface due to coco coirs ability to soak it up and steal it from the plant. This was a leason learned from my first grow that resulted in several foliage feedings to adjust for.
I was able to recycle a great deal of coco coir from my first grow which provided me enough to bump this grow up to three plants from two. So I used the recycled coco as the base and most of the back fill in all thee 5 gallon pots. I did have to use a little extra of the 70/30 to top everything off properly.
I still have a 1/4 of a bag of the 70/30 left dor future grows.
