


By continuing to use the website or clicking Accept you consent to our cookies and personal data policy and confirm that you are at least 18 year old. For details please see Privacy Policy and Terms
Accept
Likes
Comments
Share


@Ferenc
Follow
Yeah I have already written a review about it in my previous diary. It is really strong not a day time smoke... It makes you really high. The plant is very very stinky when you cut so close all the doors and windows!!!!!! Last 2 pictures in the jar was aken after 4 days of the harvest. The harvest day it was 171g and after 4 days 80g. It needs to be cured. After 6 days its weight 51g. The last 6 pictures show the flower after 3 weeks of curing. The best thing in this smoke that it doesn't have that strong smell at all almost nothing but the effect is in :) All the plants grow at least 40-50 cm but it can grow over 100cm as well if you let it.
4 weeks later : I decided to make some cannabutter. Update: Fucking hell I have never tried brownie or tea like this and also I have never been so high. I put one tsp into my tea and felt nothing so decided to repeat with 3 tsp. I went to take a nap and when I woke up I couldn't see I was so fucking high for several hours. Uhhh was great tho.😂✌️✌️ Last 10 pictures: This is what left after almost 3 months of harvest I smoked and cooked it.

Likes
4
Share


@Erich2025
Follow
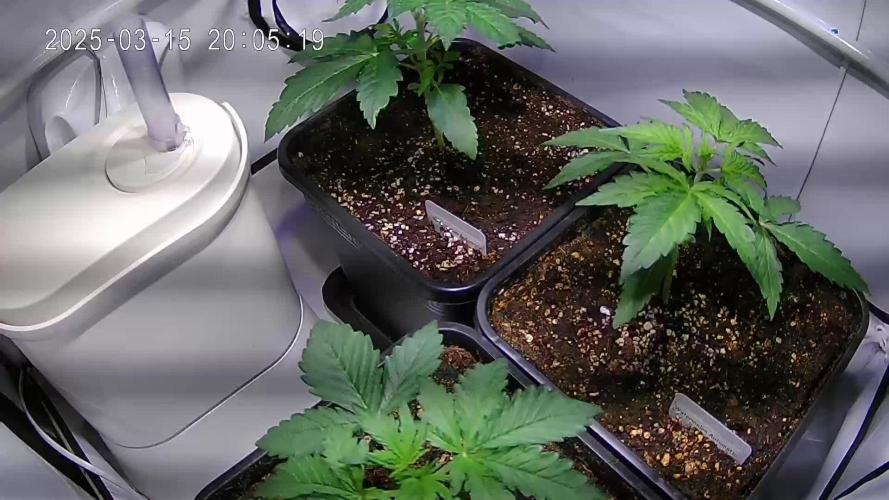
I really enjoy growing these plants. They change every day. The 2 bigger onee start to have purple all over the leafs. The tallest is craaaaazy frosty. When I open the growbox there comes a smell like a punch in my face. They smell very strong and they smell amazing. 3 different phenos, 3 different smells and structures. It is like growing 3 different strains but all 3 of them seem to be special.
I hope the grow finishes as well as it went till today.🙏🌴🍪
🌴🍪🌲🍊⛽️🔥

Likes
9
Share


@DeepRootsGrowTrees
Follow
TRIPPLE G by ROYAL QUEEN SEEDS
Week # 17 overall
Week #16 Veg
No issues this week she looking good looks like she is about to start to flower!! Stay Growing!!
Royal Queen Seeds TRIPLE G


Processing
Likes
43
Share


@Jack_Greenstalk
Follow
week 6 seeing strong new growth in both plants, trying to contain vertical growth with low and high stress training before I add the double layer trellis netting next week. started roots by heavy 16 at 1 ml per gal, and i have foliar 2 times past week (once every 3 days) heavy 16 foliar at 40 ml /1 l (breaks down to 4 ml per 100 ml of water, mist about 50 mls on bottoms of plants then all over an hour after lights turn off.
did some defoliation on lower fans to allow light penetration to potential mid level tops

Likes
38
Share


@Cariboo_OG
Follow
Utopia Haze is a rare heavily sativa dominant hybrid (90% sativa/10% indica) strain created through back crossing Brazilian Sativa strains. This tasty little bud took home 1st Place for Best Sativa in the 2008 High Times’ Cannabis Cup and for good reason – with its potent 18-22% average THC level and long lasting cerebral effects, Utopia Haze is one powerhouse smoke. The Utopia Haze high comes on soon after you finish your first toke, hitting you with a strong cerebral lift that infuses you with a sense of hazy relaxation.
Type: Feminised/Photoperiod
Cultivation: Indoor/Outdoor
Flowering Time (days): 70-75
Indoor Yield (g): Up to 650
Feminised Outdoor Harvest Month: October
Feminised Outdoor Harvest Month Week: 3rd-4th week
Aroma: Citrus, Woody, Pungent, Mint
Effect: Cerebral Lift, Hazy Relaxation, Sleepy
Welcome Everyone to the Final Entry of my Utopia Haze Grow !
There is so much to discuss ! I have been extremely busy as of late trying to get this Harvest together, but i am happy to have it here for you now !
I Seriously under estimated the amount of time, help from others, and my own necessary skills to pull this off.. and i still kind of screwed it up lol !
But its worth noting i have never actually done this before and trying to document it during....was extremely hard.
It is next to impossible to work an iPhone with rubber gloves on !
First I want to discuss everything step by step so before you jump straight into the comments on how the end product is so small in "quantity"
Rest assured i am happy with its"quality"...and thats all that matters to me because Life is a journey not a destination! and i have learned so much from this grow that I couldn't be any happy even if i messed some things up :)
But at the very least I hope you read through this entry in its entirety with an open mind and focus more on the process, rather than just the outcome!
I ran out of Ice & i was only able to wash three times..(normally I've heard you should go sometimes 5-6 washes)
Preparation is Key & things will be much better next round :)
Photos 1-22
These are pretty self explanatory but for those of you just tuning in now.. this is what happens to a very happy plant when you don't have the necessary tools to monitor key components of growing cannabis.. Ph, as well as EC levels play a very key role in the outcome of your grow lol that being said I was just able to save this plant by purchasing both tools but that doesn't mean the plant didn't suffer because of the prior events.. This was a Huge reason behind me choosing to turn this harvest into what i would consider
"Solventless Hash Rosin" from "Ice water extracted Bubble hash".
Pictures 23
The idea here is the process of using "fresh Frozen Cannabis" this has been discussed many a time online on such sites as instagram and here on grow diaries as well.. I personally have Never tried the process so i decided to try it out and make a judgement for myself..
Video 24
The Cannabis has now been in the freezer for 72 hours making it very well frozen.. as you can tell i struggled getting it all into the 25u Screen Wash Bag. One thing of note i would do differently is i will de-stem my next batch as i also believe this played a part in the amount of plant matter that escaped through the sieves.
Photo/Video's 25-28
The idea here is "ice water Seiving" & especially with the bags that I am using here that are only have screen material on the bottom portion of the bag it is very important to have spaces in-between the screens to allow the water to pass directly through the screens into the bottom bucket with the least amount of resistance.. because the hash is so extremely temperature dependant if it gets warm on the side of the bag.. it will stick there and not make it to the bottom to become use able product..
29
You do not need to use as much Ice as i used here lol... the idea is to keep everything very cold..i certainly achieved that but at the sacrifice of using so much that i ended up grinding product and producing "contaminants" but in the end they are just plant matter that i would be smoking when i rolled up my joint either way so.. I'm not super disappointed..
But it should be noted that what you want to achieve here is a Layering effect where you have the wash bag between two small layers of ice while the "water current" washes the Trichomes away allowing them to be separated by the screens setup below :)
Before Starting the machine you should allow some time (i.e.;10-12minutes pre soak to allow the product to become saturated) before the first cycle.
By video 32 I have just ran out of ice lol..
Video 33-34
Here I have a tip for you.. to separate the screens that you sieve through.. cut 5 gallon buckets to stretch them across nice and tight.. it'll make scooping your Bubble that much easier ! i learned this from the many "Frenchy" videos I have watched :)
Picture 35
Here in lays the problem for most people.. drying your hash without loosing vast amounts of "Terpenes" whilst also stay ever vigilant against mold !
Thanks to all those videos I've watched on youtube.. id like to think this was one of my most successful parts of this process..
Things to Note; Terpenes start to seriously evaporate at temperatures 68F or 20C
you need to stay as cold as possible whilst bringing the Relative Humidity in the space down into the 40-30% to stay away from that nasty mold !
I used my cold storage room in the basement.. with a dehumidifier running to keep the space at 45% RH & staying at a constant 15c.
All while spreading the hash as thin as possible across parchment paper, on top of the white screens with a fan moving air across both sides of the paper.
Pictures 36-38
These are some macros i took in the middle of my drying session I fell in love with the colour.
Yes i know the black spots are plant material but they will get caught when i bag the hash & squish the oil out.
Thing to Note; at this stage it is important to ensure you 'micro plane" the hash down as fine as you can whilst staying weary of the temperature... any "chunks" will hold pockets of moisture.. that lead to potential problems..ie; mold ...
Picture/Video 39-41
Successfully planed bubble hash ready to be bagged and Squished !
Picture 42
Ive decided to follow Pedro.. from Pedros Grow Room and double bag to be on the safe side so i don't have any blow outs.
So thats One 25u bag inside one 160u bag ! :)
Pictures 43
This is almost 3 grams of the bubble hash from above, already melting in the bag.. this is where i ran into trouble again lol things started getting to warm in the house and i was only able to get one of the three squish's i did on video :( things started getting sticky.
Picture 44
This is basically just a photo of the equipment I'm using; 3x5 LowTemp Cage in the frame I built myself, with a 20Ton bottle jack.
Something to note here is this is an older Lowtemp model with only a single heating zone which is which i have it closed here heating Both sides of the press :)
As well as the importance of having adequate pressure on your plates.. my rig is very overkill for the size of hash bags..lol
Video 45
Here is the lovely press video.. its didn't quite work the way i wanted either lol my directional folding wasn't quite tight enough for a big "drip" :)
&the Press was set to 65°c
Photo's 46-50 are pretty self explanatory :) I had a blow out.. but still managed to pull an 80% return from the hash once squished...& yes it tasted amazing :)
Was it worth it in the end... that could be debated.. for some..i understand..its not your thing, but for those of us that are interested in making our own concentrates.. free from Solvents...
I wouldn't make it any other way :)
If even ONE of you reading this diary finds it helpful to reference for ANYTHING.....even if its "what not to do" ill consider it a success !
Thanks again for tagging along on this garden adventure.. its been one heck of a journey !
Much Love from B.C. Canada,
Until Next time,
Cariboo


Likes
8
Share


@Icedoutgreen
Follow
Keine großen Veränderungen in der ersten Blütewoche, ich habe nur den lästigen großen Ventilator entfernt, da er mir zu viel Platz auf der Bodenfläche genommen hat und am Ende der ersten Woche habe ich das Blattwerk ein wenig ausgedünnt, mal sehen wie sich das auf die weitere Blüte auswirkt.

Likes
3
Share


@AdirondackGreen
Follow
Had to re-settle a few of the arrangements to avoid crowding, but generally pleased with the canopy. Not very level but every cola has their space to fill just fine. Check out my timelapse!

Likes
8
Share


@wheedtobeus420
Follow
Day 32 she’s flowering beautifully like all of a sudden poof. HahH I’m super happy with her. She’s beautiful. I have not ever grown this strain it was my husbands idea we shall see how this turns out so far so good.
Likes
18
Share


@TherealNICOGREEN
Follow
Er gået over alle forventninger igen fik toppet hende! Troede jeg havde fået dræbt hende grundt ph plus chok men jeg skiftede alt van ny gødning og ph 5,9 også skyllede jeg rødderne rigtigt godt tog de største blade væk:) og nu kan jeg ikke se hun har været ved at dø!/) Hydro er bare det bedre og man kan hurtigt rede sine fejl:)

Likes
149
Share


@CBD_Sweden
Follow
Hi all the happy people here in GrowDiaries.
This is my second cultivation ever and it will be fun to try a bigger space than my closet grow.
First, I'm just going to say I'm done with the construction of my new growroom.
I put some pictures on the construction here in week one.
The room is 2.14 meters by 1.7 meters and has a ceiling height of 2 meters.
It provides a floor area of 3.6 square meters.
I use a 54 Watt Lightwawe T5 for germination and 2 Pcs 400 Watt HPS lamps.
I have a channel fan that replaces the room air about 40 times an hour to get a comfortable theme in the room, the air enters a fresh air intake from the outside.
The air is purified through a carbon filter to then leave the room to the rest of the basement.
Then I use that heat to heat the rest of the basement.
I will use 8 pcs 15 liter Autopots to grow with and a 100 liter water tank that supplies the pots of water and nutrition.
I will grow completely organically in soil and will watercure my buds to get the best possible medicine for me.
But there are no cultivation rooms to be displayed here, so I continue with what is most important.
Today I have put my seeds in my moisture dome and hope the seeds have germinated within a few days.
I am very excited to see how the new growroom will work and how this Blue cheese Auto from Royal queen seeds will turn out.
Blue Cheese automatic cannabis seeds are a cross of Blueberry Automatic and Cheese Automatic that has been perfected over five years of breeding and careful selection. The result is a feminized, autoflowering strain with superior yield, flavor, and effects to either of its distinguished parent strains.
THC: 16%
CBD: Low
Yield Indoor : 325 - 375 gr/m2
Yield Outdoor: 60 - 110 gr/plant
Height Indoor: 40 - 70 cm
Height Outdoor: 60 - 110 cm
Flowering: 7 - 8 weeks
Harvest month: 9-10 weeks after planting
Genetic Background: Blueberry x Cheese x Ruderalis
Type: Sa 35% In 40% Ru 25%
Effect: Cerebral and uplifting
Climate: Mild
........................................................................................................................................................................................................................................................................................
2017-10-16. Week 9 day 62 from germination. The girls are stacking up in budsites and i give max nutrients.
Nr 1 is 55 cm tall, Nr2 is 112 cm tall and Nr 3 is 49 cm. Added new video and pics.
Likes
26
Share


@GrowGuy97
Follow
Day 56 ladies are really starting to get some massive buds, tent smells amazing! I can’t wait to see what this harvest looks like😍😍
Thanks for following & make sure to check back for daily updates friends! Happy growing✌️🏼🌱


Likes
3
Share


@ChaosDad420
Follow
the girls smell very strong, the two girls in the back need another week and then they will be harvested only get water from now on.

Likes
15
Share


@Herbinator
Follow
Tricky week. I've over complicated things by trying to incorporate CO2 into the grow. The main problem is the Airbomz unit is crap! 😂The timer seems to release CO2 at random intervals...I kept an eye on it and it sprayed anywhere between 1hr20 and 1hr50 with no kind of pattern...definitely not the regular 2hr interval I had selected.
I'm switching to a mushroom bag, which will sit by my intake vent and flood the tent with CO2 night and day :) A much cheaper and simpler option!
Advantage of this is that I can keep things simple with my ventilation. I've been switching on and off to allow CO2 to absorb, and the result is huge spikes in temp and humidity. I'm now extracting 24hrs a day and switching the intake fan on and off with the lights, and my temp and humidity has stabilised.
However I'm still up at 70% all day and night....which seems a bit high! I'll have to keep an eye on it.

Likes
9
Share


@Garamantes
Follow
The start of cultivation was not at all favorable at temperatures below 10 degrees then came a storm that caused cracks and tears in the leaves ...
The leaves were very dirty from clay and perlite, so I tried to wash them all with a paper tissue.
The weather was not at all kind, so I added Advanced Nutrients- B52 vitamins and Rhino Skin to strengthen the stem and leaf
I often meet different animals on my way through the forest, today I met a newly born young fallow deer


Likes
6
Share


@jkadabra
Follow
Creció mucho (especialmente para tener apenas 150 watts). No creció en altura, lo cual es bueno. El corte apical quedó bien.

Likes
4
Share


Likes
3
Share

@Bluemels
Follow
Tag 20: Heute musste ich die erste Pflanze aussortieren aus Platzgründen.
Tag 24: Wieder eine Pflanze aus Platzgründen entfernt.