By continuing to use the website or clicking Accept you consent to our cookies and personal data policy and confirm that you are at least 18 year old. For details please see Privacy Policy and Terms
Accept
Likes
Comments
Share


@BLAZED
Follow
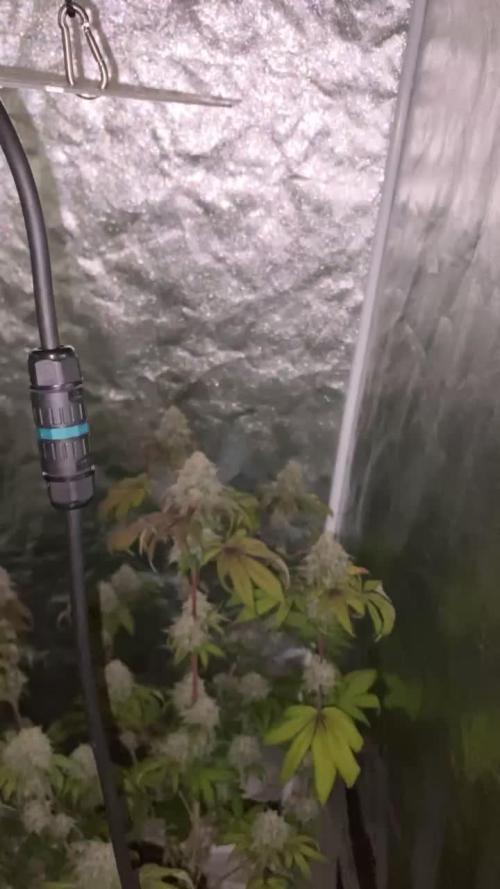
Week 14 (1-5 to 7-5)
1-5
Temperature: 28.2 degrees (lights on) 22 degrees (lights off)
Humidity: 62% (highest) 46% (lowest)
No pictures.
2-5
Temperature: 29.2 degrees (lights on) 20 degrees (lights off)
Humidity: 61% (highest) 48% (lowest)
Removed the net, and tied down some branches to the pot with some gardening wire.
This way i can easily remove the pots out of the tent to weigh them.
I also moved the oscilating fan from underneath the canopy to above the canopy.
This is because the leaves gets hotter as i increase the light's power output.
The Gorilla Kush #2 and the Chemdog #2 are showing some heat stress.
Installed a valve on the autopot from the Kush #2.
This is because its weight is higher then the other pots.
Before i watered them i weigh the pots.
Dry weight:
Gorilla Kush #1: 4.4 kg
Gorilla Kush #2: 6.0 kg
Added 10L to the reservoir.
Opened the reservoir for a couple of minutes.
3-5
Temperature: 26.2 degrees (lights on) 19.9 degrees (lights off)
Humidity: 61% (highest) 47% (lowest)
No pictures.
Increased the light's power output to 75%
LUX: 16.000 / 20.000
4-5
Temperature: 26.9 degrees (lights on) 21.2 degrees (lights off)
Humidity: 59% (highest) 41% (lowest)
Opened the reservoir for a couple of minutes.
5-5
Temperature: 27.6 degrees (lights on) 21.2 degrees (lights off)
Humidity: 60% (highest) 47% (lowest)
No pictures.
6-5
Temperature: 27.6 degrees (lights on) 20.4 degrees (lights off)
Humidity: 60% (highest) 42% (lowest)
Dry weight:
Gorilla Kush #1: 4.4 kg
Gorilla Kush #2: 5.4 kg
Added 10L to the reservoir, there was still 2850 ml left in the reservoir so now its almost 13L.
Opened the reservoir for a couple of minutes. (Only Gorilla Kush #1)
I also lowered the Gorilla Kush #2 a little bit, as she is showing some heat stress.
The bud development of the #2 is very mediocre, some buds show some THC, and some buds have almost none on them.
I am sure the yield will be low, so i will probably make some hash with the #2
7-5
Temperature: 27 degrees (lights on) 19.8 degrees (lights off)
Humidity: 57% (highest) 44% (lowest

Likes
26
Share

@shwable
Follow
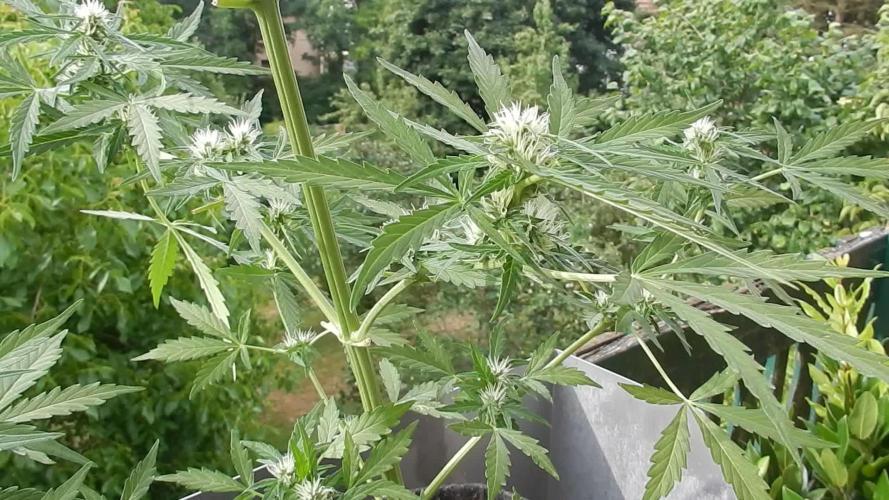
I made some mistakes but they continued to put on more frost
Did not realize that my timer for the light was not plugged in for 10 days so the ladies got 24h light a day for that period...
They already started to grow small leaves on the buds.. revegging but I corrected it on day 93 so it should be alright. Still a major fuck up.
Buds are already rock hard and smelling amazing, I just hope the light stress don't make em herm or produce seeds in the last weeks

Likes
8
Share


@ButterfliesLittleFarm
Follow
Hello Diary,
We start with a new round. I am continuing with F1 strains since I am delighted with Medusa F1.
This time I will have three different strains on the "Farm" Apollo, Milky Way and Titan.
I will keep separate diary for each strain, and this one is intended for Milky Way F1.
First, here is some information about the strain itself.
MILKY WAY F1
As one of the first true cannabis F1 hybrids, Milky Way F1 is an autoflowering variety stemming from multiple inbred lines.
The result? Unparalleled uniformity, impressive resistance to disease, great productivity, and flavors and effects that will inspire you to sow these seeds again and again.
Milky Way F1 arrived in the cosmos after breeders crossed several highly inbred genetic lines that share a heritage with Blue Mammoth, Blue Dream, and Sin Tra Bajo Auto.
Milky Way F1's parent varieties passed down a complex mix of terpenes, including myrcene, farnesene, caryophyllene, pinene, and limonene.
Together, these aromatic molecules converge to create dank aromas and flavors of metallic Skunk and citrus.
As a result, Milky Way F1 holds the title of the most aromatic cultivar in our F1 range.
As far as effects go, this F1 hybrid will catapult you into orbit with high levels of THC. Expect a warm and fuzzy body high perfect for the evenings.
Trace levels of CBG and soothing terpenes will help curb the peak of the high to keep things chill.
Flowering time - 42-45 days
SET-UP ON MY LITTLE FARM:
Box - Secret Jardin DS120W 120x60x178
Lights - MIGRO 200+
Ventilation - TT Silent-M 100
Filter - Primaklima filter PK 100/125
Fan - Oscillating Koala Fan X 2
Humidifier - Beurer LB 45
Soil - BioBizz Light - Mix
Pot - 11L Air pots
Seed - Royal Queen Seeds
Nutrition - RQS Organic nutrition
I can now officially start the journal.
20/04/2023
Planting plants. As usual, I prepare everything I need for planting in advance.
I still use Air-pots because they are really great.
For the soil, I used BioBizz - Light Mix, which I filled 2/3 of the container and then added the Organic booster in pellets, Mycorrhiza and Rhizobacter.
I mixed everything together well with the soil and filled the container to the top.
I soaked the earth well with 2 liters of water, made a small hole, put the seed and lightly covered it with earth.
The conditions on the Farm are satisfactory, the temperature is around 25 degrees while the humidity is around 50%.
I think that after sprouting I will put a humidifier to increase the humidity.
23/04/2023
I sprinkled some water on the surface of the earth to let them know where they should go.
24/04/2023
Milky Way F1 sprouted like her other two roommates.
26/04/2023
First watering. I regulated the p.H. of water at 6.0 and watered the plant with maybe 0.5 liters of water.
That's all for this week, see you soon.

Likes
74
Share


@Hou_Stone
Follow
☄️☄️☄️☄️☄️☄️☄️
Bonjour à tous 👋
Je vous l'ai peut être déjà dit mais je n'ai pas beaucoup le temps de m'occuper de ma culture, car je ne vis plus à coté. Je repasse la voir tout les 4-6 jours pour l'arroser, enlever les feuilles mortes et prendre quelques photos. J'ai l'impression que c'est suffisant.
🍀👌Pour l'instant il me semble que ça se passe bien. J'espère que ça va continuer et que je vais obtenir une bonne qualité.
Je suis impatient de gouter cette kong's krush aux effets annoncé narcotique.🤤
☄️Ci-dessous je vous partage la description provenant de la marque (GreenHouseSeed) au sujet de cette souche 👇 :
"DESCRIPTION: Kong's Krush combine les incroyables saveurs de banane et de cannelle de notre propre sélection de Banana Punch avec la saveur crémeuse et gazeuse de Wonder Pie, l'une des dernières variétés de Green House Seeds.
EFFETS : L'effet est très narcotique et bien adapté à la gestion de la douleur."☄️
❄️ ❄️ ❄️ ❄️ ❄️ ❄️ ❄️ ❄️ ❄️ ❄️ ❄️ ❄️ ❄️
Intensité de la FC3000: 90%
Ventilation : Extracteur mars hydro 6 pouces avec filtre à charbon puissance : 4/10 (24h/24h) + 3 ventilateurs à l'intérieur ( ON 8/24h). ils s'activent à un horaire différent.
Arrosage : Environ tout les 4-6 jours avec 1.5L d'eau. (+ 1gr de bioenhancer/L eau un arrosage sur 2)
Température & humidité : NUIT : 16°C & 70% / JOUR : 23°C & 50%
Mon instagram ☄️🌱❤️️
https://www.instagram.com/hou_stone420/
☄️☄️☄️☄️☄️☄️☄️☄️☄️☄️☄️☄️


Likes
9
Share


@newenglandgrowers
Follow
Starting my flush this week using 10ml of Clearex per Gallon of water flushed down to 450EC or 225ppm, going to now continue watering with ph'd balanced water when dry with about 10-20% runoff. Going to keep an eye on the trichomes but I'm thinking I'm gonna harvest early to mid of next week. I'm going to try and bring out even more of the colors in the flowers this last week or two and I'm going to start watering with ice cold water not sure if it'll help or not but I'm gonna give it a shot. End of Week 13/Week 8 of Flower it went well the plants are flushed and are fading, going to chop in a few days.

Likes
21
Share


@BudXs
Follow
This plant was a breeze to grow, finished quickly, and yielded a decent amount of colorful, fruity and rock hard nugs. A crowd pleaser, this smoke goes down easy and hits hard. More indica leaning than sativa, use this flower before bed for a nice heavy sleep. Great bag appeal and taste. Excellent work by Fastbuds once again.
Grow this plant with one topping early and LST as required to open the buds up to Jah.
Thank you for following, thank you for liking. Thank you to the GrowDiaries team for continuing to deliver an awesome platform for us to document our work

Likes
14
Share


@JBurnstein14
Follow
Getting close to finishing! Maybe start flushing Friday when it turns 7 days and aim for a 7 day flush!

Likes
1
Share

@birdmountain
Follow
Die ACB XL stellt langsam das Höhenwachstum ein und beginnt mit der verstärkten Blütenausprägung. Ansonsten wurden nur ein paar der ganz großen Fächerblätter entfernt um möglichst viel Licht an die Blüten kommen zu lassen. Ob der Bananenschalensud funktioniert wird sich zeigen, bisher jedoch sieht es ganz gut aus.
Vielen Dank für euren Besuch und noch eine schöne Grow-Woche!
---
The ACB XL slowly stops growing in height and begins to produce more flowers. Apart from that, only a few of the very large fan leaves have been removed to allow as much light as possible to reach the flowers. It remains to be seen whether the banana peel decoction will work, but so far it looks quite good.
Many thanks for your visit and have a great grow week!

Likes
16
Share


@Reddgrower
Follow
Flipping to flower
Topped a week ago with 50/50 all purpose and power bloom
Watered with microbial tea that was brewed for 18 hours.
Likes
13
Share


@Slurpy_Terpy
Follow
==> Decreased the base nutrients for less Nitrogen
She is doing great!
Smelling stronger and with more personality than last week :D
There are not many calyxes but they are swelling slowly and nicely :)
Starting to get some purple colors in the buds already :D
Her branches are thin and buds are gaining in weight so she is starting to fall! I will tie her up soon :D

Likes
12
Share


@UK420hydrogrow
Follow
Ok had a long week various problems with humidty and temp issues led me to upgrade tent from 1.2 x 1.2 to a new 2.4 x 1.2 x 2.0 also changed the flower lights to the x 2 viparspectar 450 reflectors along with the new white lighting 315 watt cdm all in one light with there 4k flower pro bulb the plants are loving the new space and abundance of lights any tips comments etc feel free to msg

Likes
14
Share


@Naujas
Follow
wow:) the girl started to grow properly!!! since there are two girls in my growing box, I noticed that this girl is the biggest, so that there would be no problems in the future due to the distance between the two girls, I cut the main ring for this girl so that the girl would not grow upwards so quickly, and would have many strong branches:) This did not cause stress for the girl:) everything looks good !!!!.


Likes
41
Share


@Wicked_Stix
Follow
This is my favorite plant of the 16oz dutch bucket grow. She has grow fast, healthy, and has a beautiful structure. She is putting on some nice tops. She is starting to show some drooping on the top leaves in the evening since being put under the quantum boards. But she perks back up in the morning so I think she will keep chugging along. I'm thinking I will easily exceed 2 oz on harvest if I can see her to the end. Got the nutrient pumping and the lights beaming. Not much else to do from here on out

Processing
Likes
3
Share


@Dico29
Follow
Day 128 it’s good smells sweet and every time I walk into my room it smells like gas
Even though quantity is lower then I expected, the trichomes are crazy


Likes
11
Share


@BudBeezy
Follow
Now that the plant is dry, I can go into a few more details.
In my opinion, the harvest is a complete success for a beginner.
During the harvest I realised how hard the flowers are. After drying, they became even harder, almost rock hard. The flowers are covered with many shiny trichomes.
The harvest took quite a long time. I spent about 14 hours on it, which was also due to the super meticulous wet trim. The reason for the thorough wet trim was the mould. Every single flower was examined. I disassembled the large flowers before drying to be on the safe side. It's nice to have huge flowers, but in the end they are chopped up anyway.
At the end of the 8 days of drying, the GG4 Sherbet FF rewarded me with finest ice-coated flowers. Thanks to the wet trim, I didn't have to do any more work. I was able to separate the buds directly from the branch and put them in the jars to mature. As the offcuts were also super potent due to the thorough wet trim, I processed them into butter.
Processing
Likes
5
Share


@Ensign420
Follow
Week 02 Introduction
This week has been a bit of a struggle. Had my first experience dealing with slime and brown algae. But I think adding enzymes and increasing the beneficial bacteria helped to fix the issue. Also experienced nutrient burn for the first time. My nutrient solution strength got as high as 671 PPMs. So backed it down to about 430 PPMs during the end-of-week reservoir change. Also cut Hydroguard (expired?), CaliMagic, and Superthrive from this grow. Now she's still stunted, but is starting to recover. Hopefully...
[START OF WEEK 02]
Day 01 - Monday - 08/10/20 - Total Days: 008
-----------------------------------
- [0830]: Still looks a bit yellow. But getting larger!
--- Solution strength was at 248 PPMs.
--- Just topped off with a bit of distilled water
--- PH went up to 6.1 so PH'd down to 5.8
--- Ran the top feed for a bit to wet the hydroton.
- [2130]: She's looking even more yellow now.
--- Even the new leaves are really yellow.
--- Decided to add more base nutes.
--- Added 4ml of Sensi A
--- Added 4ml of Sensi B
--- Now at about
--- Solution Strength went up to 304 PPM.
--- PH was at 6,
--- Also raised the water level a bit more.
--- I really hope it's a nutrient deficiency and not an over-watering issue.
--- Please live!
Day 02 - Tuesday - 08/11/20 - Total Days: 009
-----------------------------------
- [0830]: Looking less droopy. But still yellow.
--- Decided to do a reservoir change.
--- 4.5gal of distilled water
--- 8ml of Sensi Grow A
--- 8ml of Sensi Grow B
--- 8ml of Voodoo Juice
--- 4ml of B-52
--- 4ml of CaliMagic
--- 4ml of Hydroguard
--- 4 drops of Superthrive
--- PH'd down to 5.8
--- Solution strength: 302 PPM
--- Since I didn't want to risk over-watering the rockwool, I did not to do a top feed, may do one tonight after the sleep cycle (lights are still set to go off at 10am and back on at 4pm).
--- As I was doing a reservoir change, I noticed that the tubes and bucket were a bit slimy. Didn't really stink or anything. Is this normal? Maybe due to the Hydroguard and Voodoo Juice?
--- I hope she gets better soon!
- [2215]: Getting larger! But still yellow.
--- Also can see a root growing through the net pot! Tiny little thing but it's there! Will have to start dropping water once more appear.
--- After looking over a few DWC diaries using AN nutes, seems like my solution strength is still too low. Most around this stage average around 500 PPMs with about 4ml per gallon.
--- Top fed for a minute to wet the top of the hydroton.
--- Solution strength went down to 263 PPM.
--- Added 8ml more of Sensi A
--- Added 8ml more of Sensi B
--- Now base nutes are at 16ml for 4.5 gal of water.
--- PPMs went up to 411.
--- Still lower than 500 PPMs, but that's okay.
--- PH was at 6. Not sure if I should adjust PH using AN nutes. So going to not ajdust unless PH goes above 6.1.
Day 03 - Wednesday - 08/12/20 - Total Days: 010
-----------------------------------
- [0830]: Looks like more root growth!
--- She still looks yellow. But leaves are perky.
--- PH was at 6.2 so lowered down to 5.8.
--- Solution strength was at 394 PPMs
--- Since roots are still growing, I decide to lower the water level a bit. Now water level is a bit below the net pot.
- [2200]: Root is getting longer!
--- Slime is returning. Not sure why.
--- Solution strength: 357 PPMs
--- PH: 6.1
--- Decided to add an enzyme along with more beneficial bacteria to hopefully cure the slime.
--- Added 16ml of Sensizym
--- Added 5ml of Hydroguard
--- Added 8ml of Voodoo Juice
--- New solution strength: 430 PPMs
--- New PH: 6.1
--- Top fed for a minute.
--- This slimy residue is really freaking me out! I hope the added enzymes will help eliminate the slime.
--- Going to do a full reservoir sterilization/nutrient change over the weekend. Please survive until then girl!
Day 04 - Thursday - 08/13/20 - Total Days: 011
-----------------------------------
- [0930]: I think the enzymes worked! There is little to no slime now!
--- Although I think the root was also dissolved in the process. It's now just a little stub sticking just below the net pot. The enzyme is also suppose to dissolved dead roots too but guess that root was too weak? Not sure what happened there. But I think the slime is cured!
--- Solution strength went down to 395 PPMs. Decided to add more base nutrients.
--- Added 8ml of Sensi A
--- Added 8ml of Sensi B
--- Added 4ml of B-52
--- Solution strength went up to 598 PPMs.
--- PH was at 6.1
--- As long as the PH is between 5.5 and 6.3, I'm not going to use PH Up or Down. But still will monitor PH levels.
- [1715]: Checked up on her after her nap and shes looking alive but stunted. But no slime!
--- Decided to add some sugars to help maintain the enzymes and beneficial bacteria.
--- Solution strength was at 587 PPMs.
--- PH was at 6.2
--- Added 8ml of Bud Candy
--- Solution strength went up to 671 PPMs.
--- PH also went up to 6.3
--- Lowered water level a bit to hopefully promote more root growth.
--- Top fed for a minute.
--- She is getting bigger, but still looks yellow.
Day 05 - Friday - 08/14/20 - Total Days: 012
-----------------------------------
- [0915]: Leaves look a little burnt on the tips. Still no slime.
--- Going to back off on the PPMs to hopefully fix the nutrient toxicity.
--- Solution strength was at 632 PPMs
--- PH was at 6.3
--- Added/Removed water until PPMs were at 536.
--- PH was still at 6.3
--- Raised water up a bit, then top fed for a minute.
- [2200]: Looking better. Still yellow though.
--- Solution strength: 514 PPMs
--- PH: 6.5
--- Added PH down.
--- New solution strength: 518 PPMs
--- New PH: 5.2
--- PH was kind of high. So decided to PH down. Had to use quite a bit to bring it down. But eventually got it to drop down to 5.3. A little low, but so far, the PH has always gone up so wanted to start it really low.
--- Ran the top feed for a minute to re-saturate the top of the hydroton.
Day 06 - Saturday - 08/15/20 - Total Days: 013
-----------------------------------
- [0830]: She looks stunted. leaves are still yellow.
--- Solution strength: 514 PPMs
--- PH: 5.6
--- Top fed for a minute.
--- Not sure what to do at this point. Going to do another reservoir change soon. Hoping she lives until then.
- [2145]: Looking pretty much the same.
--- A bit of slime has returned. Since I've been diluting the nutrient solution, the enzyme ratio has dropped. So I guess this is expected.
--- Also noticed that slime build up was on the air-stones. Never really checked the stones so not sure how long that has been there. Looks brown too, which can't be good.
--- Going to do an H202 sterilization of the system (minus the net pot) tomorrow so did not add anything.
--- Lowered the water level to below the net pot.
--- Then top fed for a minute.
Day 07 - Sunday - 08/16/20 - Total Days: 014
-----------------------------------
- [0900]: STERILIZATION DAY!
--- Decided to skip today's night cycle for a deep clean.
--- I'm hoping that skipping a night cycle won't be too stressful.
--- Temporarily moved her to a new bucket.
--- Used about a half of gallon of straight distilled water to flush out the net pot.
--- Drained the system and wiped up all the brown sludge. Also removed the air stones and cleaned up all the goo.
--- Filled the system with 2 gallons of distilled water and at least 30ml of food grade hydrogen peroxide (35% strength).
--- Yea its a lot, but since I'm not going to sterilize the system overnight, I went with a really high doseage. Basically I kept adding until I started to see little bubbles start to form.
--- Then I ran the water pump.
- [0915]: Boiled the air stones in tap water for about 10 min. Then reconnected them to the airlines.
--- I let the air stones and hose soak in the sterilization solution for about 5 minutes so the peroxide can absorb into the stones. Then ran the air stone to help mix and agitate the solution.
--- Occasionally, I'd repeat the process of turning the air pump off for a few minutes to let the stones soak.
- [1000]: Covered the top two row of holes of the net pot with some aluminum tape. Hopefully this solves the light leaking in through the hydroton.
- [1200]: Used an old toothbrush and scrubbed the pump clean. Then drained the system.
--- Refilled with more distilled water and peroxide. Again added a lot.
--- Ran system again to sterilize even more.
- [1530]: Drained the system and refilled with distilled water to rinse.
--- Ran the system for a few minutes, then drained and rinsed again.
--- Did this a few more times over about an hour.
- [1630]: Added 4 gallons of fresh distilled water.
--- Added 15ml Sensi Grow A
--- Added 15ml Sensi Grow B
--- Added 12ml of B-52
--- Added 16ml of Voodoo Juice
--- Added 16ml Sensizym
--- Solution strength was at 430 PPMs
--- PH was at 5.6
--- I was going to add Hydroguard, but I think the bottle is expired. Since 2017 or 2018!? I think Hydroguard is good for up to 2 years from the date on the bottle or 6 months after opening. So not going to use from now on. I wonder if this could have contributed to the slime build up.
--- Also removed the CaliMagic and Superthrive too. Going to only use AN products to eliminate the chance of incompatible nutrients.
--- Placed her back in the bucket and top fed for a minute.
--- Here's hoping for the best. Going to let it ride until morning! Please feel better!
[END OF WEEK 02]

Likes
9
Share


@timbarin
Follow
25/Aug
Another week passed by and she is filling up the net slowly. All green and lush enjoying the notnao cool breeze from the fan. I hope the temp will drop a bit next week. Will let me increase the wattage

Likes
5
Share


@Kickdrum
Follow
Came home from vacation to gorgeous ladies and their light fragrances. More to follow soon.