By continuing to use the website or clicking Accept you consent to our cookies and personal data policy and confirm that you are at least 18 year old. For details please see Privacy Policy and Terms
Accept
Likes
Comments
Share


@Ieiogrow94
Follow
Eccoci qui...
Finalmente dopo uno stop per il lavoro torno ad aggiornare il diario con il capitolo finale...
Tutto è stato molto semplice con lei in quanto molto vigorosa e molto stabile non ha dato alcun problema, le cime sono piene di resina e molto compatte seguirà una recensione post concia
Grazie a @Zammi_official e a @Xpertnutrients per la collab e a tutti per il supporto🔥🌲❤️
NE VERRANNO DELLE BELLE

Likes
15
Share


@DRO420
Follow
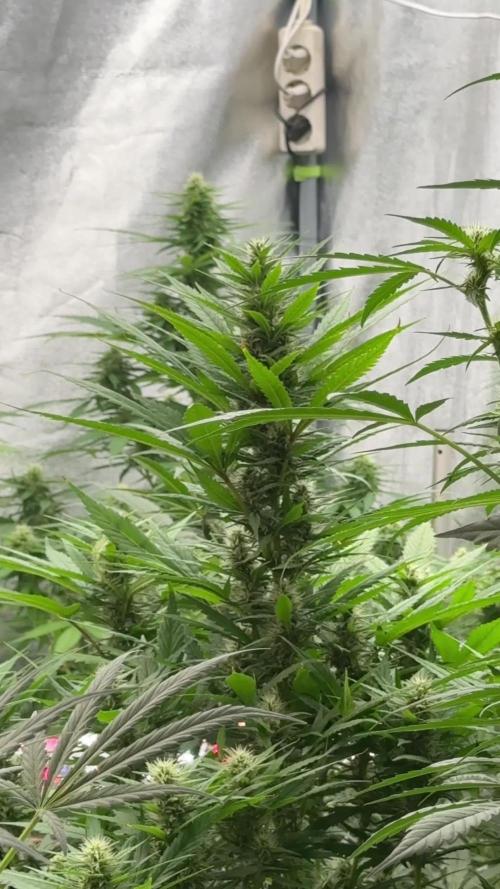
Week 2 of Flowering plants are doing there final reach. I defoliated one plant that is out of control growing fast..lol.. in hopes to stunt it a little . Everything is going well I'm very surprised at how much nutrients these girls need. I feed them every watering or they start to wilt and yellow. Crazy .. I might try to slow that down now that the leaves are very rich in green color. No signs of burn only deficiency Wich I corrected by feeding them every watering.🤷

Likes
7
Share


@Andres
Follow
here is in winter with cloudy days ... if she is like that it is my fault for not spending enough time on her ... we will say that of a flavor and good effect .
she has a good sweet smell ... we hope that I have a good smell, taste and effect ... a couple of days more and it will be harvested

Likes
100
Share


@MadeInGermany
Follow
Hi growers :-)
It smells better every day, and looks more delicious 😍.
There is not much to say this week.
They are still blooming 10 to 38 days. The 3 Victory Kush F1 and the Zkittlez in front were rinsed, and are still around 10-14 days.
The rest needs a bit :-)
Until then everyone have a nice weekend and let it grow 😎


Likes
13
Share


@GanjaFarmar
Follow
Okay so my favourite batch of all. This plant smells soo citrusy and fruity! Its got a similar texture and smell to Amnesia.
Ive been flushing these for the past week. Hopefully harvest these this week.
Not bad for no training and topping.
Ill be posting soon this week about the harvest!
One love!

Likes
10
Share


@420_Vamp
Follow
Steady as she goes 🎶
Looking very hairy now day 17 of flower.
Don't know what to say really first grow. But looks good so far.
Pheno B and C get 4 litres of water each to fill em up for the week.
Pheno A gets 1 litre.
No bud smell as of yet.
Some sparkly crystal forming. Early days yet
420V

Likes
27
Share


@RDWCGrowing
Follow
1/20/2023- So much to do pre grow and over the next 16 days, absolute first order of business is that I have to take down my current Grow---TIMBER-- Then I have a list of things I have to get done in order to be ready to start this grow 1 Feb.
With that said
T - 2 days until start 48 hour Flush
T - 2 days until Start 48 hours of Light
T - 4 days until TIMBER!!!
Items that need to be done before 1 Feb 2023
1. I need to clean the tent out
2. I need to clean the equipment- Proper Sanitization between grows in Hydro is a must!!!
3. I need to get the hole in the ceiling above my tent repaired- For my last grow I had a deep sink installed in my grow room, to make Hydroponics a little bit easier and have a water source in the same room. The seals on the pipes they were installing broke and leaked through the ceiling causing some damage all the way across my grow room, I was already weeks into my grow and couldn't risk them working above my tent and it would have been very awkward positon for them to be working in as well, so have to get this done quickly between chop and germination.
4. I have to install my new light- I was using a Vivosun 4000 and for this grow I am switching up to a Spider-farmer SF 7000.
1/20/23- For this upcoming grow I am working with M/F photo seeds so I ordered 4 Sex determination kits. I recieved my my 4 Sex determination testing kits from Rimrock Analytics today. I will be using these to test my plants at week 2 of Veg so that when/if I take clones I know I am taking them off females. As well as I don't want to accidently pollinate my tent during this grow I am looking for big beautiful buds not seeded buds. :-)
1/24/2023- Harvest of current grow- Started at 2:00pm and finshed wet trim and firt batch into the freeze dryer.
1/25/2023- Next batch into the freeze dryer and cleaning all my equipment for this Grow.
T-1 Day until the workers are supposed to be here to fix the hole in the Grow Room.
T-3 days until I instll my new Gorilla Grow Tent and my New Light Spider Farmer SE-7000 for this grow.
T-7 Days until Start of Germination
1/26/2023- Harvest is done ran through the Freeze dryer and dry tim completed.
1/27/2023- Grow Room repairs completed. Hole is gone Letting the paint dry before I install the new tent.
T-2 days until Install the New Gorilla Grow tent and the new Light
T-3 days until I put the hydro equipment in the new tent
T-5 days until Germination
1/29/2023- Day 0- Final Pre Germination activities
Germination Start T-3 days
The paint on the ceiling was dry and it was time to finish prepping for Germination. I got the following items knocked off my list.
New 4X4 Gorilla Grow Tent is up and ready
New Spider Farmer SE-7000 Light is installed- Thanks Moony Grows for the suggestion and for the Code that got me some money off and free shipping (Moonygrows)!! I turned the lights all the way up to max and set the timer to 18/6 0600-0000. I will keep an eye on the temperature and humidity without my plants and see how hot it gets with the new light.
I put my Hydro system back together and put in 40 gallons of water into it, time to monitor for leaks the next few days.
I Setup my cloning machine for Germination Days 3-11
1/30/2023
let me break down the situation, ROOM in the TENT.. Enough said.. No really I tried putting my exhaust system up in the new tent with my new light, The light is so big corner to corner that it really didn't give me enough room for the lights be be raised, with the exahust hanging the buckets my plants are Starting in are 2 and 1/2 feet off the ground, great for plenty of room for roots but not so great for upwards space for the plant to grow. In a 6' 11 tent with the exauhst in side and hanging that only gave me a little over 4 feet of grow room to play with. My last grow if you saw my diary, anyone could tell I was struggling to keep the buds off the lights. No good, Since space was such an issue I was running my carbon filter inside on the ground but It really needed to be up sucking the heat out not shooting the cool out. With that setup I was sucking air through the filter and pushing it out the tent at a bottom exhaust hole cold out. Wasn't doing me any good for my heat. I was hitting temps of up to 85 degrees. I bought a portable AC unit and have been running it in the grow room to try and keep temps below 85 and I have had to lower the power on my lights during grow also not ideal.. With that said a friend of mine MoonyGrows (Check out his diary) took the time to look at my issue send me a picture of my grow tent setup with detailed instructions on how to suck the air out from the top but putting my filter and fan on top of my tent so no room issue and I am sucking the air out from the top where the heat is instead of pushing the air out from the bottom where the cool is... THANK YOU MoonyGrows For taking the time to help me get this straightened out.. Now I have room and I have the exhausts working right and now my temps with everything at 100% are topping out at 80 this dropped the temp by 5 + degrees at 100% max.
T-2 days until Start of Germination
Prepped my seed tray with humidity dome
Prepped my Rapid Rooter plugs. I Used RO water, and I added a few drops of Hydrogen peroxide to Oxygenate the water. I then PH balanced between 5.7-6.0 the same that they will be getting in the Cloning Machine and when they get to thier final grow pod. I perfere the 5.8x range and I hit 5.84 for these rapid rooters. If you want to see a complete video on the process HowWeedGrow has an amzing video that shows step by step how to do it and explains it better than I ever could including how to plant the seeds. Which I will cover when I get to that step on Wed. https://www.howweedgrow.com/how-germinate-weed-seeds-cannabis-rapid-rooters/
1/31/2023
T-1 day until Germination Start
All set and ready have my Rapid Rooter plugs ready to go have my seeds out.. Have my seed tray warming up tonight. Tomorrow morning right into the Rapid Rooter then strait into the tray. I will spray the dome to start the humidity in there.
2/1/2023
Germination Day!!
Let the games begin!
0600am Put the seeds into the Root Riots. And then put the seeded Root Riots into their first home the Seed tray. I have them under the light 24/7. Sprayed the dome
7:30pm Sprayed the Dome to keep humidity going on the dome.
2/2/2023
Day 1 of Germination
Sprayed the Dome in the morning
Sprayed the Dome in the evening
2/3/2023
Day 2 of Germination
Roots are starting to come out the bottom of the root riot plugs and the heads are slowly popping out of Number 4 just below the surface.
Afternoon- Number 4 has popped up
Evening- Number 3 has popped up as well. Happy Dance!!
2/4/2023
Day 3 - Germination
Surprise Surprise Surprise- all 4 have now poked their heads up.. Happy day!! 100% Germination succeeded.
Now major milestone to track is how many are female and how many are male.
I will take look at the roots this afternoon/evening and see if they have enough root to go into the cloning machine for the next 7 days before they go into their Hydro Pods.
Day 3 - Germination - Evening..
Roots looked good and they were tall enough to make it into the cloning machine.
Now that they are all in the cloning machine I have switched the lighting to veg state 18 on 6 off.
2/5/2023
Day 4 - Germination - Morning
All the Ladies (fingers crossed) looking great stretching nicely and look nice and green, Photo synthesis underway....
UPDATE!! After a very interesting POD cast on FSTS by Dr. Bruce Bugsbee from Utah University, I have shifted my lighting to 24 hours on through seedling and then I am going to shift to 20 hours on the rest of Veg.
2/6/2023
Day 5 - Germination
While Checking on my conditions inside the new tent last night, I found that the Humidity was down to 39 Percent. I added an AquaOasis Cool Mist Humidifier, the reason I selected this humidifier is that I needed one that could be turned on and off utilizing my Inkbird Humidity Controller IHC200 that I have my Pro Breeze Dehumidifier currently running with.
Root structures are starting to get there about 1/4 of an inch.
2/7/2023
Day 6 - Germination
Everything seems on track more roots poking out of each today. They are each getting a little taller as well.
Checked in the evening and number 3 was drooping the Root riot plug on the bottome was dry and the roots were not in the water yet. I raised the water just enough that the longest root that was sticking out is now hitting the water.
2/8/2023
Day 7 - Germination
Everything looked good while checking in on them this morning number 3 is now full up and no droop again.
2/9/2023
Day 8 - Germination
T-2 days until Plant into Forever Pods and we start week 1 of Veg .. :-)
Surprising thing to me is that number 1 and 2 were later in popping then 3 and 4 but the roots are growing longer in 1 and 2.
2/10/2023
Day 9 - Germination
Number 1 and Number 2 are definitely ready for transplant today.. Based on how they were yesterday and where they are today I am hoping by tomorrow 3 and 4 are ready. Today they look to me where 1 and 2 did yesterday.. I really hope 3 and 4 catch up by tomorrow since..
T-1 day until transplant to new/ final home for grow.
Need the roots long enough to have some clay down in the basket to keep the root riot out of the water and only roots in the water..
2/11/2023
Day 10 - Germination
Today they got placed in thier forever Home, 7 days from Sprout and 7 days until Week 1 Start.
PPM- 180 this is water out of the Tap
Temp Water: 70.7
Temp Tent: 77
Humidity: 40% I have a humidifier going 24/7 to try and bring this up.. I also have Humidity Domes on each plant.
2/12/2023
Day 11 - Germination
Sprayed the domes, all are looking good.. Nothing much to do at this phase but Keep monitoring the PH level in the system and making sure they have a comfortable home.
T-6 days until Week 1 start
2/13/2023
Day 12 - Germination
Sprayed the domes, They were looking a little yellow today so I moved the light down to assist. Nothing much to do at this phase but Keep monitoring the PH level in the system and making sure they have a comfortable home.
T-5 days until Week 1 start
2/14/2023
Day 13 - Germination
Sprayed the domes, They were looking a little Florissant yellow today, with what looks like slight burn on the tips, I talked with a fellow grower and we agreed that It was probably that I was drowning them, Yes you can drown you plants even in Hydro, but only early on.. :-) It usually happens with the water being too high, which soaks not only the roots but the medium (root Riot plug in this case). I lowered the water from touching the bottom of the pot to about 1" away. This will probably take 3-4 days to resolve. I will continue my daily monitoring.
T-4 days until Week 1 start
2/15/2023
Day 14 - Germination
Sprayed the domes, continue my daily monitoring they look a little darker green instead of lime green now that I lowered the water levels in the system, so I think that I might have resolved the issue but it will take a few days for recovery to happen.
T-3 days until Week 1 start
2/16/2023
Day 15 - Germination
I looked in on them this morning, 3 and 4 look like they are doing well and recovering nicely. Number 1 not so much it has brown spots on the leaves, this very well can still be a side effect of the overwatering but I decide to go ahead and add Nutes earlier than I was planning just incase. I was going to wait until Saturday but I think intervention is necessary now especially after drowning them early on.
I added 1/2 what I am planning on adding for week 1 start. I also think I am going to adjust my chart to add 1/2 2 days after plant from now on. I don't think it would hurt it to have some Nutes to pull from.
.25ml/Gal Calmag = 12.5ml
1ml/gal GH FloraMicro= 50ml
1ml/gal GH FloraGro = 50ml
1ml/gal GH FloraBloom = 50ml
T-2 days until Week 1 start = I will drain the system and start it over on Saturday with Week 1 Nutes.
2/17/2023
Day 16- Germination
I didn't even want to post today after looking in on them this morning, 3 of the 4 are now showing signs of dronwing.. Brown spots on the leaves, the water levels were still too high.. I drained about another inch out of the tanks.. Will see how quick they recover.. I start week 1 tomorrow and will have to ensure my water levels are at least 1" away from the basket on this round.

Likes
3
Share


@CalGonJim
Follow
4/28 MONDAY 330am.... Looking great. All plants growing in an almost perfect square
4/29 3am looking good
5/1 4am Doing great!!!! Did you know that NOT burning your plants makes them grow better???...boring. I better add TONS of supplements.
5/2 12am 8ml Con. bloom. a little left over Grow nutes. 430 am 7Z is strong enough to trim off bottom buds. I usually leave those as early samples not this time. Concentrate all power to 4 solid easy to trim, dry and store.
They are ALL STRONG.....WOW the flowers are FAST they really live up to the name and they JUST started they are going to be great if I dont burn them!!!! Great luck with them all!!!!!! 2 pm. Defoliation and bud trimming worked great. 7Z has3 colas that are VERY big and one that is just ok. Im going to think about this for a day or so, BUT I MIGHT chop to a 3 cola grow, get rid of the smaller one and see if that will bring THAT potential energy to the remaining strong colas?????🚨
Likes
31
Share


@MMSC16
Follow
Nov 13 - Day 94 - More bulking up, girls are holding water longer. Watered Older plant at 7.45PM. Started defoliating withered leaves with trichomes, I'm keeping those for now, and will combine with bubble hash trim.
Nov 14 - Day 95 - Both pots aren't super light so I'll wait until tomorrow and water both at the same time. Starting to think about drying and harvest, I suspect there to be a fortnight between each harvest - but unsure if I can afford the tent space with next run growing. I think I'll water either as lights turn off (if humidity wont rise) or first thing on Nov 15.
Nov 14 - Trichomes are milky with the speckle of clear and amber. Lets hope the lagging cola fattens up in the week to come.
Nov 14 - WATERED Younger plant at 10.30PM.
Nov 15 - Watered Older plant at 3PM
Nov 16 - Watered Younger plant at 5PM
Nov 17 - Woke up to 80F. Likely at higher temp for 1 hour before noticing. Defoliated a few leaves, including one or two with trichomes, of which I've saved.
Nov 18 - Watered Older plant at 6AM. Younger plant pot is light at lights off- will water first thing in the morning. Also removed dead tips and accidentally chopped a healthy fan leaf. I was hoping to chop today, but it might be another week before the younger plant is ready.
Nov 19 - DAY 100 - Watered Younger plant at 10.30AM. Trichomes are developing nicely, I suspect 1 more week with younger plant which makes me wonder when to chop older plant.
Processing
Likes
5
Share


@Mr_nugs_lover_David
Follow
She looks perfectly healthy and strong, she's gonna be a banger for sure, I end up loving each and every strain that I grow from Gea seeds and I just can't wait to work with this beautiful amnesia strain called "amnesia Pro" let's see what happens guys! ✌️👨🌾💎💚


Likes
21
Share

@MadeInGermany
Follow
Info:
Unfortunately, I had to find out that my account is used for fake pages in social media.
I am only active here on growdiaries.
I am not on facebook instagram twitter etc All accounts except this one are fake.
Have fun with the update.
Flowering day 54
since time change
to 12/12.
Hey everyone ☺️.
We are slowly getting closer to the harvest 😍.
You can see that the lady sucks all her energy out of the leaves and passes it on to the flowers.
The buds smell very tasty 😍.
It should be ready to harvest in the next 17 - 25 days.
But of course we will be observing this closely with the microscope from next week.
Otherwise the tent was cleaned as usual and the humidifier refilled.
I wish you a lot of fun with the update. Stay healthy and let it grow 🙏🏻
You can buy this Strain at
https://www.amsterdamgenetics.com/product/kosher-tangie-kush/
Type:
Kosher Tangie Kush
☝️🏼
Genetics:
Kosher Kush
X
Tangie
👍
Vega lamp:
2 x Todogrow Led
Quantum Board 100 W
💡
Bloom Lamp :
2 x Todogrow Led
Cxb 3590 COB 3500 K 205W
💡💡☝️🏼
Soil :
Canna Coco Professional +
☝️🏼
Fertilizer:
Green House Powder Feeding
☝️🏼🌱
Water:
Osmosis water mixed with normal water (24 hours stale that the chlorine evaporates) to 0.2 EC. Add Cal / Mag to 0.4 Ec Ph with Organic Ph - to 5.5 - 5.8 .
Likes
44
Share


@Aedaone
Follow
The temperatures, humidity, and watering volume(if measured) in grow conditions are all averaged for the week. The pH is soil pH. Any watering done by me is well water which is 7.6 pH and 50° F. Any listed nutrients are ml/gallon of soil.
Day 1 we had high temperatures of 88°F, clear skies, and lots of sunshine. I watered 2-2.5 gallons per pot, from the water hose.
Day 2 we had a high temperature of 90 with lots of sunshine. I gave them 2.5 gallons of water per pot.
Day 3 we had lots of sunshine and a high temperature of 91°F. I watered these about 2-2.5 gallons twice today.
Day 4 we had high temperature of 86°F. I watered about 2.5 gallons per pot.
Day 5 we had mostly sunny skies with a high temperature of 88°F. I watered about 2.5 gallons from the water hose. I added 50ml of Ferrous Sulfate top dressed to each pot. I added 50 ml of blood meal top dressed around the pot.
Day 6 we had a high temperature of 88°F with mostly sunny skies. I watered 2-2.5 gallons once today.
Day 7 we had high temperature of 89 with mostly sunny skies. I watered 2-2.5 gallons per pot.
This week was a success. These girls got a boost of nitrogen they needed. I was really focusing on the lemons and cheesecake, and noticed their hunger late. I'll be adding more nitrogen next week.
Likes
3
Share


@HookahCli
Follow
d103
Han crecido modo bestia, la melon gum le tendré que aplicar un poco mas de LST, no cabe dentro, probablemente le csmbie el sitio por la Mimosa Evo, que no es tan grande, esto tiene muy buena pinta, LSD tiene las ramas de la parte trasera bastante más pequeñas que la parte delantera, pero esta bien grandota.
d106
se les han hecho un poco de LST para que no crezcan hacia arriba y hagan más desarrollo lateral.


Likes
3
Share


@Akil21
Follow
About 3 week into flower packing in tons of frost it amazing smooth sailing can wait to see this finished product

Likes
8
Share


@Abreuvoir
Follow
Day 35-42
Plants are making a nice comeback (d36)
Some minor defoliation around the top was done during the last few days (d32-36)
I plan on increasing DLI to 40+ during next week.
Some defoliation + LST/leaf tucking + pinching (d38)
#3 has comeback nicely and has a unique phenotype compared to the 3 others (d38)
#4 has slowed down a little bit. The soil was more dry so maybe a lack of water/nutes intake (d38)
Likes
4
Share

@DogDoctorOfficial
Follow
🍰 Lava Cake – Week 8 (4th Week Flower) | The Bulking Phase
The fourth week of flower has arrived, and both Lava Cakes are showing their full potential. Their structure is strong, pistils are snow-white and thick, and bud sites are stacking beautifully. This is the week where the promise of flowers begins to turn into visible production, every day, you can almost see them swelling.
⸻
🔬 What’s Happening in Week 4 Flower
By now, stretch is nearly finished. The plants are redirecting their energy:
• From vertical growth ➝ into flower bulk.
• From nitrogen demand ➝ into phosphorus & potassium demand.
• From building structure ➝ into packing density.
This transition is crucial: the roots, the soil microbiology, and the nutrient profile all work together to feed flowers instead of stems and leaves.
What we see this week:
• Thick, healthy pistils at every site.
• Calyx swelling beginning, the first signs of true bud stacking.
• Leaves still dark and strong — proof of balanced nutrition.
• No stress, no burn, no deficiencies.
⸻
🥤 Feeding Strategy – Why Boosters Matter Now
This week, we removed the Aptus All-in-One Liquid, despite it being in the photo. The reason: the soil’s super soil base + slow-release pellets still carry enough NPK to support the girls. Overfeeding at this stage could risk tip burn or nutrient lockout — and we want the roots to stay clean and active.
Instead, the focus is on precision boosters:
Recipe (per L water):
• Aptus Regulator – 0.15 ml → strengthens cell walls, stress protection, and nutrient uptake efficiency.
• Aptus CalMag Boost – 0.25 ml → keeps calcium steady (critical for bud structure) and magnesium strong (photosynthesis & chlorophyll).
• Plagron Power Buds – 1 ml → directs plant energy into flower production.
• Plagron Sugar Royal – 1 ml → provides organic nitrogen + enzymes to stimulate terpene development.
• Plagron Green Sensation – 1 ml → PK booster + biostimulant, promoting dense, resin-rich flowers.
Why this mix?
• Because the NPK in soil is still sufficient → boosters fill in the extra needs of flowering without overwhelming the root zone.
• Because boosters provide specialized roles → each product targets a specific physiological process.
• Because balance prevents problems → overdoing NPK at week 4 could backfire, while focused boosters guide the plants safely into mid-bloom.
⸻
🌡️ Environmental Notes
• Temps: Still ~31–34°C until AC arrives. High, but plants are adapting.
• Humidity: 55–60%, VPD ~1.8–2.0 kPa — slightly high, but still manageable.
• Watering Rhythm: Once substrate moisture falls near 19–20%, measured by TrolMaster WCS substrate sensor. This ensures roots get oxygen before each feed.
Even under warm conditions, the plants are drinking heavily — proving they are metabolically active and thriving.
⸻
🌸 What to Expect Next Week (Week 5 Flower)
✅ Expect:
• Noticeable bulking → flowers will become rounder, denser, and begin to “stack.”
• More pistils → a full carpet of white hairs covering colas.
• Aroma development → the first hints of Lava Cake’s dessert-like terpene profile may start releasing.
❌ Not to Expect (yet):
• Full frost coverage → heavy trichome production usually comes weeks 5–7.
• Final density → buds will continue swelling for several weeks, so patience is key.
⸻
✨ Closing Thoughts
Week 4 flower is the foundation of yield. It’s when the plants finish their stretch, define their bud sites, and begin to convert light, water, and nutrients into the weight and density we harvest later.
Our Lava Cakes are in perfect rhythm:
• Strong genetics, showing symmetrical growth.
• Balanced feeding, keeping roots clean and buds fueled.
• Stable environment, with monitoring from TrolMaster guiding every adjustment.
From here forward, every day brings visible progress. The journey of seeds to now feels like preparation — this is the beginning of the true show.
🔬 Science Spotlight – The Unsung Heroes: Calcium & Magnesium
Many growers focus on NPK during flower, but two “quiet players” — calcium (Ca) and magnesium (Mg) — are just as vital to ensure flowers bulk properly.
🌿 Calcium (Ca):
• Strengthens cell walls, making flowers denser and less prone to collapse.
• Improves nutrient transport, ensuring phosphorus and potassium (the bloom drivers) actually reach the buds.
• Helps roots resist stress in warm environments (like our 31–34°C room).
🌿 Magnesium (Mg):
• The central atom in chlorophyll → without magnesium, photosynthesis collapses.
• Supports enzyme activity, converting sugars into energy for bud building.
• Directly influences terpene production, giving flowers their aroma and flavor.
Why CalMag Boost now?
• In soil mixes, calcium can sometimes get “locked up” as the pH fluctuates.
• With daily watering at slightly acidic pH (5.8–6.0), we guarantee Ca and Mg are immediately available.
• This ensures strong, vibrant leaves → which means more energy for flower sites.
In short: while NPK builds the skeleton of yield, calcium and magnesium are the glue and spark that hold it all together. Skipping them would weaken the entire flowering process.
✨ Grower’s Analogy:
Think of your plant like a construction site:
• NPK are the bricks and beams (the main structure).
• Calcium is the cement holding every wall together. Without it, the structure would crumble.
• Magnesium is the spark plug in the engine — it makes photosynthesis “run” and fuels the work crews building the flowers.
No cement, no structure. No spark plug, no engine. That’s why CalMag support is never optional — especially in flower when the demand skyrockets. 🌸
📲 Don’t forget to Subscribe and follow me on Instagram and YouTube @DogDoctorOfficial for exclusive content, real-time updates, and behind-the-scenes magic. We’ve got so much more coming, including transplanting and all the amazing techniques that go along with it. You won’t want to miss it.
• GrowDiaries Journal: https://growdiaries.woodroom.tel/grower/dogdoctorofficial
• Instagram: https://www.instagram.com/dogdoctorofficial/ • YouTube: https://www.youtube.com/@dogdoctorofficial
⸻
Explore the Gear that Powers My Grow
If you’re curious about the tech I’m using, check out these links:
• Genetics, gear, nutrients, and more – Zamnesia: https://www.zamnesia.com/
• Environmental control & automation – TrolMaster: https://www.trolmaster.eu/
• Advanced LED lighting – Future of Grow: https://www.futureofgrow.com/
• Root and growth nutrition – Aptus Holland: https://aptus-holland.com/
• Nutrient systems & boosters – Plagron: https://plagron.com/en/
• Soil & substrate excellence – PRO-MIX BX: https://www.pthorticulture.com/en-us/products/pro-mix-bx-mycorrhizae
• Curing and storage – Grove Bags: https://grovebags.com/
⸻
We’ve got much more coming as we move through the grow cycles. Trust me, you won’t want to miss the next steps, let’s push the boundaries of indoor horticulture together!
As always, this is shared for educational purposes, aiming to spread understanding and appreciation for this plant. Let’s celebrate it responsibly and continue to learn and grow together.
With true love comes happiness. Always believe in yourself, and always do things expecting nothing and with an open heart. Be a giver, and the universe will give back in ways you could never imagine.
💚 Growers love to all 💚


