By continuing to use the website or clicking Accept you consent to our cookies and personal data policy and confirm that you are at least 18 year old. For details please see Privacy Policy and Terms
Accept
Likes
Comments
Share


@BudBoutique
Follow
! this is my current status, gonna upload my last veg weeks within the next week - got a bit busy around Spannabis - thank you for your understanding! 💚
Welcome to Bud Boutique Grow Diary - really appreciate all your love and support :)
Dont forget to check out my other current grows!
🗓️ This Week:
after 48 hours of complete darkness (important for seedlings to make sure all plants switch into flower same time), I finally switched my lights to the 12/12 schedule and sent my ladies into the flower.
- This one Phenos good in bud sights production but still cant catch up with the others, so I raised to pot by 10-20cm depends how it will move on
- bud besides this more than healthy and going well
- Day 3: Foliar spray with APTUS Regulator and APTUS Nutrispray to give them extra micronutrients and give them a little shell for protection.
! always use APTUS Regulator first and mix well with your water before adding any other nutrients for Feeding or Foliar!
Thank you for still staying with me 💚
___________________________________________
--- 🌱 Strain (Sponsor) 🌱 ---
🏷️ Big Band by Kannabia Seed Company
https://www.kannabia.com/en/feminized-cannabis-seeds/big-band
--- 🥗 Nutrients and Feeding (sponsored by APTUS: APTUS Ambassador) ---
🍸 APTUS: full nutrient schedule extreme
-- Regulator, N-Boost, P-Boost, CaMg-Boost, K-Boost, Allin1 Liquid, Startbooster, Topbooster, Enzym+ every feeding
-- Fulvic-Blast, NutriSpray as Foliar each once a week
🔗 https://aptus-holland.com/
--- ♻️ Grow Control (Sponsor) ---
TROLMASTER: TENT-X + LM14 Light Adapter to dim/sunrise/sunset lights + Temp & rH Sensor all remote on App
🔗 https://www.trolmaster.eu/
--- 🏭 Grow Setup ---
💡LUMATEK Zeus Pro 600
* 🏠🌿 Indoor: Homebox 120x120x200cm (4x4)
* 📐🌀 PrimaKlima exhausting Fan 1180m3/h (running on 60-80%)
* 🌀 Can Light Filter 800m3/h & 1x Fanbox 1x Dyson fan for Air circulation
🔗 https://lumatek-lighting.com/zeus-600w-pro-29/
🔗 https://primaklima.com/de/shop/ventilatoren-de/ec-ventilatoren/pk160ec-tc/
🔗 https://canfilters.com/products/filters/
All Likes and comments are highly appreciated!!!
👨🌾 don't forget to check out my Instagram for daily educational content: budboutiquee
- Bud Boutique

Processing
Likes
84
Share


@Beans
Follow
Get me out of this tiny tent! I'm like 10lbs of shit in a 5lb bag.. and I got a funny feeling in my special parts. I just wanna bud repeatedly and rub pollen all over them. I got major blue buds and need to come to fruition asap.

Likes
9
Share


@Headies
Follow
This is the beginning of each week. So I flushed them and switched nutrients. They were mag deficient, nitro toxic. Not PH actually. I'm adding co2 next week after I seal the room. I think I need to back the PAR down to 800 but they are still alive and it's over half way done.
How any more weeks? I thought this was a 65 day auto. Hydro in a 5 gallon pot could add up to three weeks I heard with Autos. could these go 12 weeks total?

Likes
19
Share


@adam_pawloski87
Follow
Let’s go Day 85 from seed !! This has been another great week ,ladies are coming close to the finish line an looking so beautiful!! This week we will continue flushing on these 3 ladies an jump em into there 48 hrs of darkness on Friday or Saturday will see ! Let’s have another great week ,, peace love an positive vibes to all y’all Keep them eyes peeled for next weeks update !! Cheers 😶🌫️💨💨💨💨💨🤙🏻

Likes
16
Share


@MrGoonai
Follow
I didn't use the Bio-Grow and Bio-Bloom the whole week because of slight nutrient burn in the tips of the leaves on the upper part of the plant. I asked on a forum (grower.ch) what it might be, and they said it probably is too much potassium. I really do hope it will get better with time, but right now it has gotten a little bit worse, although it still is a minor inconvenience.
I really thought that it is very hard to feed too many nutrients with biological fertilizer, but I had not thought about the soil. It seems that the prefertilized soil must be the problem here. Next week, I'll use just the Bio-Bloom at 50% of the recommendation and won't use Bio-Grow anymore. I do hope that it won't get worse. She is in bloom and needs nutrients. There seems to be a little lack of them since one leaf on the bottom is turning slightly yellow, so she is redistributing nutrients.
I need to look for new soil, and also I'm going to change my approach to fertilizing in the upcoming grow.
Other than that, she is now too tall with her 118 cm to keep her on my window, so she hasn't and won't see the real sun again. She got a lot more buds this week, and I really enjoy looking at her beautiful flowers. She has a very nice and sweet smell too.
I am really thinking about setting up the grow tent in my apartment and not in my basement, just to take a look at how the plants are doing. I love plants, always have, but cannabis is just the most fascinating one.


Likes
43
Share


@UnorthadoxDude
Follow
Hello and welcome to week 7 beginning for Nesia, the largest and most advanced 6 week old plant I have ever grown.
I update daily so week 6 is now complete. Please do check it out!
I have added some comparisons shots of Karen, the oldest girl of this [G2] series to show just how impressive Nesia is. Nesia is 25 days younger than Karen and she is already a larger plant. This diary is not very popular or comment filled right now, but as this grow progresses I really think it's going to gain some attention. Nesia is going to be big.
Day 44: Nesia stretching fast now.
Day 45: Flowering is going well. I have adjusted the timer such that the main tent is now getting 20/4 upped from 18/6. After monitoring DLI at 18/6 for a week I am unhappy with the overall level but because of the varying heights of the plants I am limited in what I can do in adjusting the light height. Some areas were only getting 20 DLI. So I have rearranged to have the taller plants on the edges and the lowest in the middle and doing it this way all plants are getting between 35 and 50 DLI at 20/4 - although one or two cola tips here and there are getting 55. Will monitor for a week.
Day 46: Fertigated 5l
Day 47: Nesia is really moving into flower strongly now. Pistil development has started proper, stretching rapidly.
Day 49: Nesia starting to pose me a challenge. She is big. Now by far the largest plant. She has reached 50cm height and 70cm across.
I will add proper photos later and do a week summary.
Day 49: Nesia is stretching really fast now. I hope she doesn't stretch much more but I fear we're only halfway done. She's way bigger than Karen now. Taller, wider. Fertigated 5l
End of week summary... well what can I say Nesia has now surpassed Karen (25 days older) in every size and growth metric. She is following exactly the same pattern except without all the problems. I think she still has 2 weeks of stretching to go, on that basis I am expecting her to grow upto 25cm in the next week and the same again the week after - so I think Nesia is going to end up being about 1m tall. Honestly I hope not though, but let us see.


Likes
3
Share


@factoryofweed
Follow
Buenas!
Esta semana se encuentran ya terminadas de estirar y produciendo gran cantidad de pistilos, enseguida comenzaran a engordar y rellenar las paredes celulares.
Podemos observar los tonos purpuras que estan saliendo de nuestras variedades!!
Ahorraremos para un LED que pueda ayudarnos en este armario tan bonito ya que con sodio g/w es un poco escaso hoy en dia.
Likes
38
Share


@Cariboo_OG
Follow
Utopia Haze is a rare heavily sativa dominant hybrid (90% sativa/10% indica) strain created through back crossing Brazilian Sativa strains. This tasty little bud took home 1st Place for Best Sativa in the 2008 High Times’ Cannabis Cup and for good reason – with its potent 18-22% average THC level and long lasting cerebral effects, Utopia Haze is one powerhouse smoke. The Utopia Haze high comes on soon after you finish your first toke, hitting you with a strong cerebral lift that infuses you with a sense of hazy relaxation.
Type: Feminised/Photoperiod
Cultivation: Indoor/Outdoor
Flowering Time (days): 70-75
Indoor Yield (g): Up to 650
Feminised Outdoor Harvest Month: October
Feminised Outdoor Harvest Month Week: 3rd-4th week
Aroma: Citrus, Woody, Pungent, Mint
Effect: Cerebral Lift, Hazy Relaxation, Sleepy
Welcome Everyone to the Final Entry of my Utopia Haze Grow !
There is so much to discuss ! I have been extremely busy as of late trying to get this Harvest together, but i am happy to have it here for you now !
I Seriously under estimated the amount of time, help from others, and my own necessary skills to pull this off.. and i still kind of screwed it up lol !
But its worth noting i have never actually done this before and trying to document it during....was extremely hard.
It is next to impossible to work an iPhone with rubber gloves on !
First I want to discuss everything step by step so before you jump straight into the comments on how the end product is so small in "quantity"
Rest assured i am happy with its"quality"...and thats all that matters to me because Life is a journey not a destination! and i have learned so much from this grow that I couldn't be any happy even if i messed some things up :)
But at the very least I hope you read through this entry in its entirety with an open mind and focus more on the process, rather than just the outcome!
I ran out of Ice & i was only able to wash three times..(normally I've heard you should go sometimes 5-6 washes)
Preparation is Key & things will be much better next round :)
Photos 1-22
These are pretty self explanatory but for those of you just tuning in now.. this is what happens to a very happy plant when you don't have the necessary tools to monitor key components of growing cannabis.. Ph, as well as EC levels play a very key role in the outcome of your grow lol that being said I was just able to save this plant by purchasing both tools but that doesn't mean the plant didn't suffer because of the prior events.. This was a Huge reason behind me choosing to turn this harvest into what i would consider
"Solventless Hash Rosin" from "Ice water extracted Bubble hash".
Pictures 23
The idea here is the process of using "fresh Frozen Cannabis" this has been discussed many a time online on such sites as instagram and here on grow diaries as well.. I personally have Never tried the process so i decided to try it out and make a judgement for myself..
Video 24
The Cannabis has now been in the freezer for 72 hours making it very well frozen.. as you can tell i struggled getting it all into the 25u Screen Wash Bag. One thing of note i would do differently is i will de-stem my next batch as i also believe this played a part in the amount of plant matter that escaped through the sieves.
Photo/Video's 25-28
The idea here is "ice water Seiving" & especially with the bags that I am using here that are only have screen material on the bottom portion of the bag it is very important to have spaces in-between the screens to allow the water to pass directly through the screens into the bottom bucket with the least amount of resistance.. because the hash is so extremely temperature dependant if it gets warm on the side of the bag.. it will stick there and not make it to the bottom to become use able product..
29
You do not need to use as much Ice as i used here lol... the idea is to keep everything very cold..i certainly achieved that but at the sacrifice of using so much that i ended up grinding product and producing "contaminants" but in the end they are just plant matter that i would be smoking when i rolled up my joint either way so.. I'm not super disappointed..
But it should be noted that what you want to achieve here is a Layering effect where you have the wash bag between two small layers of ice while the "water current" washes the Trichomes away allowing them to be separated by the screens setup below :)
Before Starting the machine you should allow some time (i.e.;10-12minutes pre soak to allow the product to become saturated) before the first cycle.
By video 32 I have just ran out of ice lol..
Video 33-34
Here I have a tip for you.. to separate the screens that you sieve through.. cut 5 gallon buckets to stretch them across nice and tight.. it'll make scooping your Bubble that much easier ! i learned this from the many "Frenchy" videos I have watched :)
Picture 35
Here in lays the problem for most people.. drying your hash without loosing vast amounts of "Terpenes" whilst also stay ever vigilant against mold !
Thanks to all those videos I've watched on youtube.. id like to think this was one of my most successful parts of this process..
Things to Note; Terpenes start to seriously evaporate at temperatures 68F or 20C
you need to stay as cold as possible whilst bringing the Relative Humidity in the space down into the 40-30% to stay away from that nasty mold !
I used my cold storage room in the basement.. with a dehumidifier running to keep the space at 45% RH & staying at a constant 15c.
All while spreading the hash as thin as possible across parchment paper, on top of the white screens with a fan moving air across both sides of the paper.
Pictures 36-38
These are some macros i took in the middle of my drying session I fell in love with the colour.
Yes i know the black spots are plant material but they will get caught when i bag the hash & squish the oil out.
Thing to Note; at this stage it is important to ensure you 'micro plane" the hash down as fine as you can whilst staying weary of the temperature... any "chunks" will hold pockets of moisture.. that lead to potential problems..ie; mold ...
Picture/Video 39-41
Successfully planed bubble hash ready to be bagged and Squished !
Picture 42
Ive decided to follow Pedro.. from Pedros Grow Room and double bag to be on the safe side so i don't have any blow outs.
So thats One 25u bag inside one 160u bag ! :)
Pictures 43
This is almost 3 grams of the bubble hash from above, already melting in the bag.. this is where i ran into trouble again lol things started getting to warm in the house and i was only able to get one of the three squish's i did on video :( things started getting sticky.
Picture 44
This is basically just a photo of the equipment I'm using; 3x5 LowTemp Cage in the frame I built myself, with a 20Ton bottle jack.
Something to note here is this is an older Lowtemp model with only a single heating zone which is which i have it closed here heating Both sides of the press :)
As well as the importance of having adequate pressure on your plates.. my rig is very overkill for the size of hash bags..lol
Video 45
Here is the lovely press video.. its didn't quite work the way i wanted either lol my directional folding wasn't quite tight enough for a big "drip" :)
&the Press was set to 65°c
Photo's 46-50 are pretty self explanatory :) I had a blow out.. but still managed to pull an 80% return from the hash once squished...& yes it tasted amazing :)
Was it worth it in the end... that could be debated.. for some..i understand..its not your thing, but for those of us that are interested in making our own concentrates.. free from Solvents...
I wouldn't make it any other way :)
If even ONE of you reading this diary finds it helpful to reference for ANYTHING.....even if its "what not to do" ill consider it a success !
Thanks again for tagging along on this garden adventure.. its been one heck of a journey !
Much Love from B.C. Canada,
Until Next time,
Cariboo


Likes
33
Share


@cheetah844
Follow
Sadly OG Kush didn't survive the kitty attack ⚰️
I did put in an extra REG Blueberry OG when I first started all of the seeds so I will replace this journal & updates with that 2nd Blueberry OG. I'll update with that starting next week, it is the same age as all these other plants.
I just have a feeling it's going to be a male though, it's running for the sky very early on versus the other Blueberry OG.
Likes
13
Share


@Robeeriegenetics
Follow
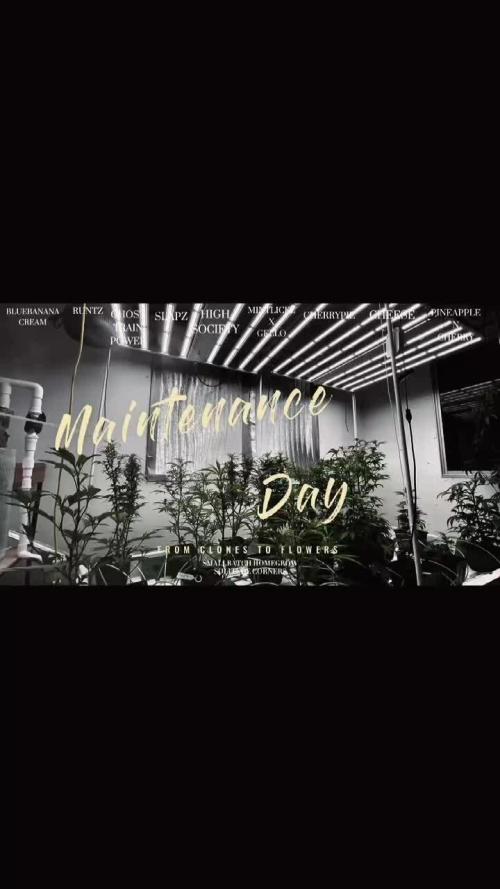
Dropped light hours down to 16 . Topped off nutrient solution with 5.0 ph evened out .removed none chosen phenos to be flowered in separate room no longer tracking those we will only follow the chosen mothers clones i cut clones today as well had the lady friend clean floor with bleach and dawn put clones in ez cloner 32 systems
Likes
69
Share


@Seed2WeedYT
Follow
1/17 - Entered Week 3 Today, Everything is going good so far. Just have been watering with fish tank water only. I have been adjusting plant ties so the light penetrates lower branches, in hopes of more tops. I have also been leaf tucking and adjusting lower branches over bigger leaves. #1 is growing at a pretty fast pace, faster then others, and is showing signs of multiple branches coming to top, #2 is doing good, I have been trying to get more light to lower branches, hopefully in the next few days will see progress, but overall it is growing at a good rate. #3 is doing alright, its growing at an okay pace, I started LST on it yesterday and have noticed branches emerging. #4 is still quite small, but growing at an alright rate, when it's a little taller will attempt LST. Overall, everything is going great!
1/18 - Yesterday I discovered white specks on leaves, did some research, one thing I found that could've been issue was my humidifier running tap water, I immediately cleaned out humidifier and filled with distilled water. After doing that did further inspection I saw a gnat in soil, only seen one so I killed him, turned off lights and fans, sprayed neem oil spray on soil and over plants very lightly, turned on fans , let dry for about 15mins and turned light back on. I did some research on neem oil and what I understood is that it's okay to use in veg but not quite flowering. Hoping this will be the last time using it, going to get sticky traps for future. Going to keep an eye on white specs and make sure they don't get worse, some wiped off but others didn't. #1 is starting to show pistil hairs. Everything still the same, added a very small amount of calmag to fish tank water in jug.
1/19 - Not to much to update , just have been filling humidifier, and watering. Tent is staying 80 degrees and 70% humidity VPD around .9-1. The white specks on leaves aren't going anywhere, but I don't notice any additional specks.
1/20 - Mid-day - Last night around midnight I started LST with #4, her lower branches looked like they had some growth so hopefully we get some good results with it. I've been adjusting canopy, bringing branches to open spots. Watered full pot today with just fish tank water, pot was a bit dry. Ordered Branch benders and Trellis net last night hopefully it comes just in time.
1/21 - Received Trellis net today, Going to attempt SCROG, This will be my first time attempting will see what the results will be and if it's helpful, If you have any tips or suggestions let me know. I put around 4inches above canopy's, so hopefully in a few days will get to toggle with branches. Tomorrow, I have adjustable, and 90 degree branch benders coming in, will be testing those out also. Everything is going smoothly so far. Thank you for all the support, and if any questions or suggestions feel free to drop below.
1/23 - Feeling bad that I missed a day of documenting, but did receive LST clips yesterday and I'm absolutely loving them. Even though they are on the cheaper end, they still seem to get the job done. Plants haven't met Trellis net yet, but hopefully in a few days #1 will start getting ready to train on SCROG. I'm very excited for week 4 and really can't wait for what it's going to bring. Also, while writing this, I did have some sad news, While attempting to LST a smaller branch, I accidently got to rough, and it broke off, my first lesson. Since then, I've been being a lot more careful with these girls knowing they are about to enter flower.
Thank you so much for the support, Check out my Instagram for daily uploads, Check Bio 💪 Will follow you back 👊


Likes
10
Share


@PolezGardn
Follow
week two flower everything looks healthy :D
today i defoliated them
i watered them with 1.5l every 48h
the light i use was set to 80% and it hangs 80cm away from the tops

Likes
3
Share


@Barcelona_Farmers710
Follow
Booom! Ya tenemos los cogollos formandose Farmers!! Ya casi no se nota la falta de magnesio por problema con el humidificador pero en breves ya empiezo lo buenoo!😜 mis favoritas las de Barneys Farms!!! espero que os guste farmers buen comienzo de semana!!💚
Likes
Comments
Share


@kissrubb
Follow
me encantaría escuchar sugerencia de mas gente con mas experiencia y consejos, espero os guste y muy buenos humos a todos
Likes
Comments
Share

@SolitudeCorners
Follow
🌿Week 4: Defoliation & SCROG Setup
Week 4 was all about structure and airflow.
The canopy was getting bushy fast, with a ton of inner growth, so we went in for a solid defoliation session across the board. Lower fans, overlapping leaves, and shaded internodes were cleaned up to let light penetrate deeper into the canopy and reduce potential humidity traps.
Right after that, we finally dropped the SCROG net, stretched out gently across the canopy to guide the branches horizontally and prep for flower stacking. Some of these phenos are already reaching for the sky, so the timing felt just right.
Captured a full-time-lapse clip of the defoliation + netting process. It’s super satisfying watching the chaos turn into clean lines. Nature meets intention.
Feed Bloom since 20/6
22/6 Defoliation
🌱 Plant Response:
After defol, they bounced back fast. Tops are perky, leaves are praying, and stretch is continuing in a controlled way. The structure’s more open now — better airflow, better light distribution, better everything.

Likes
3
Share


@CRIPPYGROWS
Follow
Work in progress however I finally was able to get the girls into the drip system. They have recovered nicely from the light burn but unfortunately I lost one of the girls. Now I am working with 4 and so far happy with the results. I am waiting on a better light, I ordered a 720 watt bar style light from Alibaba which will arrive in just a few weeks hopefully before flower. Still need to get the room in order so more to come on improvements. Switched to Gen Hydro Maxi Series just for the simplicity. We will see how this goes.
