


By continuing to use the website or clicking Accept you consent to our cookies and personal data policy and confirm that you are at least 18 year old. For details please see Privacy Policy and Terms
Accept
Likes
Comments
Share


@Allautosallday
Follow
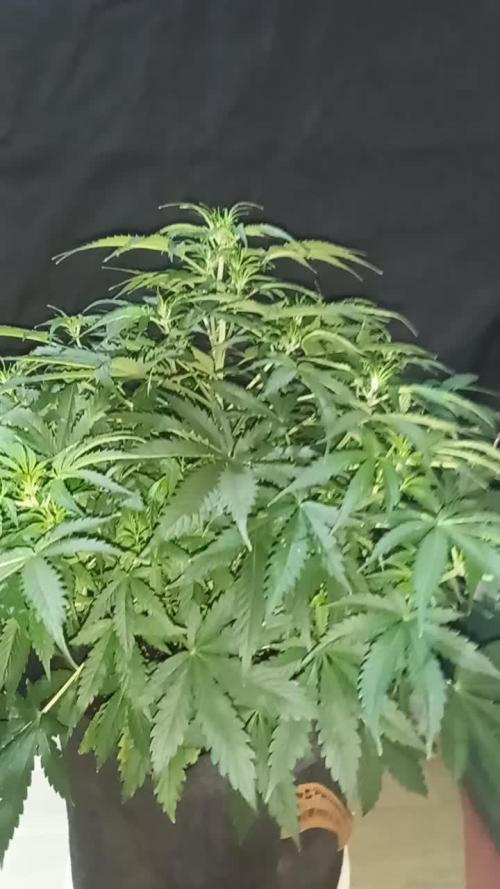
Made up a tea mixture of some locally sourced worm castings with Dr Earth Bud an Bloom booster, an about 2ml of Cal mag. Let that aerate for about 24 hours. Then cut the mix to a 1:1 ratio. I know thats pretty hot but wanted to see what I could start to push. Have a little rusty looking spot on 1 of the plants. Not sure what it is, i'll post some pics an keep you posted. That was week 2 I got fucked up on my photos. These included are weeks 3 an starting 4. Had some weird orange spots on 1 of the 4. Needed up clipping off in defoliation. Did some LST with some old ass plant tape. Hit it with about a 1/4 cup of marine cuisine added to my earthworm casting tea. Fed them on 8-18 watered them about a liter each 8-20. Brewing some more Dr Earth Bud & Bloom, worm castings, an molasses with rain water

Likes
2
Share


@DrWolverine46
Follow
This little lady is growing on track and she seems to be pretty happy. I moved her into a different tent because i was reading that Autos dont do the best until they are flowering in 12/12 of light. Depending how tall she gets i will likely not move her and keep the 18/6 schedule at this time. I am hoping for some better growth in the next few weeks with a closer light and only room for her. Has anyone done autos on a 12/12 schedule? What did you think? Let me know! Hope all is well. Happy growing.
Likes
39
Share


@J_diaz420
Follow
Se hace defoliación extrema 5 días antes del corte para intentar hacer madurar la planta de forma mas pareja.✌️👨🌾🏻

Likes
51
Share


@Prilyfe13
Follow
December 27, 2023 Day 113
Strawberry Gorilla:
Day 3 Curing
I just got my grove bags, so there won't be any burping. 2 weeks of curing time should do it. Maybe 3
Gorilla Cookies:
This lady is nearly done now. I think I started flushing a little late. As in today. The top half of the plant is just about ready for harvest while the lower half still has white pistils. Lots of trichomes, but still not ready yet.
So I removed the wick system and will be top watering Flawless Finish as needed. She my be harvest ready in the next few days. Maybe tomorrow? I don't know.
I have the lights coming in tomorrow, so those should help speed the maturing process along quickly.
Anyway, I'll be harvesting very soon. I think I'll remove some fan leaves before harvest. Just to make trimming gonna little faster and to give more air flow while drying.
It's raining and gross today. Unfortunately, that means the RH in the tent is too high. So I need to keep an eye today. Open the tent up every couple of hours to let any extra moisture out.
Grow System Environment:
Temp: 73.2°
RH: 52.6%
VPD: 1.30 kPa
December 28, 2023
Strawberry Gorilla:
Day 4 Curing
The whole yield is in a quarter pound grove bag now. It's sealed so there's nothing to do but let it cure for the next 4 weeks. I can't wait. This stuff is fire!
Gorilla Cookies:
This lady definitely has a bunch of amber trichomes on the tops, but after further inspection, its more like a quarter of the plant is ready for harvest. Just the tops. So the supplemental lighting may help things move along. I'm not expecting anything of substance, but it will certainly mature faster and I'll be able to harvest sooner.
She got about 1.5 liters of Flawless Finish top feed today. She'll be needing a new top feed every couple of days from now on. I only expect her to last another week. Maybe a little less, but still no fade on this lady. However, her leaves are popping off without any pressure. Just touch and some of them pop right off. Some of them won't even take a pulling or bending. So she's definitely not quite ready yet.
Grow System Environment:
Temp: 74.1°
RH: 55.5%
VPD: 1.25 kPa
It's rainy and humid out here, so the tent is suffering from it. It's not too bad, but it has been hovering over 56% and that's unacceptable. Even with the tent door wide open, it only goes down to around 52%. It shouldn't last more than a few more hours. We just need the temp to drop a bit and everything will level out. At least down to around 51% for now. We have a could front coming in soon, so that'll fix the issue.
December 29, 2023
Strawberry Gorilla:
Day 5 Curing
Gorilla Cookies:
She is just about ready. The top seems like it's definitely ready to go, but I want the lower part of the plant to mature up a bit. Hopefully the supplemental lighting will help move that along.
She will need another flush tomorrow. I'll give her around 3 to 5 days. I won't be able to do a dark period with this one. The tent will already have a drying plant in it and they won't be able to fit in there at the same time. Unless they are both drying. On the other hand, I may be able to squeeze both in there. We shall see.
Grow System Environment:
Temp: 74.1°
RH: 52.7%
VPD: 1.32 kPa
December 30, 2023
Strawberry Gorilla:
Day 6 Curing
Gorilla Cookies:
She isn't showing much, but I don't really expect her to with the new lights. She is too far along. I'm just hoping for a faster maturity rate. She definitely needs to be harvested within the next week. She got another flush today with the Flawless finish. I don't know how many flushes she has left before harvest, but I doubt it's much. Maybe 2 or 3? No signs of fading though. It's strange. This plant and the smaller on in the main tent haven't faded at all. While the big one in the main tent looks like she will have a wonderful fade. I wonder what I'm doing wrong with this one. Maybe the soil is just too rich for the short term flushing. Maybe she really needs a full 2 weeks of flush. We shall see. I will check trichomes tomorrow I think. I don't think I'll see much difference from 2 days ago. Not in the lower part of the plant that is. The tops are all ready to go. They could certainly use a tiny bit more time, but they are definitely ready to go now.
Grow System Environment:
Temp: 73.2°
RH: 50.7%
VPD: 1.34 kPa
December 31, 2023
Strawberry Gorilla:
Day 7 Curing
Gorilla Cookies:
She's taking a bit longer than expected, well, actually I originally expected about a week after another Gorilla Cookies from the main tent. I harvested it today. This lady looks like she may be harvest ready in the next 3 to 5 days. I'm hoping she will take a bit longer so I can clear out the dry tent for her. She got about a liter of Flawless Finish today. I'm not sure if she is still as thirsty as she once was. Honestly, I can't tell. She was using the wick system so efficiently, before, I couldn't say how much she was actually drinking at the time. Maybe a liter a day? So she may have not changed her drinking volume at all. Which also means she isn't ready for harvest. The lower part of the plant is still immature. However, the supplemental lighting seems to be helping to move things along. We shall see. Let's hope for some extra time. Ultimately 10ndays would be perfect. But I'm almost certain that won't be a thing. It's too far away compared to her maturity level, especially with the main tops. Those are all nearly ready to go as it is. They could be harvested anytime. But I can still hold off anyway for more amber trichomes. Her leaves are loaded with them, but I don't see a bunch on the buds yet. I'd like to see 20% amber with this plant and preferably no clear.
Grow System Environment:
Temp: 72.6°
RH: 47.8%
VPD: 1.40 kPa
January 1, 2024 Happy New Year!
Strawberry Gorilla:
Day 8 Curing
Gorilla Cookies:
I believe the lights are doing the job now. The lower part of the canopy is starting to harden off, pistils are turning orange and trichomes are starting to turn cloudy. At least from what I can see.
She got another top watering today with about a liter of Flawless Finish. It looks like she is still drinking at the same rate as before. I wonder if I started flushing a bit too early. It's quite possible. But maybe not. The top of the plant is ready to go as it has been for nearly a week.
I'm going to check the trichomes in the next day or 2. I don't think it's absolutely necessary at the moment as I can tell the bottom of the plant is still very immature, but moving along nicely. I wonder if foxtails take less time to finish up than a solid bud. An interesting theory. However, the plant has been about a week behind anyway due to the few stressors she was under.
Anyway, I think I can hold off harvesting for the week coming up.
Update:
I had to turn the main light intensity down from 40% to 30% for the large plant in the main diary. The PPFD is around 750 now.
Apparently the light intensity should be dropped around this time anyway, so maybe I'm doing a good thing for this Gorilla Cookies. I'm leaving the supplemental lighting alone for now. I believe it is doing something.
Grow System Environment:
Temp: 72.9°
RH: 46.3%
VPD: 1.45 kPa
January 2, 2024
Strawberry Gorilla:
Day 9 Curing
Gorilla Cookies:
Today was another top feed of Flawless Finish. She is cruising through water at a decent rate. I'm pretty sure I was too early with her flushing.
The supplemental lighting seems to have perked her right up. The lower part of the plant is showing healthy deep green growth instead of the light green from before. The little budlets are swelling up as well. They aren't tight, dense or anything like that. There are clusters of them all over the lower branches. No real formed buds. But will be great with the trim. At least from what I won't be able to salvage as a bud. Even a loose bud is better than a trim bud.
I've also decided to wait to harvest this lady for when the dry tent is cleared out of another Gorilla Cookies that's in there. It should have around 8 days left. Frankly, I'm not worried about it. It'll be a good experiment to see how this strain does with a higher percentage of amber trichomes. Although, at this rate, I don't think 8 days is off the mark by much. I know a lot can happen in 8 days, but I don't think the lower part of the plant will have a problem with it. Lots of clear trichomes. Plenty of cloudy, but definitely too many clear.
Grow System Environment:
Temp: 72.9°
RH: 45.2%
VPD: 1.47 kPa

Likes
209
Share


@Rock_n_Roll_Randy
Follow
Day 66 for the 54 plant grow. 42 different strains of photoperiods and 12 different autoflower strains in the:
8X8 GROW TENT WITH THE NEW FC-E6500, FC4800 AND TSW2000 and green buzz all organic/vegan fertilizers🤘
The girls are loving their MARS MANSION and everything is doing good and looking nice and getting bigger👍 lots of hairs clumping up now and some are already getting frosty. MARS HYDRO ALWAYS GETS EM FROSTY👍.I AM NEVER DISAPPOINTED With how awesome these lights are🤘. KEEP KILLING IT MARS🤘👏👏
BREEDERS AND SEEDS:
DIVINE SEEDS:
MAZAR, OPIUM, WHITE WIDOW, OG KUSH, PABLO ESCOBAR, DIVINE INDICA.
AUTO WHITE WIDOW
AUTO PABLO ESCOBAR
AUTO WHITE RUSSIAN
AUTO FRACTAL
AUTO MONTREAL
AUTO OPIUM
AUTO KABUL
AUTO MAZAR.
WEEDSEED EXPRESS:
GREEN CRACK, GHOST TRAIN HAZE, LITHIUM OG, CHEESE.
DOCTORS CHOICE:
DC KUSH, AUTO NIAGARA, AUTO ROCK MACHINE.
EXOTIC SEEDS:
HIPPIE BERRY, MALASANA GELATO, EXOTIC ANIMAL.
GENE/MEME SEEDS:
BLACK HELL.
ORIGINAL SENSIBLE SEEDS:
PURPLE PUNCH COOKIES, WEDDING CAKE, PURE KUSH, GORILLA COOKIES.
SWEET SEEDS:
BLACK JACK, GORILLA GIRL, SWEET ZKITTLES.
EMERALD TRIANGLE SEEDS:
GORILLA GLUE, MASTODON KUSH.
SEEDSMAN SEEDS:
BLACK SUGAR, PEYOTE FORUM, PEYOTE WIFI, BADAZZ COOKIES OG, PURPLE GHOST CANDY, STRAWBERRY BANANA GRAPE, L.A. PEYOTE KUSH, PEYOTE WIFI CBD, FUEL DOG, CRITICAL PURPLE KUSH.
AMSTERDAM MARIJUANA SEEDS:
GIRL SCOUT COOKIES EXTREME, GREEN CRACK.
QUEBEC CANNABIS SEEDS:
BRUCE BANNER, GREEN CRACK, QUEBEC CBD 20:1.
I 💚 GROWING MARIJUANA:
SKYWALKER OG, BANANA KUSH, BLUEBERRY CBD.
FOR EVERYTHING MARS HYDRO VISIT:
www.mars-hydro.com
www.marshydroled.ca
PROMO CODE: rocknroll
VISIT THE ALIEXPRESS STORE:
@marshydro_aliexpress2
Instagram: @marshydropenny
https://youtube.com/channel/UChU5ZWwNi-DvnO3oWVU3ceA
https://greenbuzzliquids.com/
#greenbuzzliquids
@GreenBuzzLiquids
https://greenbuzzliquids.com/en/shop/
PROMO CODE: rocknroll
https://www.youtube.com/watch?v=8hEqyS1jPpI
https://growdiaries.woodroom.tel/diaries/112437-grow-journal-by-rock-n-roll-randy/week/593118
Thanks for taking the time to read and check out my shit🤜🤛
FC-E6500 LED GROW LIGHT:
FC-E6500 grow light with 3978pcs OSRAM BridgeLux Diodes & Moso Driver, market-leading PPF 2.7 µmol/J, Max 2.5g yield/watt with 30% higher Average PPE, more cost-effective when compared to same style type lights. Only consumes 650W, perfectly cover 5x5ft (personal), 4x4ft (commercial) grow space. Innovative Precise Uniform Lighting-Built-in removable bars interval & dimmability enable the exact & dynamic PPFD control over each of the plant growing stages, FC-E6500 detachable bars deliverSuperior Heat Dissipation: Real Aluminum heatsink together with 6 slim profile passive cooled bars (THINNER & LARGER surface) and detachable Meanwell Driver, create less heat. save 50% hydro than other old grow lights! Driver can be mounted remotely on the side of a grow tent/rack or on an adjacent wall to remove heat from grow space. Full Spectrum UV IR LED: With Yield Max spectrum (660nm Osram enhanced Deep Red,2800k-5000k,730-740nm IR,380-410nm UV LEDs), Average PPFD the FC-E6500 LED grow lamp enables cultivators to produce BIG FAT Dense Buds, perfect for full-cycle hydroponic, soil, grow tent/grow room.
Dimmable Commercial Grow Light: Cost-efficient, easy dimming & daisy chain With a max up to 20 lights, IP65 Waterproof, master light easily controls the rest. Perfect for commercial & home horticulture.
FC4800 LED GROW LIGHT:
GET THE MAX FROM MARS👍: Welcome one of the newest members of the Mars Hydro family🤜🤛🤘. The Mars Hydro FC 4800 480W LED Grow Light can accommodate up to a 4' x 4' area for flowering. It has OVER 2000 LED chips consisting of the best selling Samsung LM301B diodes which has a Luminous Efficacy of: 220 lm/W
0.2 W, 3 V mid power,
Osram 660nm Diodes, Infrared light and UV LIGHT👍. It boasts the incredible efficiency of 2.8 µmol/J, maximum 2.5gram yield per watt with 30% higher Average PPFD. This High-intensity spectrum is beneficial for plants at all stages - from veg to bloom, and creates Big dense Buds👍. achieve 50% higher yields & quality compared with the old lights! Only consumes 480W for 4x4ft personal grows, and 3x3ft for commerical grow. It comes with a dimmer and daisy chain function with a maximum of up to 15 lights, the master light controls the rest👍. Wide 6-bar design offers even & wide canopy coverage and can maximizes your grow space. slim 180° FOLDABLE DESIGN... YES I SAID FOLDABLE🤘🤣 , making it compact and easy to install, it's IP65 WATERPROOF and will give you no worries while growing in a humid environment and makes it a flexible high performance commercial grow light for enormous SUPER FROSTY yields.😛😛😛. MARS GETS EM FROSTY BOYS👍
AWESOME HEAT DISSIPATION: The Low energy consumption FC4800 growing light has 6 passive-cooled bars and an aluminum heat-sink a removable driver you can upgrade later or have it outside your tent. with zero noise you can save up to 50% in your electricity bill compared to HID's or HPS lights!
It also has a removable driver so you can upgrade it in the future or have it outside your grow space for better heat control in your growroom👍
UPGRADED FULL SPECTRUM: Yield Max Spectrum with enhanced red (Top-Bin Samsung 3000k-5000knm, Osram 660nm Deep Red), speed up blooming & fruiting, perfectly suited for full-cycle growing. The FC4800 LED grow lamp was born for Big Buds, perfect for commercial, grow tent, grow room, hydroponics, and all soil grows.👍
THE BEST SAMSUNG DIODES: THE FC4800 has Top Bin genuine Samsung Osram Diodes, combined with remarkable 2.8 µmol/J Efficacy, 30% higher Average PPFD, 50% less energy consumption, to maximize your yields. They give you a TRUSTED 3 years warranty 100% Satisfactory guaranteed!!!
TSW2000 LED GROW LIGHT:
INCREASE YIELD AND CROP QUALITY WITH MARS HYDRO LED GROW LIGHTS: NEWEST SMD LED technology provides the highest PAR/LUMEN output (1122umol@18") and can make you get 30% higher yield compared to OLD blurple led lights. Max 2.5g yield per wattage and achieve maximum quality and quantity, much better than traditional HPS grow systems
LOW ENERGY CONSUMPTION LED GROW LIGHT: Consuming only 300W true output with 684 LEDS! It saves up to 50% energy than other led grow lights. Perfect for 3.5x3.5ft bloom stage, 4x4ft veg stage. Over 90% light energy can be absorbed by plants, it will have higher intensity in a MARS HYDRO grow tent with diamond design mylar, or by crossing over using multiple TSW2000
HIGH EFFICIENCY FULL SPECTRUM INDOOR GROW: 3000K 5000K and IR 660nm 760nm RED, makes it close to natural light, highly engineered to provide improved growing performance for plants at all stages of growing, rapid plant response from seed to flower; Uniform and wide-beam light distribution for your plant's optimal growth
8x8 GROW TENT:
The MARS HYDRO 8x8 Grow Tent interior is made of a unique diamond design mylar which is highly reflective. (Other companies mylar and reflective rate is as low as 50%, and it won't provide efficient light. They use thick 1680D oxford canvas, and being double stitched, it is tear proof and perfect for locking in the light. Their grow tent keeps 100% of the light inside the tent and helps your plants absorb more light. EXTRA-THICK material means No light leaks or rips at all.👍
Strong Stable metal corner adapters and poles are the trustful supporters of the tent. It's very sturdy, neither rusting or paint flaking off. quick and easy tool-free setup. They use heavy-duty metal zippers, with double layer black lining, by far the best on the market which creates a light-proof seal.
The Easy observation windows are made by double layers of cloth. Observe the growing conditions of your plants without opening the tent and avoid disturbing your plants. The observation windows also serves to dissipate heat and ventilate the air.
The tent includes 2 removable waterproof floor trays to hold soil and water. The removable tray can be taken out to wash easily.
They guarantee the grow tents are easy to install even if you've never done something like this before. Clear Instructions and no tools needed! They also offer 30-day unconditional refunds for quality problems. Just contact their friendly 24 hours customer service 👍
Likes
2
Share


@Aleks555
Follow
Our beauty is now 6 weeks old and has officially entered the flowering stage! She has gained noticeable height and bushiness, showing off her healthy growth and vibrant energy. We've installed a net and gently guided her underneath to maximize the potential of each branch and ensure even light distribution.
The light schedule remains 12/12. Daytime temperature is a steady 28°C, nighttime drops to 21°C, and humidity stays at 65%. We continue feeding her with Xpert Nutrients, providing all the essential elements she needs during flowering. CO2 supplementation also continues, supporting her vigorous development.
A huge thank you to Xpert Nutrients for their top-quality fertilizers — it’s thanks to them our girl is entering the flowering phase with such strength and confidence!
Likes
11
Share


@Skinnytalls420
Follow
Just as difficult to grow as the first time I done Afghan kush but still managed to get some nice purple bud out of it!!!
Likes
5
Share


@BigGGrows
Follow
Took her down at day 94 in her 14th week. I did notice budswelling and density increasing in this final week. She was exposed to heat wave temperatures above 95f degrees in the greenhouse, yet took it well. I just had to water heavier than normal and at a daily rate....a rate of about 1/2 a gallon a day. She was flushed for 2 weeks using only TPS signal, ph water, and unsulfered molasses. She smells earthy, bold, and sweet....like a bold caramel latte.
As soon as the leaves started fading i figured it was time for the chop. Next week (15) will be the actual harvest info, as she is in drying now and weights cannot be supplied at the moment.


Likes
28
Share


@Trickybis82
Follow
Hello my fellow growmies,
Please find this week pictures and updates. I am into the final stretch with Runtz Muffin & Wedding Cheesecake.
After this week I will put them onto ripen for there last couple feeds before I then start the flush process.
The smell coming off these plants is ridiculous lol it makes the room smell like a fruity cake factory 🏭 🤣.
Grape gusher is a little behind the other girls but that is fine because she is a giant with so many bud sites perfect!
I will update next week.
Peace and love people!

Likes
2
Share


@Ninjabuds
Follow
My Purple Kush plant is still the smallest in the tent, but hopefully it'll produce some good buds by the end.
It's been a challenging week with the constant rain and ridiculously high humidity. Keeping things dry indoors has been a real struggle. Despite the weather, I managed to flip all my feminized photoperiod plants to flower this week. I'm hoping the switch will go smoothly, but with this humidity, it's going to be tough.

Likes
3
Share


@Dsant
Follow
Another 20L dechlorified tap water reservoir change on the 19th.
Flowering stretch looks to be finally over - and I'm glad, because I've got no more vertical space left. Can barely believe these have been topped, they're by far the biggest plants I ever grew (not that I have grown many to be honest lol)
Did a good defoliation session on the 22nd, but that was before the pics and video. RH went down from around 70%+ to a controlled 64%.
Temps are super high at the tent, but the girls look to be handling that very well. We'll see.
Likes
5
Share


@cookingwithninja
Follow
this is week 5. will make fem pollen from this genetics and seeds. crossing with the queen to make AU79. both bridals very strong. this is very very special, already showing me extreme trics in veg. will veg max time 15-20 weeks. I had issues with neglecting my ph, too nigh causing k issues, not phing down, added a few drops b+ nutrient and will be good with my ph. My rh lowest was 23%, so added more red romaine lettuce seeds, dill to grow so I am not wasting my light. It is dimmed to 60% only CW diodes on, NW IR R UVA are off. Only controlling cool white diodes for veg. More red longer wavelengths light for flower, along with uv. Everything is good, extremly positive with this grow!
2 queens on the right topped

Likes
3
Share


@Huckleberry39
Follow
She is thriving so far. Can't wait to see how it goes. Thanks again @

Likes
44
Share


@Jays_Not_Here_Man
Follow
I transplanted the girls and got them ready for flower. Did a small defoliation, and put them in the 4 gallon tall pots that I have grown to like. The girls took about 48 hours to recover fully from the transplant, and at the end of the week, I switched the light cycle to 12/12 Happy Gardening ! 🇨🇦👊❤️


Likes
12
Share


@CaliforniaOGkush
Follow
it's extremely hot 106 this week out here California any tips to keep theese growing bigger??

Likes
3
Share


@Krautbauern
Follow
Ladies need a lot of water, every other day they are drinking 1,2l+nutrients
Lollipopping + Scrog done at day 18 now they will hopefully get another boost

Likes
17
Share


@Grindlife219
Follow
Getting ready to take clones and flip them into flower in the next few weeks


Processing
Likes
5
Share


@Saihtan
Follow
W9D1 12-14-2020 I thought Mama Mia looked thirsty however she only drank 3Lt 2 less than previous, she may be slowing down in drinking or I watered to soon TBD~~ White widow drank quite a bit today 4Lts I got to see her outside of the lights today and could see some of that Autumn foliage in the Natural light.
Love,
Saihtan