By continuing to use the website or clicking Accept you consent to our cookies and personal data policy and confirm that you are at least 18 year old. For details please see Privacy Policy and Terms
Accept


Likes
10
Share


@Dude147
Follow
Hello everyone ✊
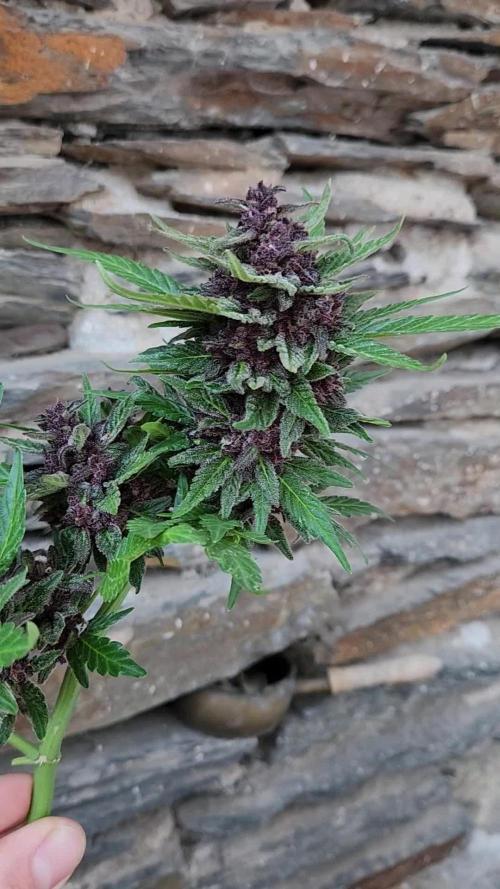
9th week has started, plant is doing very very well, I really like her shape and looks.
She got first trichomes this week, some pistils also started getting brown, but I think she will need more time then 12 weeks to finish the life cycle.
I'm happy to get some advices or feedback about this beauty.
Keep you updated.
Happy growing to you all 👽✊
Likes
11
Share


@Ninjabuds
Follow
The Blackberry Moon Rocks are looking promising. One of them is growing into this beautiful little bush, and I think it's almost ready to harvest. The other plant is stacking up buds, but I'm thinking it's still a couple of weeks away.
The past few weeks have been so beautiful, watching the plants grow and change. It's amazing how something so small and fragile can turn into something so strong and vibrant. Now that they're getting ready to bloom, it feels a little bittersweet. I'm so excited to see the finished product, but I'll definitely miss having them around while they're growing.

Likes
11
Share


@Inceptionist
Follow
Welcome to week 2 of flower!
They are all developing quite well. #1 is a little bit over watered I think and quite hard to LST since nodes are stacked up very close together.
#2 is starting to get some yellow tips on top. I think/hope it's just a bit of light stress, since she is the tallest and was always a bit closer to the lights than the other two.
#3 is growing very well, will get some LST today as well but due to the topping, she is a bit behind the others and just starting to produce white pistols, so for #3 , it's basically start week 1 of flower, not week 2 but it is what it is.
Because of the light stress I didn't raise up the light intensity this week. Still at 35% of the Sanlight (~24DLI).
Nothing else to say right now. I hope the yellow tips of #2 won't get worse, that #1 will push a bit harder and #3 just needs to stack up those pistols

Likes
24
Share


@Theia
Follow
A good week with no news to report. Very sativa like growth and buds...
EC dropped to 1.6 and more pk removed from the diet. Just greenbuzz nutrients organic bloom now.
Lights are at 60% and 1100umols average across the canopy.
Life is good
Grow well 🌿💚🌿🙏🏼
Likes
11
Share


@ElGrowLab
Follow
Friday is Highday… One Week to go
Here are some expressions of my Grow.
Except the drying I think there’s nothing that could go wrong now.
This Week I only pour water to the plant. The next days no more water for the lady’s so they absorb the last nutrients from the soil
Nice Weekend 👌🏻 ElGrowLab🍀

Likes
7
Share


@WolverineGreens
Follow
Everything is pretty much on autopilot. A blumat in a pot in the back wasnt working but i caught it before it did much damage. I think i took care of it but will watch to make sure.
Added a little mammoth p to my res to get worked thru the blumats. Gonna let the tank get close to dry then ill refill wgJust about to do a tank swap for the co2 as well.


Likes
17
Share


@Nicogreen
Follow
Super flot uger igen og har lige været kommet hjem fra ferie igen.. Men jeg har ikke mere ferie nu, så nu kan jeg forkusere 110 procent på. Min små børn. Og jeg får ny lampe i morgen engang. Håber i andre har det godt og god konkurrence til alle jer der deltager.


Likes
36
Share


@MadeInGermany
Follow
Hey everyone ☺️.
After 60 hours, the lady's case was already open :-).
Today the seed was placed in soil :-).
I only use the soil for cultivation because I have it left and it has to go slowly :-).
When repotting, it comes in Canna Coco 👍.
I watered the soil with some Canna Rizotonic before the seeds got 1 cm under the soil :-).
After that, the pot was placed under a hood in which I sprayed clay every day so that the humidity is between 80-90%.
I do this for the first few days until the head looks out of the earth.
From this point on, I open the hood at the upper opening bit by bit every few days so that you can slowly get used to 65% humidity before the hood comes down.
It is also only poured when the roots are right, until then the earth is sprayed. Which training I will use I will decide spontaneously when the time comes :-).
Until then, I wish you all a lot of fun with the update. Let it grow and stay healthy 🙏🏻🍀
You can buy this Strain at :
https://originalsensible.com/original-sensible-seeds-zkittlez~20503
Type:
Zkittlez
☝️🏼
Genetics:
Afghan Kush Indica x Grandaddy Purple x Grapefruit hybrid
👍
Vega lamp:
2 x Todogrow Led
Quantum Board 100 W
💡
Bloom Lamp :
2 x Todogrow Led
Cxb 3590 COB 3500 K 205W
💡💡☝️🏼
Soil :
Canna Coco Professional +
☝️🏼
Fertilizer:
Green House Powder Feeding
☝️🏼🌱
Water:
Osmosis water mixed with normal water (24 hours stale that the chlorine evaporates) to 0.2 EC. Add Cal / Mag to 0.4 Ec Ph with Organic Ph - to 5.5 - 5.8 .


Likes
12
Share


@Kakui
Follow
Veg17, riego 1.3 EC y pH 6.1. Se hizo una muy pequeña defoliación y corte de algunos nodos para empezar a moldear la estructura.
Veg18, un par de horas después del LST ya están mostrando la estructura deseada.
Veg21, ajuste de LST.
Veg22, riego 6.1 pH y EC 1.5.

Likes
1
Share


Likes
9
Share

@Oldwied
Follow
After 85 days of growing I havest.
Plant hung up whole to dry.
5 days later by 21°C/ 45% r.h.
It's trimming time.
Likes
14
Share


@MillennialHippie
Follow
I’m about to lose it. Big progress both from the broken stem and the plant as a whole. I think though the accident was very stressful and it turn it into a hermie. Once the lovely community makes sure I got a hermie I will cut the balls off(no cap).
Day 36, one day after the hermie incident.I cut the sacs of and keeping a really close eye on it.Like checking every hour on different lighting again and again. Main cola looks like neither full bounced back, nor losing the battle from the harm I did to her in the middle of the fifth week,the tape is still on. I'm anxious if I face a light stress till the full recovery of the stem. I can't LST thats for sure and I have an HPS lamp.
I'm aware that my yields will not be the same as the true potencial of the strain but I'm sure the taste and high will be diffrent for me due to the work I'm putting in and the "stress" I'm going through.
Day 37: No sight of sacs. Looks thirsty every day and sometimes I water twice.The soil is dry one the first cm.
Likes
41
Share


@Stork
Follow
Day 120
PH 5.8
EC 0.2
PPM
DLI 6h
PPFD/
Water 18c
Day 121 Tue
PH 6.0
EC 0.2
PPM
DLI 6h
PPFD/
Water 18c
Day 123
PH 6.0
EC 0.2
PPM
DLI 6h
PPFD/
Water 18c
Day 125
PH 6.0
EC 0.2
PPM
DLI 6h
PPFD/
Water 18c

Likes
5
Share


@Cannaseur2k19
Follow
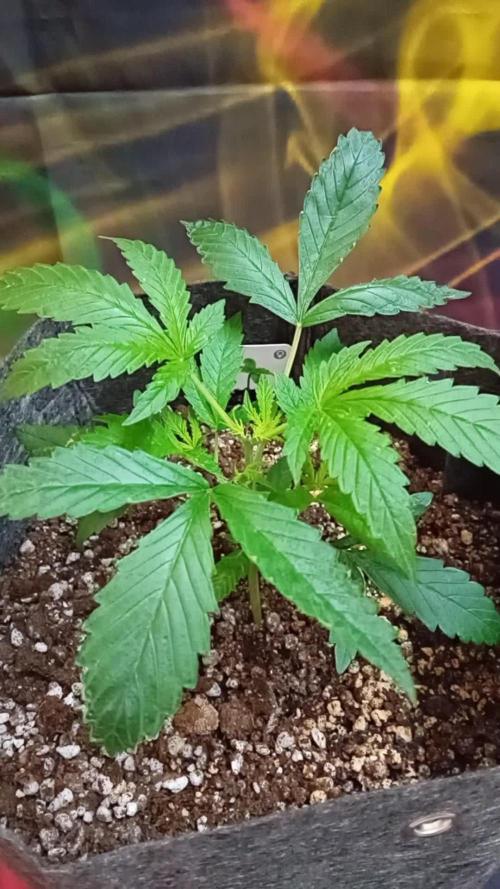
They dont really strech much its more like cruise control, still not sure if I need nutrients?

Likes
226
Share


@JUNGLE_B4RNS
Follow
Every beginning has an end 😊
This is the last update for The Royal Jumanji.
Harvest tiiiiime 👍😄
I would like to say thank you at :
James from Royal Queen Seeds for providing great seeds
Platiniumhydroponics and Cellmax for the Nutrients and Soil
The Grow Boss and his channel on YouTube
Victoria and all the rest of the GrowDiaries team
All the followers and peoples for your kinds comments
I will put all Strains on Harvest when dried in about 15 days .
To be continued.... 😉
Likes
3
Share

@MaltaHerbman
Follow
Day 21 Topping.
As 3rd week here and the Pablo Escobar aswering very good,she growing very fast and have done topping.Had add some the ppm too with plagron nutrients.Thanks for Watching
Likes
4
Share


@LoganatorDude
Follow
Day 15
Smooth sailing so far! I’m happy with her progress, and excited to see her potential. I think I really like autoflowers :)
💪
