By continuing to use the website or clicking Accept you consent to our cookies and personal data policy and confirm that you are at least 18 year old. For details please see Privacy Policy and Terms
Accept
Likes
Comments
Share


@m0use
Follow
***Sponsored Grow*** = Medic || https://medicgrow.com || Grow = ***Sponsored Grow***
This plant has been doing great, when I am in working with it it releases lovely peppery notes into the air. It has a super short compact structure I'm curious to see what it will be like in stretch.
Still giving them a 2:1 or 2.5:1 grow vs bloom nutrient. Its helping with some of the pink stems from last week. Feeding strength is up .2 point to reach 900ppm or aorund 1.8EC will leave it here fro the remainder of Veg. Prob will do for 2 more weeks then flip to flower as I just topped them and want to give them some time to recover.
NPK ratio of 7-7-14 1:1 equal parts grow/bloom.
Grow=8-4-15
Bloom=6-10-14
Boost=1-15-30 "not yet used it yet"
Also took some clones from the plants as well, took two main cuttings from each plant, forgot to do the one so its not shown in the first video up the updated clone pics later in the week. If any of these impress me then the clones will go outside and grow there all year for a extra special harvest. Or I'll give them out to some friends and family maybe a little gorilla gardening project, but I will wait before getting ride of them all as I'm still kicking my self in the ass over the Blue Cindy loss. really liked that plant and wish its clones I gave out where still aorund.
Lights doing well. The V1 spectrum is good on the medic grow mini sun-2's 240w. No issues so far, dimmed at 80% till flower is initiated then up to 100%, Will test out 13/11 I think as the schedule to give them some more photons for an extra hour vs 12/12
.
Till next week.
***Sponsored Grow***
Official Website:
https://medicgrow.com/
+
https://seedstockers.com/
Facebook:
https://www.facebook.com/medicgrowled
+
https://www.facebook.com/SeedstockersBarcelona/
Twitter:
https://twitter.com/medicgrow
+
https://twitter.com/seedstockersb
Instagram:
https://www.instagram.com/medicgrow420/
+
https://www.instagram.com/seedstockers_seeds
YouTube:
https://www.youtube.com/channel/UCNmiY4F9z94u-8eGj7R1CSQ
+
https://www.youtube.com/channel/UC4GiFYrIWeNtwtXjcivCmfw
Growdiaries:
https://growdiaries.woodroom.tel/grower/medicgrowled
https://growdiaries.woodroom.tel/grow-lights/medic-grow
+
https://growdiaries.woodroom.tel/grower/seedstockersofficial
https://growdiaries.woodroom.tel/seedbank/seedstockers


Likes
10
Share


@CordersGreen
Follow
👉DIA : 13/12/21👈
Metodo de germinacion: 👉<< VASO DE AGUA >>👈
seleccionamos las cantidades deseadas de semillas y en un pequeño vaso con agua opmotizada insertamos las semillas para nutrirlas durante 12H, situada en un lugar sin luz, apropiadamente tapada con un trapo.😉
__________________________________________________________________________________________________________________________________________________________________________________
👉DIA : 14/12/2021👈
👇👇👇👇👇👇👇👇👇👇👇👇
una vez pasada las 12 H de germinacion en vaso de agua , depositamos las semillas bien colocadas en un recipiente con papel de cocina humedecido con agua y 1ML de estimulador de raices (TOPCROP).
Esperamos de 1 a 2 días a que salga la raiz de la semilla y ser transportada a los Jiffy😉
___________________________________________________________________________________________________________________________________________________________________________________
👉DIA 17/12/2021👈
👇👇👇👇👇👇👇👇👇👇👇👇
Pues pasados los 3 dias de germinacion en el metodo de papel, vemos que ya salieron a luz las raices y con sorpresa😱 NUNCA habia visto una cosa asin!!
An salido GEMELAS, sii sii !!😵 de una misma semilla an salido dos raices una cosa impresinante!
y damos paso a colocarlas en los Jiffy.
👉Instrucciones:👈
- Colocación de los jiffy en un recipiente con 2L de agua y 2ML de enraizantes de top Crop.
- Dejamos actuar durantes varios minutos hasta que el jiffy se extienda.
- Abrimos un pequeño orificio en los Jiffy para introducir la semilla con el cáliz dejandolo hacia afuera.
- Colocamos en un pequeño invernadero para que tengan la suficiente humedad.
- Ayudandonos de unos foco de pocos waltios, le damos a luz necesaria para esta face de germinacion dejandolas 24 horas de luz.
________________________________________________________________________________________________________________________________________________________________
DIA 22/12/2021
Colocacion de Jiffy en Maceta de 3,25L
👇👇👇👇👇👇👇👇👇👇👇👇
👉Instrucciones👈
-Pasados varios dias vemos que el periantio(semilla) ya se rompió y empezo a salir los cotiledones con una hermosa raiz blanca por debajo del jiffy.
-rellenamos macetas de 3,25L con sustrato de top crop(anterior cultivo).
-introducimos los jiffy en las macetas dejando la plantula bien colocada.
-regamos con 3L agua opmotizada y 1ML/L enraizante Voodoo ADVANCED NUTRIENTS
- Permanecemos con las 24 horas de luz con foco led.
_________________________________________________________________________________________________________________________________________________
👉DIA 25/12/2021👈
👇👇👇👇👇👇👇👇👇👇👇👇👇👇👇
pasados 3 dias desde que se plantó en maceta. A dado unas respuestas increibles !!👍
las volvemos a regar y a cambiar las horas de luz que se pasarian a 18H

Likes
57
Share


@AsNoriu
Follow
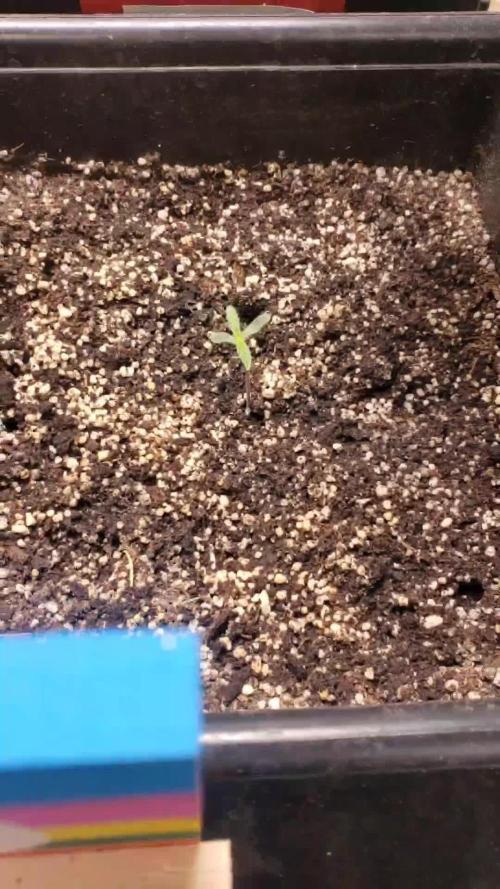
Day 9. All is running very nice. Happy with light performace a lot.
Girls missed wind a bit, but i cant make it faster, because of neighbours and sound, so i took humidity dome away.
TSL2000 runs 40 cm away and on 40% output.
Girls get daily shower , try to keep some wet cloth to maintain humidity.
Day 12. Thats the happy f@cker in video ;))))
Happy Growing !!!

Likes
13
Share


@LeedsGenetics
Follow
Sorry about the last 2 weeks guys had some issues and couldn't upload.
So I flipped the lady's to flower on Sunday 6th December, added a Scrog and pushed it down so over the next few weeks while the plant stretches more and more heads should appear.
Had some issues with thrips 2 weeks ago but have resolved that issue with a pesticide. For a sativa dominant strain the plants are very bushy with close nodes.
Probably should add a lot of info to this week but I don't know where to start so if anyone has any questions please ask away!
Nutrients are based on 15L of water currently
💚

Likes
574
Share


@TOTEM
Follow
Hello everybody! This week will be the hardest one. I’ll have to work a lot inside the room, and even on GD to document all the changes. Last week I topped for the last time (in reality this happened the first day of this week), and finally stopped with high stress training. From now on, our attention will fall totally on ScrOG.
Day 43: Topped the 4 colas at the extremities. Red blood came out from them (see the photos). Amazing! Sorry for the bad quality, but I got just the phone with me when I did the job. When I took the second photo (a few hours later), the plant had already sucked up all the lymph. You can still see the red blood by the way.
Day 44: Set the timer to start with 12/12 from midnight of day 45.
Day 45: SO MANY THINGS HAPPENED TODAY. Flowering started, baby! 🤩 Today, in the evening, I worked for about 4 hours to prepare the ScrOG environment.
- Improved the LST before placing the grid.
- Took some photos.
- Removed the humidifier.
- Since my LED panel has half of the blue lights broken (this happened three weeks ago), resulting in 100W less of total potency, I added 3 new lights pointing where the panel is broken (2x 36W led bulbs and 1x 30W COB led light). I uploaded a photo and a video to better understand what I’m talking about. I even tried changing the broken LED driver, but it didn’t work, so now I’ll have to wait until the end of this cycle to send it to maintenance.
- Put 20gr of BatMagno (which is bat guano), 10gr of “Farina di Neem” (Neem Flour), and 50gr of Alghe, all of them over the soil. I’ll write something about these fertilizers at the end of the comment.
- 4.5L of tap water (corrected to PH6.5), which gave zero runoff. Haha, she’s drinking like a camel.
- Placed the grid.
- Took a few photos.
- Little defoliation.
- Took all the other photos.
- There we go!
I preferred not to add the bloom fertilizer now because I’m a little worried about overfertilizing this baby. During veg, she showed me she doesn’t like nutrients, so I’m just listening to her requests. I’ll add the bloom one as soon as she seems hungry again. By the way she’s just 20cm tall (I’m so proud of this result) and the grid is located a few centimeters above her. Let’s see if I switched to 12/12 at the right time: I heard this strain usually stretches for about 6 weeks!!! 😱😱
Let’s talk about the ferts I placed on the surface of the soil.
- BatGuano: it’s a mixture of organic fertilizers of natural origin and suitable to produce a high amount of organic nitrogen and phosphorus that can be assimilated at 100%. It’s a natural slow-release fertilizer for flowering: the raw materials used (guano, dried borlanda with ammonium salts, kieserite of natural origin, flagpole, meat meal, bone meal and dried poultry) are the result of a careful selection which ensures a low salinity and a gradual transfer of the elements. The phosphorus content in BatMagno (being organic) does not undergo insolubilization.
- Alghe: they are a portentose substrate activator made of a mixture of algae of the species Ascophillum, Fucales and Laminariales, obtained through a process of dehydration and grinding without the use of any chemical substance. They can be used during the preparation of the soil, and increase and strengthen the formation of the root system, mobilize the nutrients in the soil, reinvigorate the plants, protecting them from adverse weather conditions, help plants to overcome stress conditions and improve the quantity and quality of production. All of this is possible thanks to the presence of betaine, cytokinins, vitamins, auxins and alginates polysaccharides.
- Farina di Neem (Neem Flour): it’s a vegetable product based on Neem seeds, obtained from the extraction of Neem Oil through a process of cold-squizzing out, which increases crops, improving both growth and flowering, as well as strengthening the roots of the plants. The Neem Flour is mixed with nitrogen fertilizers, that slow down the conversion and leaching of nitrogen. Repeated interventions improve the endogenous resistance of plants to pathogens, creating an unsuitable environment for the development of insects and cryptogams. Due to the presence of important trace elements for plant life, it prevents imbalances and nutritional disorders. It also protects plants from Nematodes, ants, insects and soil larvae.
Let’s say Alghe is the most smelly product. My room now smells like seaweed! I need to figure out how to give her water now that the grid is on. I think I’ll plug a 2m pipe at the end of my watering can. That’s the most easy and cheap way to fix this problem. I just need to find the right size of the pipe. I’ll show you my solution next week.


Processing
Likes
7
Share


@Canadian_Bud
Follow
31-08-2019
Another glorious week with the new system, getting the RO water is less a challenge than the Soil or CoCo with previous grows and soo much better than feedings of 2 or more gallons every other day. She seems to be coming out of the shock mode as some stems are changing back to green from deep purple. Some new growth has started to appear so that's a good sign 😎
Nutrition will be doubled on the next Nutrition Change out in 7 days. So far! All variables are under control. I like the fact I can turn the tap and check accurately and adjust if needed unlike soil unless you are using a soil kit all the time.
I have notice a few drips coming out of the unit but not much to be concerned with. Pump work 15 min intervals pumping Nutritional spray. 2 different Air flows 1) in solution with air stone and 2) open wand spray inside directed at the roots to provide additional oxygen.

Likes
2
Share


@CannaIGrow
Follow
Transplant week! Some of the girls in the tent started to droop but this one didn’t! She’s looking pretty good to me
Come hang out with us in the discord!
Likes
71
Share


@ThrashedTV_BakedByGlaze
Follow
Made sure I posted a "Championship" QUALITY VIDEO according to @Fast_Buds :D
suck it to @Fast_Buds and whoever has been running the site for the past year because HOLY SHIT has the quality been down ACROSS the board 😴
The site wasn't even ready for the FLASH change over on new years and they had to scramble to do obvious backend work lolol
*Fart Noise*
😂


Likes
Comments
Share

@The_Doctor_Green
Follow
Hola a todos! Espero que anden bien!!..
Les comento que hice esta semana, la he regado con agua un riego y el último hoy, con nutrientes en sus dosis indicadas más arriba.
La planta ha crecido mucho esta semana 37cm en 7 días, ha pegado el estirón, y también han mostrado sus preflores.
Esta semana he tenido una humedad alta 70% y no la he podido bajar,pero con humedad y una temperatura que ha rozado los 28 grados por momentos, he notado que las plantas les gusta ese ambiente, por eso el crecimiento que ha pegado.
Hoy (17/09 ) ,dia 35, de la Auto Divine Rapier he quitado las hojas más grandes que tapaban las ramas bajas, espero que en este momento no estrese la planta.
Bueno, no los aburro más, nos vemos la próxima semana!.
Buenos humos!!
Las imágenes corresponden al periodo del 10/09 hasta el 17/09 (dia 35) inclusive.

Likes
25
Share


@Kakui
Follow
Veg8, siguen creciendo bien, todavía quedan 2 plantas por sacrificar, lo decidiré en el próximo riego.
Veg9, ya se seleccionaron las 9 plantas, se sacrificaron las últimas 2.
Veg10, riego con 0.7 EC y pH 6.0, drenaje de 1.0 EC y 6.6 pH, se tendrá que seguir bajando el pH de los siguientes riegos, las plantas han estirado un poco más, en unos 2 días se hará transplante a los maceteros definitivos. Se planea hacer LST, pero ya que los nodos están muy juntos, si no estiran mucho tendré que hacer Main Lining.
Veg11, nada significativo.
Veg12, riego con 0.8 EC y pH 5.5, drenaje 1.0 EC y pH 6.5, plantas listas para transplante dentro de los próximos días, se comienza a mezclar el sustrato para los maceteros definitivos.
Veg13, dia de transplante, sustrato con 50% de turba y 50% de vermiculita(sílice), se agrego dolomita para subir el pH del suelo a 5.5~5.8 y además la dolomita agrega calcio y magnesio al suelo, también se agregó yeso agrícola al sustrato el cual es de liberación lenta y agrega calcio y azufre. Al momento del transplante se rocía directamente las raices con voodoo juice, tarantula y piranha, además se espolvorea great white, una ves puesta en el nuevo sustrato, se riega con 1.2 EC y 5.5 pH, de micro, grow y bloom, además b-52, etc.
Veg14, nada significativo, siguen creciendo bien, en unos 2 días más haré Main Lining.

Likes
4
Share


@LittleBigTrees
Follow
I've been defoliating slowly trying to keep them small due to a house inspection coming up. Once that's out the way I'll put them in bigger pots then switch to flower.
They all outgrew the mutated start and are looking good.


Likes
17
Share


@eldruida_lamota
Follow
Que hay familia, actualizo la cuarta semana de floración de estas Runtz F1 automáticas de Zamnesia.
Vaya liada de floración, me salió en este indoor una plaga de trips y los 5 ejemplares están picados, ya traté las plantas esta semana, añadí aceite de neem en la tierra, rocié un insecticida y añadí tiras azules, veremos esta próxima semana si ya erradique este inconveniente.
Empiezo por supuesto abonando una pequeña cantidad de la gama Agrobeta.
La temperatura está 25 grados y la humedad anda entorno al 50%. Riego cada 48 horas.
Hasta aquí es todo estas próximas semanas veremos cómo van avanzando.
Agrobeta:
https://www.agrobeta.com/agrobetatiendaonline/36-abonos-canamo
Mars hydro:
Code discount: EL420
https://www.mars-hydro.com/
Os comento que tengo un descuento y para que compréis en la web de Zamnesia de un 20%, el código es ZAMMIGD2023
The discount 20% and the code is ZAMMIGD2023
https://www.zamnesia.com/
Hasta aquí es todo, buenos humos 💨💨💨.
Likes
8
Share


@TheGreenLeopard
Follow
paper towel and into a peat pellet. worked fine. have put them all in a 20 liter pot to see how it goes. these are in a perma auto flower tent. 20/4 off, in good company. this week we launch the unit. first leaves then new diary.. enojoy and take care
Likes
4
Share


@GaliforniaWeeds
Follow
7/9/29 día 1 de floración
Esto arranca amigos, por desgracia lo hace con unas temperaturas altísimas, con maximas de incluso 32 grados debido a la ola de calor que estamos sufriendo. Ya hemos montado el sistema de riego y lo hemos preogramado para regar durante 1min cada 4h durante el día. La solución la hemos preparado con los productos Cyco arriba descritos, con una ec de 1 y un ph de 6,1. Por otro lado nuestro jardín. Esta iluminado por 4 barras led 100w de solux, y un lec solux de 630w aunque por el momento está a 315w debido a las altas temperaturas. Para empezar la floración lo hacemos con una defoliación y una poda de ramas bajas. Estaremos atentos a cambios en las pequeñas para intentar mantener en cada momento la alimentación adecuada, sin carencia y sin excesos. No te lo pierdas!!
9/9/20 día 3 de floración
Buenas, nuestras pequeñas se aclimatan bien a la nueva alimentación y a su nuevo medio. Aumentamos la ec del tanke a 1,1ec y seguimos manteniendo el ph a 6,1. Por otro lado las temperaturas parece que disminuyen por lo que pasamos el lec de 315w a 415w, manteniendo así unas temperaturas diurnas de entre 26 y 27 grados. Esperemos que continúen descendiendo hasta poder mantener las temperaturas a 23 grados durante todo el día. La humedad ronda el 40% y estaremos atentos para que no suba de ahí. Deja tu like y síguenos para no perderte nada. Buenos humos!!
11/9/20 día 5 de floración
Nuestro cultivo avanza sin demasiados cambios, durante estos días se aprecia que las nenas aumentan su altura más rápidamente y los brotes se multiplican.seguiremos atentos para que todo siga su curso. Buenos humos.
