By continuing to use the website or clicking Accept you consent to our cookies and personal data policy and confirm that you are at least 18 year old. For details please see Privacy Policy and Terms
Accept
Likes
Comments
Share


@DoctorCannas
Follow
Miei cari amici,
L'estate incalza e finalmente il tempoi permette di trasformare ad hoc. Secondo i gusti il giardino, la terrazza e i due balconi.
Un lavoro duro e intenso con i 25/30 gradi che il NW in questa settima sta proponendo e che spero vivamente durino tanto.
Travaso storico e professionale.
Vediamo ciò che l'armadio dice.
Questo travaso probabilmente ritardera di due o tre settimane il raccolto, ma andava fatto e ne varrà sicuramente la pena.
28/06
My dearest friends, comrades and farm partners.
Doc. Cannas is extremely happy to introduce you to the 5 wonders of Expert Seeds.
Still my most heartfelt congratulations for their genetics,
between photos and videos you have seen what a wonder these little girls are growing.
Today they have been introduced to LST, an art halfway between Astana yoga and BSDM.
Being their first time there was a need for love and passion.
So it was.
At the next update farmers

Likes
6
Share


@Rinna
Follow
Defoliated and lollipopped quite a bit, also flipped the ladies this week! All the girls are looking very happy and I’m super excited to see some flowering action soon 🤩 also I’m glad I managed to fill up the tent completely, with an uncountable amount of budsites!

Likes
6
Share


@Eldorado_ed
Follow
We’ll all up to date and the guys who have said to hold on to next week or week after before chop now that my diaries uploaded I will post weekly as just thought I would post for info today and got it instantly cheers people ✌️🏻

Likes
7
Share


@SB1993Cannabis
Follow
Week 10, and Syrian is the first plant to be harvested. Just gave her a trim, and now she's on to drying.
Likes
26
Share


@BlackForestGrower
Follow
Plant 1 is ready the other two get another 12h and 24h in dark tent
Taste fruity and berrys
White Ash

Likes
16
Share


@AestheticGenetics
Follow
4/9/25
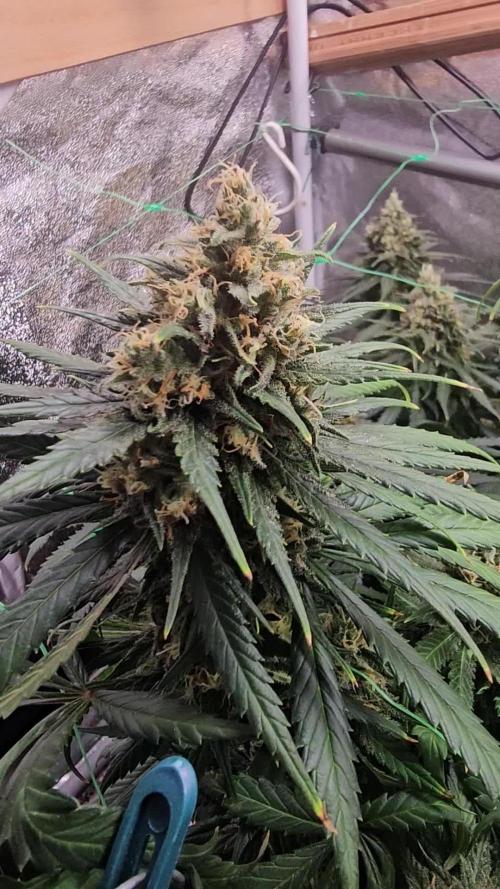
This plant is beyond frosty. Stacking up super nicely. Seems like she will yeild quite a bit.
My only gripe is that she has like no smell at all.
Using the foil as a soil cover is working quite nicely. the top soil is getting filled with roots quite well.
Top dressed 1tsp of Bloom
1tsp microbe charge
1tsp bloom

Likes
5
Share


@Sativa763
Follow
Day 42 after switch.
did some defoliation on day 40.
this week only watering with water and one time BioTabs compost tee.
everything running smooth so far.
no bigger problems and buds are now starting to get fatter.🙏
Processing
Likes
15
Share


@CanadianFillmore
Follow
Start of week 4, the blueberry is using up nutes quicker then the other strain's, but she rebounded quickly after being fed. The OG Kush is very compact and tight node spacing, lots of bud sites.

Likes
1
Share

@Fischi_420
Follow
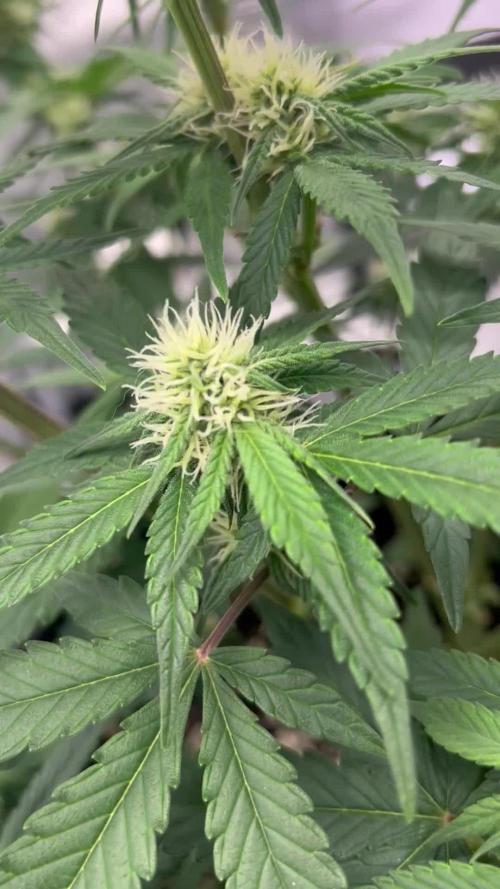
Lemon Cherry Cookies – Flowering Week 2 🌸
The plant is now fully into flowering. Bud sites are stacking up nicely and the white pistils are shooting out strongly. She’s still growing bushy and filling out the tent well.
📌 Training:
•
Lollypopping next Week
📌 Feeding:
• 1 ml/L Bio-Grow
• 2 ml/L Bio-Bloom
• 1 ml/L Top-Max
• 0.5 ml/L CalMag
• 0.5 ml/L Alg-A-Mic
Leaves look healthy and lush, with a nice green tone and just a light tip fade – exactly where she should be in this phase. Nutrients are being absorbed well, no visible deficiencies or stress signs.

Likes
7
Share


@Lacremelabs
Follow
The flora has started, and I increased the amount of MKP while reducing calcium nitrate. PPM is slightly above 1000, nearing 1200. The pH remains between 5.8-6. They are in that phase of substantial daily growth, hoping for a bountiful harvest. I'm still defoliating and tying them.

Likes
31
Share


@Chucky324
Follow
Hello. Got the plants into the main grow room.
There is 2 videos . In the first I just sit in the room quitly and turn the camera. you get a sense :) of what it's like in there. In the second I try to describe what's in the room, equipment and maybe a new technique. With the tomato cages I use, and needing the plant to slow down, I twist the stock into a large figure 8. Eventually I take off what is on the lower part of the 8, and just work the top of the 8.
About 2 weeks in veg in this room. Then I take clones of everything before I switch to flower.
>Carbon dioxide enhancement: I had to make that choice 20 years ago. I could, rent a tank and have my name on a list, at the gas store. Or make my own. They didn't have the small propane tanks like they do today for the blue flame you get when you burn it. I decided on a kerosene lamp burning down as low as it could be without going out. It makes a half blue and half yellow flame. I vent constantly so the small amount of carbon monoxide is not a problem. For the first week you can smell it a bit, but the smell disappears after that. I light the lamp in the morning and put it out at lights out (unless it's bed time). It needs to be put in a place in the room that cant get knocked over (pets, children, ?). I try to use extra attention whenever I use it. It can burn down the place. Be careful Please.
>About 17 years ago I thought I'd lower my table by knocking a hole in the cement and dropping my 10 gallon reservoir more. I was able to lower it by 16 inches. Still have to watch the height of some plants though, it worked out well. Watch the video.
> Air cleaner: The reason I got a big 8 inch exhaust fan was, I had a bout of powder mildew and needed better a exhaust system. When I plugged it in there was too much air moving. I phoned and asked and the salesman said that a dimmer switch wasn't a good idea. I put one on anyway. Works great. I have the fan barely on in the winter and about half way on in the middle of the summer. I haven't had any powdery mildew since. About 12 years ago I bought a good air cleaner. An ORECK, It has electrified plates that zap any organic particle or spore that come between the plates. Use to grow a Northern Lights that got 6 to 8 ounces per harvest, it grew big buds. Buds as big as my forearm. I had problems with gray mold attaching the buds. But none since I bought the air cleaner. Ya learn as you go.

Likes
4
Share


@NSABND
Follow
Day 29 massive leave cutting in the morning... but the queens seems to be ok 😃🙏👌👍the Z-Up strain has 5cm more then the others
Day 30 all queens are a little bit shocked from cutting 😩 ok chill today but tomorrow back to work bitches 😂😂😆😃🙏👍
Day 31 everything seems to be allright 😃🙏👌
Day 32 well the queens raise again 😃🙏👍
Day 33 i think this will be a really good grow 😃👌
Likes
1
Share

@FlowerOasis420
Follow
Die Blüten beginnen sich zu verfärben und bekommen ein leichtes rot. Die Trichome sind zum Großteil milchig, vereinzelt schon Bernsteinfarben.
Sie haben genau noch 7 Tage, der Geruch haut einen um.

Likes
52
Share


@SlowpokeFuegobud
Follow
🍮 🤤 ❤️ 🍮 🤤 ❤️ 🍮 🤤 ❤️ 🍮 🤤 ❤️ 🍮 🤤 ❤️
DAY 64
Watered with nutes again haha 💧 0.5ml/L Grow + 3ml/L Bloom
DAY 67
Watered with nutes 💧 0.5ml/L Grow + 3ml/L Bloom
DAY 69
Watered with BioEnhancer 🐡 :doctorfish: 0,5g/L
🌱 🙏 Grower love!!!
_________________________________________________________________________
https://hypnoseeds.com/product/cream-brulee-auto/
Cream Brulee Auto
Description
We love our Cream Brulee and wanted to create an even more special variety so everyone could harvest it faster. Introducing Cream Brulee Auto! After a meticulous process of crossing our exemplary variety with our autoflowering genetics of the highest quality; it is ready to shine and captivate all grow spaces. Equally to lovely feminized Indica-leaning sister, Cream Brulee Auto will take over your heart. You’ll want to keep it in constant rotation. In just about 8 weeks it goes from being a seed to a bountiful harvest of sweet and creamy cannabis from the irresistible dessert we know and love.
Appearance and Grow Tips
While Cream Brulee Auto has the same quality and potency as its feminized cannabis predecessor, what stands out is its speed to finish and enormous dense colas. These magical cannabis seeds take around 8 weeks from seed to harvest and can produce up to 500 grams (per plant) of pure happiness. Indica lovers won’t be able to look away, their growth speed will put anyone in a trance!
Make sure to provide this variety with at least 18 hours of light throughout the entire grow and decent pot size, around 3 gallons minimum, so it can grow to its full potential. Due to its ultra-fast autoflowering genetics, we recommend planting the previously germinated seed directly into the final pot to avoid stressing or damaging the roots. LST is always a good idea to increase performance and control any height problems you want to avoid.
Administer nutrients at 1⁄4 of the recommended dose and then gradually increased as the plant grows and reacts. With optimal conditions and treatment, this strain will bless you with beautiful buds of up to 19% THC.
Flavor and aroma
Thanks to its special lineage, Cream Brulee Auto is absolutely packed with the same delicious flavors and aromas. Its autoflowering magic makes it even easier and quicker to grab your delicious dessert cannabis buds. Notes of cream, caramel, together with vanilla, buttered nuts, and coffee will leave stunned even the most experimental cannabis connoisseur.
Effects
After the first delicious puff, you will be in a dream state, deeply relaxed and pleasantly euphoric. Its calming effect makes it better to consume it at night to help you sleep. Similarly, during the day if you are looking for a half-conscious state Cream Brulee Auto will keep you upbeat and happy.
😍
________________________________________________________________________________
SETUP:
° Mars Hydro TS1000 Version 2022
https://www.mars-hydro.com/all-products/ts-1000-led-grow-light
Thanks @coco!! ❤️
° Zelsius 60x60 cm (2x2ft)
° 2x 5W Fans
° PrimaKlima EC 125 400/240cm³/h exhaust fan & Carbon Active Granulate 240cm³/h
° Biobizz Grow + Bloom
° tap water EC 0,26uS upgraded to EC 0,5 with PlantMagic MagneCal - pH 8, nutrient solution downgraded to pH 6,5 with Advanced Hydroponics Minus Bloom
° BioEnhancer every 2 weeks instead of feeding
° from week 4 in the same container Aptus Enzym+ once a week
° Organic tomato soil + perlite
🍮


Likes
10
Share


@Adkguerrilla44
Follow
All in all i ended up with almost 2.5ozs of some super nice rock hard buds and another oz of some larfy smaller buds i made into cannaoil with coconut oil!! I will grow her again for sure but next time i will start it in my big tent and let her stretch her arms and legs out and see if i can get a monster!!!
Processing
Likes
2
Share


@Valedor
Follow
semana de crecimiento de tricomas, ademas las flores presentan un crecimiento muy bueno, ya están madurando de verdad, el próximo cultivo lo documentaré con fotos mas claras, he aprendido mucho de tenerlas en hidroponia, me gusta y lo voy a seguir usando y explotando


Likes
1
Share


@DTHGenetics
Follow
Only took one video of both of my strains black moonflower and garlic fusion at week 5 you can find the other strains diary on my page they are doing good I topped week 5 and transplanted into 1 gallon . Looking alright the ones in the back are chic lit autoflowers from mendocino twenty twenty 5 weeks old topped and ones lst. Theese videos are before topping and after


Likes
Comments
Share


@Takeaims
Follow
Sweet manderain taking g it's sweet time to finish haha on week 9 witb this girl week 7 for the others and week 3 for the smallest ones doing some defoliation
