


By continuing to use the website or clicking Accept you consent to our cookies and personal data policy and confirm that you are at least 18 year old. For details please see Privacy Policy and Terms
Accept
Likes
Comments
Share


@Growurownseed
Follow
What I did to germinate my seed was I soaked the seed in water for 12 hours and I gave it a tap, once it sunk to the bottom I then placed in a wet paper towel for 24 hours and that has work for me 100%


Likes
1
Share


@Pot_Portraits
Follow
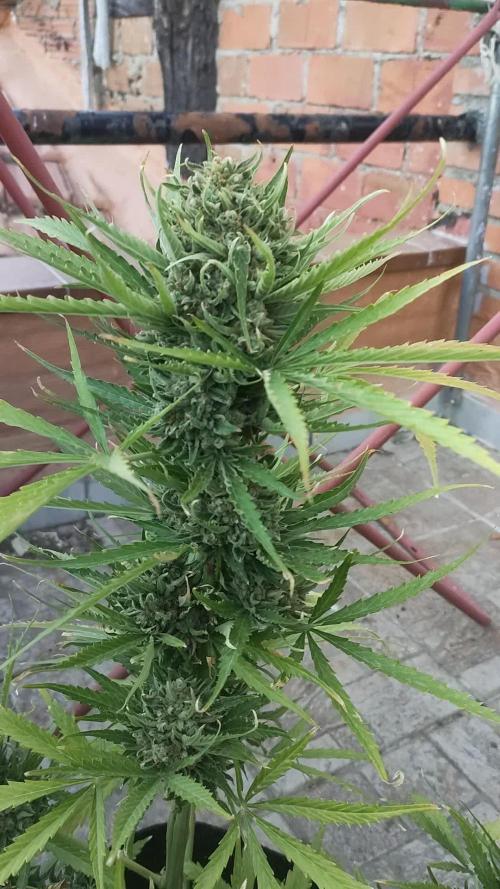
We are flowering, Royal Moby showing the typical fat flower genetics already, grows very fast flowers and does amazing !
Classic showing its potential, lets see what comes soon !
Likes
8
Share


@ChitownCannaChica
Follow
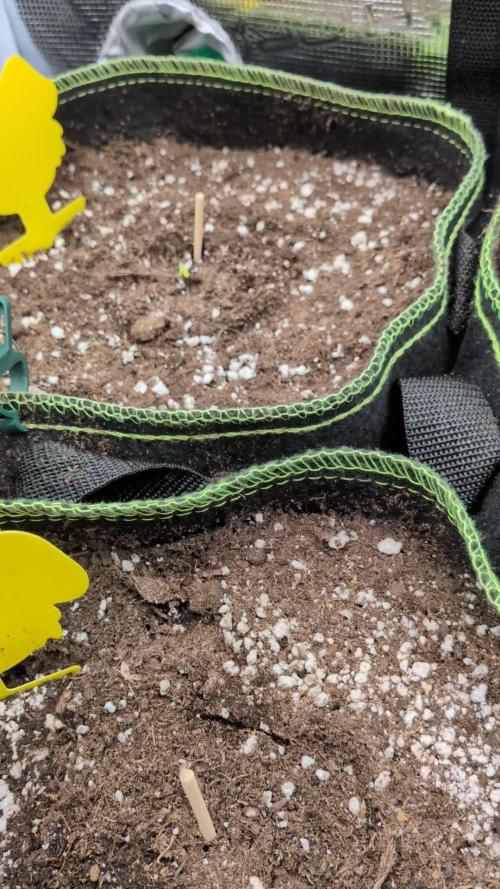
Topped the plant—- I have a seed popping out of the soil! Not sure what that could be…
Just water so far, but I have to water so much more frequent!


Likes
6
Share


@xXNoShowXx
Follow
Normally I allow two days in the paper towel germination. This one after only 24 hours.
Likes
14
Share


@BruWeed
Follow
🍀Estuvo bien en toda su etapa, no tuve ningún problema. Los resultados fueron muy buenos, se encuentra muy resinosa y con aroma a dulce.
🍀En total saque 143g de una sola planta.
🍀En total estuvo 105 días de vida desde su germinación.
🍀Recomiendo esta genética, por el momento son cocos Premium, ya quiero probarlo para saber que sabor tiene.
🍀Ahora se encuentra en etapa de secado, cuando ya estén para la etapa de curado subiré más imágenes.
🍀🇦🇷Podes seguirme en Instagram como @bruweed_arg🍀🇦🇷

Likes
10
Share


Likes
11
Share

@BruWeed
Follow
🍀13/07 - Empieza su séptima semana en semana en etapa de floración.
🍀Esta llena de tricomas, cada semana le agrego el Top Bud que ayuda mucho.
🍀Estoy tratando de que la temperatura en el armario sea baja, en algunas fotos se nota que de apoco estan tomando color violeta.
🍀No tuve problemas hasta el momento, dentro de dos semanas ya la podo.
🍀La planta entera esta en un 60% ambar.
🍀Esta cumpliendo 86 dias de vida en total desde su germinación.
🍀En estos dias seguire subiendo más imágenes de como viene.
🍀🇦🇷😶🌫️Podes seguirme en Insta gram como @bruweed_arg🍀🇦🇷😶🌫️
Likes
2
Share


@Krissci
Follow
Day 3 Light LST as stems are still growing, but nice and green.
Clean pots is always a must
Likes
Comments
Share

@therealgrowmie
Follow
What’s up Growmie! 🌱
With this new run, I’m trying to max out what I can do in my very limited grow space. The flavour profile of the autos we’re sowing is as modern as it gets - think a bag of Skittles with an extra punch. 🌈🔥
Lineup:
3x Purple Lemonade
1x Strawberry Gorilla
1x Tropicana Cookies
(all by FastBuds)
I wasn’t too happy with the last grow, where I applied some radical training. So this time, I’ll stick to simple LST to guide the plants where they need to be - all set in a nice bed of BioBizz Light Mix.
Feel the rainbow, taste the rainbow, Growmie! Let’s grow! 💪🌿


Likes
49
Share


@Roberts
Follow
Mandarin Squeeze smells amazing if you love oranges. The girls grew great. One took dominance as I expected in the grow. I hope it tastes as good as it smells. It would be my new favorite indica strain. I will be back with a smoke report in a few months. Thanks again Terpyz Mutant Genetics, and Spider Farmer. 🤜🏻🤛🏻🌱🌱🌱
Thank you grow diaries community for the 👇likes👇, follows, comments, and subscriptions on my YouTube channel👇.
Thank you Happy Growing 🌱🌱🌱
https://youtube.com/channel/UCAhN7yRzWLpcaRHhMIQ7X4g

Likes
3
Share


@Pechu420
Follow
They were already quite wilted, and I decided to harvest them a day early because I was sad to see them like that. Now I'll let them dry and then taste them. I couldn't weigh them when they were wet, so I'll wait until I see the dry weight.
After 9 days of drying, I put it to cure today. I've already tried it, it's delicious, little bitter buts its ok only 9 days.
The biggest one has a bitter taste, it was overfertilized, let's see if the cure will improve it.
The smallest one was also overfertilized, but smaller, it's very tasty, it looks like the first highcloudz i planted.
The taste didn't improve much because of the overfert, I did a water cure, it improved a bit, but I think the overfert was too poisonous for the plants. Wait a while to see if there is any improvement.
The overfertilization was more serious than I imagined, one plant had foxtails and became a hermaphrodite, few bananas, and only one good seed was produced.
In the future I will definitely plant this strain again, but I hope not to make the same terrible mistake of overfertilization.
They yielded very well despite the overfert, but I expected more if there was no overfert, of course. Almost 1g/watt, that's good.
Likes
22
Share


@Gerryboy82d
Follow
So far not a single issue considering this is my first grow I think these are coming on really nice


Likes
10
Share

@420DeepGrow
Follow
📆 Semana 11:
La Auto Pablo Escobar ha entrado en la fase de lavado de raíces, preparándose para la cosecha. Durante esta etapa, se suspende la fertilización para eliminar restos de nutrientes acumulados en el sustrato, lo que mejora el sabor y la calidad del producto final. Los cogollos mantienen su densidad y la resina sigue brillante, con tricomas que comienzan a tornarse ámbar, señal clara de que la madurez está próxima. El aroma se percibe más limpio, listo para la fase final.
¡Seguimos creciendo fuerte! 💪


