By continuing to use the website or clicking Accept you consent to our cookies and personal data policy and confirm that you are at least 18 year old. For details please see Privacy Policy and Terms
Accept


Likes
12
Share


@GREENPHOENIX6262
Follow
*Week 3 Flowering 09/17*
Fastbuds - Mimosa Cake (Auto) (2)
Thus far the flower transition has run smoothly and both plants are running accordingly
Nute feeds have increased
*Week 3 End of week Flowering 09/23*
Flowering for both Mimosa's is proceeding accordingly.
Light defoliation was applied
Light LST to heavy COLA's was applied, anchored to the trellis net.
*FRONT TENT (MIMOSA-2) QUICK VIDEO ADDED*

Processing
Likes
5
Share


@Ensign420
Follow
Week 02 Introduction
This week has been a bit of a struggle. Had my first experience dealing with slime and brown algae. But I think adding enzymes and increasing the beneficial bacteria helped to fix the issue. Also experienced nutrient burn for the first time. My nutrient solution strength got as high as 671 PPMs. So backed it down to about 430 PPMs during the end-of-week reservoir change. Also cut Hydroguard (expired?), CaliMagic, and Superthrive from this grow. Now she's still stunted, but is starting to recover. Hopefully...
[START OF WEEK 02]
Day 01 - Monday - 08/10/20 - Total Days: 008
-----------------------------------
- [0830]: Still looks a bit yellow. But getting larger!
--- Solution strength was at 248 PPMs.
--- Just topped off with a bit of distilled water
--- PH went up to 6.1 so PH'd down to 5.8
--- Ran the top feed for a bit to wet the hydroton.
- [2130]: She's looking even more yellow now.
--- Even the new leaves are really yellow.
--- Decided to add more base nutes.
--- Added 4ml of Sensi A
--- Added 4ml of Sensi B
--- Now at about
--- Solution Strength went up to 304 PPM.
--- PH was at 6,
--- Also raised the water level a bit more.
--- I really hope it's a nutrient deficiency and not an over-watering issue.
--- Please live!
Day 02 - Tuesday - 08/11/20 - Total Days: 009
-----------------------------------
- [0830]: Looking less droopy. But still yellow.
--- Decided to do a reservoir change.
--- 4.5gal of distilled water
--- 8ml of Sensi Grow A
--- 8ml of Sensi Grow B
--- 8ml of Voodoo Juice
--- 4ml of B-52
--- 4ml of CaliMagic
--- 4ml of Hydroguard
--- 4 drops of Superthrive
--- PH'd down to 5.8
--- Solution strength: 302 PPM
--- Since I didn't want to risk over-watering the rockwool, I did not to do a top feed, may do one tonight after the sleep cycle (lights are still set to go off at 10am and back on at 4pm).
--- As I was doing a reservoir change, I noticed that the tubes and bucket were a bit slimy. Didn't really stink or anything. Is this normal? Maybe due to the Hydroguard and Voodoo Juice?
--- I hope she gets better soon!
- [2215]: Getting larger! But still yellow.
--- Also can see a root growing through the net pot! Tiny little thing but it's there! Will have to start dropping water once more appear.
--- After looking over a few DWC diaries using AN nutes, seems like my solution strength is still too low. Most around this stage average around 500 PPMs with about 4ml per gallon.
--- Top fed for a minute to wet the top of the hydroton.
--- Solution strength went down to 263 PPM.
--- Added 8ml more of Sensi A
--- Added 8ml more of Sensi B
--- Now base nutes are at 16ml for 4.5 gal of water.
--- PPMs went up to 411.
--- Still lower than 500 PPMs, but that's okay.
--- PH was at 6. Not sure if I should adjust PH using AN nutes. So going to not ajdust unless PH goes above 6.1.
Day 03 - Wednesday - 08/12/20 - Total Days: 010
-----------------------------------
- [0830]: Looks like more root growth!
--- She still looks yellow. But leaves are perky.
--- PH was at 6.2 so lowered down to 5.8.
--- Solution strength was at 394 PPMs
--- Since roots are still growing, I decide to lower the water level a bit. Now water level is a bit below the net pot.
- [2200]: Root is getting longer!
--- Slime is returning. Not sure why.
--- Solution strength: 357 PPMs
--- PH: 6.1
--- Decided to add an enzyme along with more beneficial bacteria to hopefully cure the slime.
--- Added 16ml of Sensizym
--- Added 5ml of Hydroguard
--- Added 8ml of Voodoo Juice
--- New solution strength: 430 PPMs
--- New PH: 6.1
--- Top fed for a minute.
--- This slimy residue is really freaking me out! I hope the added enzymes will help eliminate the slime.
--- Going to do a full reservoir sterilization/nutrient change over the weekend. Please survive until then girl!
Day 04 - Thursday - 08/13/20 - Total Days: 011
-----------------------------------
- [0930]: I think the enzymes worked! There is little to no slime now!
--- Although I think the root was also dissolved in the process. It's now just a little stub sticking just below the net pot. The enzyme is also suppose to dissolved dead roots too but guess that root was too weak? Not sure what happened there. But I think the slime is cured!
--- Solution strength went down to 395 PPMs. Decided to add more base nutrients.
--- Added 8ml of Sensi A
--- Added 8ml of Sensi B
--- Added 4ml of B-52
--- Solution strength went up to 598 PPMs.
--- PH was at 6.1
--- As long as the PH is between 5.5 and 6.3, I'm not going to use PH Up or Down. But still will monitor PH levels.
- [1715]: Checked up on her after her nap and shes looking alive but stunted. But no slime!
--- Decided to add some sugars to help maintain the enzymes and beneficial bacteria.
--- Solution strength was at 587 PPMs.
--- PH was at 6.2
--- Added 8ml of Bud Candy
--- Solution strength went up to 671 PPMs.
--- PH also went up to 6.3
--- Lowered water level a bit to hopefully promote more root growth.
--- Top fed for a minute.
--- She is getting bigger, but still looks yellow.
Day 05 - Friday - 08/14/20 - Total Days: 012
-----------------------------------
- [0915]: Leaves look a little burnt on the tips. Still no slime.
--- Going to back off on the PPMs to hopefully fix the nutrient toxicity.
--- Solution strength was at 632 PPMs
--- PH was at 6.3
--- Added/Removed water until PPMs were at 536.
--- PH was still at 6.3
--- Raised water up a bit, then top fed for a minute.
- [2200]: Looking better. Still yellow though.
--- Solution strength: 514 PPMs
--- PH: 6.5
--- Added PH down.
--- New solution strength: 518 PPMs
--- New PH: 5.2
--- PH was kind of high. So decided to PH down. Had to use quite a bit to bring it down. But eventually got it to drop down to 5.3. A little low, but so far, the PH has always gone up so wanted to start it really low.
--- Ran the top feed for a minute to re-saturate the top of the hydroton.
Day 06 - Saturday - 08/15/20 - Total Days: 013
-----------------------------------
- [0830]: She looks stunted. leaves are still yellow.
--- Solution strength: 514 PPMs
--- PH: 5.6
--- Top fed for a minute.
--- Not sure what to do at this point. Going to do another reservoir change soon. Hoping she lives until then.
- [2145]: Looking pretty much the same.
--- A bit of slime has returned. Since I've been diluting the nutrient solution, the enzyme ratio has dropped. So I guess this is expected.
--- Also noticed that slime build up was on the air-stones. Never really checked the stones so not sure how long that has been there. Looks brown too, which can't be good.
--- Going to do an H202 sterilization of the system (minus the net pot) tomorrow so did not add anything.
--- Lowered the water level to below the net pot.
--- Then top fed for a minute.
Day 07 - Sunday - 08/16/20 - Total Days: 014
-----------------------------------
- [0900]: STERILIZATION DAY!
--- Decided to skip today's night cycle for a deep clean.
--- I'm hoping that skipping a night cycle won't be too stressful.
--- Temporarily moved her to a new bucket.
--- Used about a half of gallon of straight distilled water to flush out the net pot.
--- Drained the system and wiped up all the brown sludge. Also removed the air stones and cleaned up all the goo.
--- Filled the system with 2 gallons of distilled water and at least 30ml of food grade hydrogen peroxide (35% strength).
--- Yea its a lot, but since I'm not going to sterilize the system overnight, I went with a really high doseage. Basically I kept adding until I started to see little bubbles start to form.
--- Then I ran the water pump.
- [0915]: Boiled the air stones in tap water for about 10 min. Then reconnected them to the airlines.
--- I let the air stones and hose soak in the sterilization solution for about 5 minutes so the peroxide can absorb into the stones. Then ran the air stone to help mix and agitate the solution.
--- Occasionally, I'd repeat the process of turning the air pump off for a few minutes to let the stones soak.
- [1000]: Covered the top two row of holes of the net pot with some aluminum tape. Hopefully this solves the light leaking in through the hydroton.
- [1200]: Used an old toothbrush and scrubbed the pump clean. Then drained the system.
--- Refilled with more distilled water and peroxide. Again added a lot.
--- Ran system again to sterilize even more.
- [1530]: Drained the system and refilled with distilled water to rinse.
--- Ran the system for a few minutes, then drained and rinsed again.
--- Did this a few more times over about an hour.
- [1630]: Added 4 gallons of fresh distilled water.
--- Added 15ml Sensi Grow A
--- Added 15ml Sensi Grow B
--- Added 12ml of B-52
--- Added 16ml of Voodoo Juice
--- Added 16ml Sensizym
--- Solution strength was at 430 PPMs
--- PH was at 5.6
--- I was going to add Hydroguard, but I think the bottle is expired. Since 2017 or 2018!? I think Hydroguard is good for up to 2 years from the date on the bottle or 6 months after opening. So not going to use from now on. I wonder if this could have contributed to the slime build up.
--- Also removed the CaliMagic and Superthrive too. Going to only use AN products to eliminate the chance of incompatible nutrients.
--- Placed her back in the bucket and top fed for a minute.
--- Here's hoping for the best. Going to let it ride until morning! Please feel better!
[END OF WEEK 02]


Likes
10
Share


@theplantdaddy
Follow
Temps at 78-84 f, humidity inside dome around 68-76 depending on temps. Direct planting into coco jiffy plugs, charged with a light seaweed extract. Took 2 days exactly for seed to pop out of plugs. Another day to remove its shell, will start counting as day 1 from here on out. Check out the other strains on my other diaries. 1 gelat.og auto and a green crack auto, both from seedsman.

Likes
116
Share


@Kitties_and_Colas
Follow
~_~_~_~_~_~_~_~_~_~_~_~_~_~_~_~_~_~_~_~_~_~_~_~_~_~_~_~_~_~_~_~_~_~_~_~_~_~_~_~_~_~_~_~_~_~_~_~_~_~_~_~_~_~_~_~_~_~_~_~_~_~_~_~_~_~_~_~_~_~_~_~_~_~_~_~_~_~_~_~_~_~_~_
10/07/21
👋😺Hi grow family!! We're beyond excited to try out this new MarsHydro LED for our latest grow, the SP-3000 is INCREDIBLY bright!! ..I have never seen a light more appropriate for a 4x2 tent in my life, we (happily) replaced 3 "600 watt" blurple LEDs with this single rig ( something we've wanted for a very long time). There should be no issue achieving perfect coverage, corner to corner with this light. Its been years since we've flowered under LED ( and never one of this quality), we're a little bias towards HID/CMH, especially my hubby but I think this might just be the LED that changes our mind! We'll be growing Gelat OG Auto by Seedsman (we've heard amazing things) for our first grow under the SP-3000, all plants in 5gl fabric pots, Promix-B (25% perlite) on a 20/4hr cycle. We're starting with 4 plants but if they become unmanageable, we'll move one or 2 of the plants to another tent. We use a glass of water and a paper towel as our germination method. We soak seeds roughly 24hrs and then in a wet paper towel for another 12-24hrs, we average roughly a 90% success rate doing it this way... Thank you for reading if you made it this far and happy harvests everyone! ❤️💡🌱😽💨
⚡Mars Hydro/SP-3000⚡ Specifications ⚙️:
Diodes: Samsung LM301B / Osram 660nm (960 total)
Driver: Meanwell 300watt 🔌 (300W±5% @AC120V-277V)
PPF: 824umol/S ☢️
PPE: 2.8 µmol/j 〰️〰️
Lifespan: >50k hrs ⌛
Veg Coverage: 3 x 5 ft 🌱
Flowering Coverage: 2 x 4 ft 🌼
Weight: 10.1 lbs (4.6kg)
-No-fan design: the SP-3000 uses an aluminum heatsink, and the driver can be removed then placed outside the tent🌡️⬇️
-IP65 waterproof ratings, tolerant to high humidity grow environments 💦 ..
-Up to 30 of these lights can be daisy-chained together and controlled from a single light!
💡~💡~💡~💡~💡
~_~_~_~_~_~_~_~_~_~_~_~_~_~_~_~_~_~_~_~_~_~_~_~_~_~_~_~_~_~_~_~_~_~_~_~_~_~_~_~_~_~_~_~_~_~_~_~_~_~_~_~_~_~_~_~_~_~_~_~_~_~_~_~_~_~_~_~_~_~_~_~_~_~_~_~_~_~_~_~_~_~_~_
10/10/21
🤘😺 100% germination!! All seedlings have broken the soil today.. I'm so in love with this light!! ❤️💡🌱
~_~_~_~_~_~_~_~_~_~_~_~_~_~_~_~_~_~_~_~_~_~_~_~_~_~_~_~_~_~_~_~_~_~_~_~_~_~_~_~_~_~_~_~_~_~_~_~_~_~_~_~_~_~_~_~_~_~_~_~_~_~_~_~_~_~_~_~_~_~_~_~_~_~_~_~_~_~_~_~_~_~_~


Likes
2
Share


@PressurexGarden
Follow
Pretty easy grow so far. Yes I water a lot but I'm also in my garden a lot so it keeps me busy. Purple stems only panic I had. I switched to ro water
Likes
27
Share


@ButterfliesLittleFarm
Follow
Hello Diary.
A new diary, a new beginning. In the fifth farm we have three residents again, two Haze Berry Automatic and Fat Banana Automatic, both strains from Royal Queen Seeds. 😍
I would like to thank the team from the Royal Queen Seeds who have recognized my efforts in keeping a diary and greatly support me in what I love. 🙏
I always try to make a balance between sativa and indica, since I do creative work, I am a big fan of sativa, although in the evening, when my obligations are over, I like to relax with indica. So this time I planted two Haze Berry Auto that are predominantly sativa and one Fat Banana which is more indica. 😵
WHY HAZE BERRY?
Haze Berry Automatic is the sativa-dominant successor to the legendary Haze Berry. Haze Berry Automatic inherited Haze Berry (Blue Dream’s) characteristic high. The sativa-dominant effects ramp up central nervous system activity and engage the mind. However, her flowers only contain a THC content of 13%. While this might seem comparatively low, it’s absolutely ideal for me. This makes it a great strain to use intermittently throughout the day. Haze Berry Automatic can be smoked in-between tasks or during a work break to produce a similar effect as a cup of coffee. It provides light stimulation and refreshes the mind for a more creative outlook.
LET'S START FIRST WITH THE FARM SET-UP:
Box - Secret Jardin DS120W 120x60x178
Lights - MIGRO 200+
Ventilation - Blauberg Turbo - E 100
Filter - Primaklima filter PK 100/125
Fan - Oscillating Koala Fan
Humidifier - Beurer LB 45
Soil - BIOBIZZ Light - Mix
Pot - 11L AirPot
Seed - Royal Queen Seed
Nutrition - BioBizz and RQS Organic nutrition
LET THE DIARY START OFFICIALLY:
14/09/2020
Planting. I prepared everything I needed for planting, cleaned the farm and changed the filter. I put Primaklima filter - PK 100/125. This time I decidet for AirPots, I also used them in the first two farms, BioBizz-Light Mix is already standard on my farm and Easy Boost and Easy Roots Mycorrhiza Mix from RQS as organic nutrition. Since the first farm I use only organic fertilizers and for now I have used BioBizz and RQS organic nutrition.
After I put the soil in the pot, I added 50g of Easy Boost Organic nutrition and mixed it well with the soil, after that I added 5g of Easy Roots Mycorrhiza Mix and also mixed everything once more.
I prepared 7 liters of water in which I regulated p.H with Plagron’s Lemon Kick, and soaked the soil well before making a hole in which I put the seed. Otherwise, the water would have pushed the seed much deeper into the ground.
After the planting is completed, they enter their new home. The temperature in the Box at that time was 26 degrees and the humidity was slightly below 60%.
I set the lights 35cm from the pots as Migro recommends.
14 - 17/09/2020
I sprayed the surface of the soil with water a couple of times to keep the soil moisture at the surface.
Also the humidity dropped so I put on a humidifier for a couple of days.
17/09/2020
The first Haze Berry has sprouted, and I'm still waiting for the second.
19/09/2020
The other Haze Berry didn’t germinate, so I soaked the soil with water again and put the seed back on. I hope it works out this time. This is the first time since I planted that my seed has not germinated.
Also the first Haze Berry got a liter of water with regulated p.H at 6.3
23/09/2020
The big day, the second Haze Berry sprouted the first one got watering. As for p.H. values, I always regulate, in my case I lower the value between 6.2 and 6.5. I removed the humidifier.
Temp / Humidity on the farm - 26 degrees and 57% humidity.
I would like to thank Grow Diaries for making germination week an option. I think that's a great thing. It will be interesting to follow the development of both Haze Berrys since the second one is a week late, but this time I will be photographing and filming just one plant in detail. See you next week.

Likes
Comments
Share

@Kardo
Follow
Die Purple wird nicht mehr getoppt wir schauen jetzt was die Triebe für eine Kraft bekommen
Likes
30
Share


@Dunk_Junk
Follow
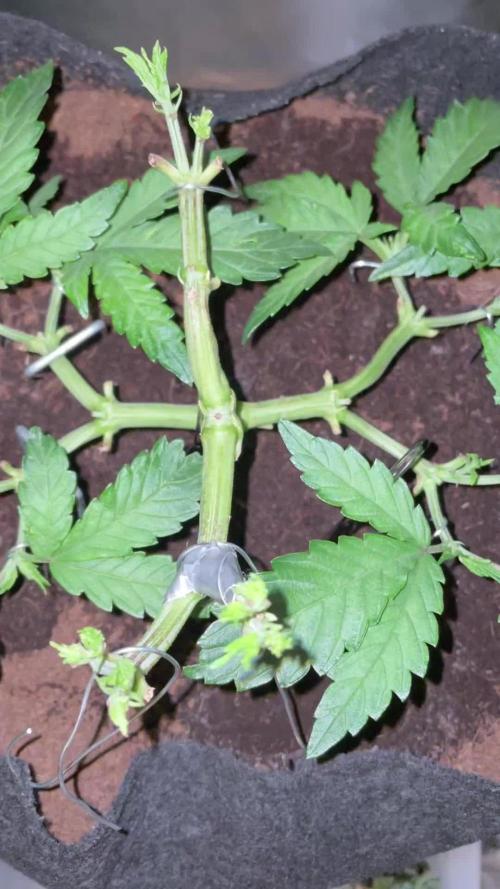
The flowers are starting to pack on weight this week. I'm not doing anything at all other that watering/feeding.
I left the tape measure visible in the video for scale. Good? Helpful?

Likes
7
Share


@Staffedition
Follow
Привет друзья.
Наше знакомство продолжается с новым фотоцветущим растением от Smail_Seeds сорт ORIGINAL CHEMZKITTLEZ F1 reg.
Сегодня растению 92 дня.
Шишки наливаются уже тяжело ей стоять)
Перевёл на 12/12 1.10.2023
Растение очень хорошо развивается, ни каких сбоев в генетике не наблюдается😀
Сорт выводим сами.
Смотри мой профиль, у нас всегда есть что то интересное.
Не забудь поставить лайк❤️, если понравилась как прошла неделя
И читайте наш TELEGRAM: https://t.me/smail_seeds
#Smail_Seeds 😀
Likes
42
Share


@DogDoctorOfficial
Follow
Yup as i suspected the defoliation, despise on her case a almost no leafs one since she is an auto and she was on her first week flowering, but she did took it like the champ she is and she is aiming to the moon as i like them to do, her bud formation is peculiar and beautiful to my eyes <3 <3 <3 i think i am in live with this Lavender, big shout out to the @SeedsMafia on this outstanding creation of them, very exited to see what she will tell me next <3 <3 <3
As always thank you all for stopping by and for supporting me on this journey, i am super passion about growing and fell blessed to have you all with me on this new journey <3 <3 <3
Genetics -Seeds Mafia Lavender Automatic
Light - LUMATEK ZEUS 465 COMPACT PRO
Food - APTUS HOLLAND
All info and full product details can be find in can find @
https://seedsmafia.com
https://aptus-holland.com/
https://autopot.co.uk/
https://lumatek-lighting.com/
<3 <3 <3 Growers love to you all <3 <3 <3
Auto Lavender Feminized is a very popular type of cannabis, whose strong therapeutic effects are highly appreciated. It has a flowering period of approximately 9-10 weeks and can be grown both indoors and outdoors. It is a resistant variety which can be cared for easily.
This variety is mostly appreciated because it produces strong, durable and resistant plants. Its branches and stem usually grow vertically rather than horizontally. It reaches heights of 120 cm and the harvests amount to 90 grams/plant. In addition, it contains high levels of THC- up to 20%.
As their name suggests, the plants that grow from Auto Lavender Feminized seeds have a smell and taste similar to those of lavender, also comprising mint and rosemary tones. This is a variety of cannabis that is usually appreciated for its pleasant fragrance and high productivity, seeing as its buds and stem produce an impressive quantity of resin. If you’re looking for another kind of feminized, autoflowering variety, Auto Lavender Feminized will not disappoint you for sure!
auto Lavender Feminized is a feminized, autoflowering variety, obtained by crossing the Lavender and Lowryder 2 species. The plants that grow from this variety have a very specific structure: they are tall, vigorous, and have large branches. At the end of the flowering period, the plants acquire an orange-gold shade

Processing
Likes
12
Share


@Nighttripper
Follow
Another good week. Knock on wood. The plants responded very well to drop in the nutrient level. This is the first and second week of the flower cycle. And starting to get some white hairs. They are girls! I decided they needed a haircut and did some major defoliation today. There’s some pictures before and after.

Likes
12
Share


@2Stones1Bird
Follow
Checkout my Instagram @smallbudz to see the Small budget grow setup for indoor use, low watt, low heat, low noise, step by step.
13/12/2019 - Change the light schedule to 12-12h after 8 weeks of no signs of flowering I think is a photo not and auto.
16/12/2019 - Fed her 1.5l of 6.5PH water with 0,5ml of each: Grow, Bloom and Max, and 1ml of each: Heaven, Alga-mic and Vera, noticed about 10% run off, I use about 1/3 of the nutrient dosage on the chart, to achieve about 200/300PPM (500 scale).
17/12/2019 - Did some defoliation on the lower branches mainly.

Likes
30
Share


@Flauros
Follow
Хороший куст, 230+/- грамм сухих шишек с куста потеряв месяц Вегетативной стадии. Сахарные шишки. Много листьев.
Likes
7
Share


@Cultivatorcarlos
Follow
december 14th gave her a feed of about 6 cups of dechlorinated tap water phd to 6.4 with 1/2 tsp of veg nutes to 3 gallons and 4 2 tsps of calmag to 3 gallons of water. I thought she was initially getting a calmag deficiency but it was just her switching to flower and needing diff nutes ig? I also tested runoff for the first time which i should've done from the beginning but it came out at 6.3 ph
december 17th 2021: gave her half a gallon of dechlorinated tap water phd to 6.4 with 1/2 tsp of veg nutes to each 3 gallons of water and 2 tsps of calmag to 3 gallons of water.


Likes
31
Share


@Santica_Garden
Follow
All of the explanation has been done on the video I have uploaded..... Hopefully it works because for some reason previous viodes didn't! Any questions guys just ask. Thanks & Happy Growing

Likes
20
Share


@Bread_n_Buds
Follow
Here we are again ready to start again, always under the sign of Zamnesia, we make our fantastic plants and we show you what we are capable of. We have 5 autoflowering strains and 5 photoperiodic ones and now we present them to you.
The fourth autoflowering that we present to you is our version or rather of Zamnesia forgive me if I start to feel at home, it is the Northern Lights. Here we are talking about a classic of classics naturally in the Zamnesia version as I said above with the right ruderalis it really promises big harvests in a short time. There is great competition on this plant and I have grown some very good ones let's see what the home one is like.
To explain my germination method which is a combination of experiences acquired in the field and readings of the right advisors, I have chosen to divide it into phases so whoever wants can follow them and understand better step by step.
- Preparatory Phase ---- Check the average temperature in the room, humidity status to understand if it is the case to start or wait, I decided for the end of August because the temperatures start to drop towards the 22-25 degrees recommended for germination.
Then another thing more or less credible depending on the sensitivity is the control of the lunar phases. I believe in it a lot, it is a method that ancient farmers used to understand when it was best to plant depending on the attraction of the moon. To make my life easier I use a simple app that advises you on the right time to plant, harvest and put in the jar (depending on the lunar phases).
- Phase 1 --- Soaking in water. There are many authoritative friends who advise against this method due to the risk of drowning, but I have always been fine and I follow the rule if it opens in water the seed is almost certainly healthy and will come out of the ground 90% normally.
- Phase 2 --- Opening the seed in water. As soon as the seed opens and the root comes out a little, you have to be very very careful not to leave the seed in the water open for too long. This is why there is a risk of drowning. So as soon as the root comes out, it must be planted. Do not wait for it to stretch out a lot, you can wait a little longer in the absorbent paper, but not in water.
- Phase 3 --- In the meantime, while I soaked the seeds, I prepared my pots: I use small biodegradable pots (choose the ones with holes underneath for drainage). A few hours before working with the opened seeds, I moistened the soil with water adjusted to the right pH (5.8 - 6.2) and Plagron Power Roots. The small root is now open and we can make a little hole with a toothpick, widen it and insert the seed. Not too deep with the root facing downwards. From Serious Seeds we learned the dome technique: if you put a small dome of soil on the seed the water will settle on the sides avoiding overwatering problems.
- Phase 4 --- The plant emerges from the soil. So far I have not put the light, now I turn it on at minimum after half a day of soil to give direction to the seedlings. The first week the light will be gradually brought from 40% to 60% to go to 70% - 75% in the remaining weeks of veg. During the first week maximum, I keep the cycle of 24 hours to avoid stretching. Be careful not to exceed the first week at least with photoperiodic plants.
- Germination % --- In water 20/20 seeds have opened for good luck I'm waiting to talk when they come out of the ground but it seems that we are going towards an excellent percentage of germination..."Not too bad"...
- Soil and Food --- The soil used is entirely organic in its entirety and is the Plagron Promix that will be used with the 100% organic pack provided by Zamnesia complete with all the main fertilizers for your plant buy it at the link --
https://www.zamnesia.io/it/11457-plagron-easy-pack-natural.html
// Strain Description // Born from the rib of a classic, Northern Lights Automatic is a weed from the past, but with a futuristic update. This feminized version sees Northern Lights hybridized with a ruderalis to create an extra sweet variety, that all fans are sure to love. Growers can expect abundant results in just 9 weeks, from seed to harvest! -
- Get a seed of this fantastic strain --- https://www.zamnesia.io/it/3324-zamnesia-seeds-northern-lights-automatica-femminizzata.html
- Soil and Fertilizers entirely organic --- https://plagron.com/en
- Growbox --- https://www.secretjardin.com/
- Music and sound --- I made my girls listen to 432hz frequencies and music from www.radionula.com
- Z --- You can find these seeds, much more from the world of cannabis, mushrooms and an incredible series of accessories and gadgets on the reference site not only mine but of many growers ----
https://www.zamnesia.io
