By continuing to use the website or clicking Accept you consent to our cookies and personal data policy and confirm that you are at least 18 year old. For details please see Privacy Policy and Terms
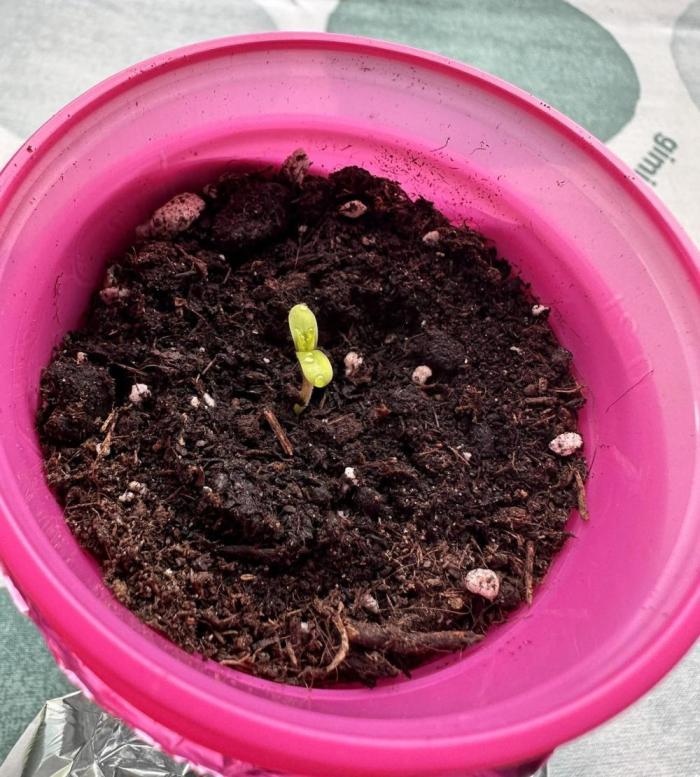
NewNewbie Germinated on 04.06.25, first time growing a photoperiodic strain. Lets hope for the best😀
2 likes
comments
Share
Used method
Glass Of Water
Germination Method
1
Week 1. Vegetation
2mo ago
1/2
7 cm
Height
20 hrs
Light Schedule
25 °C
Day Air Temp
7.0
pH
No Smell
Smell
0.2 liters
Pot Size
50 cm
Lamp Distance
NewNewbie Off to a slow start, also because the conditions were not kept consistant.
2 likes
comments
Share
2
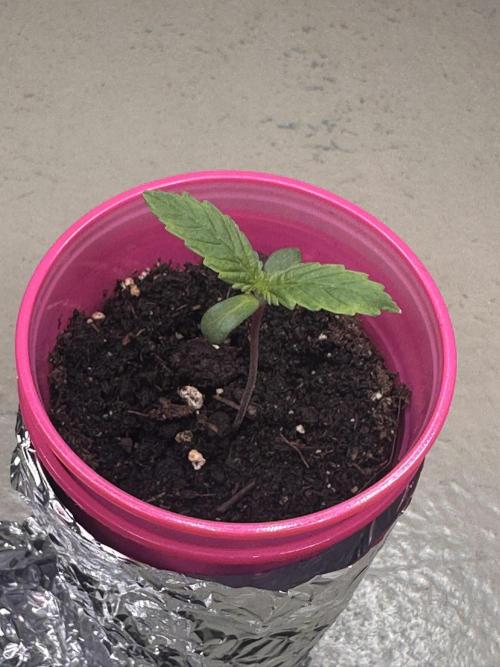
Week 2. Vegetation
2mo ago
13 cm
Height
20 hrs
Light Schedule
27 °C
Day Air Temp
7.0
pH
No Smell
Smell
1.5 liters
Pot Size
3 liters
Watering Volume
50 cm
Lamp Distance
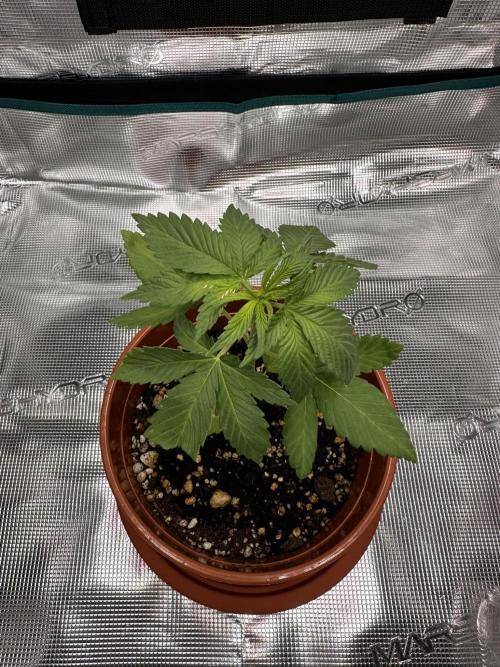
NewNewbie Following the slow start, the growth continued slow. Could be because during good weather, she got to sit on the balcony, where the temperatures climbed up to 30 degrees.
2 likes
comments
Share
Used techniques
Transplantation
Technique
3
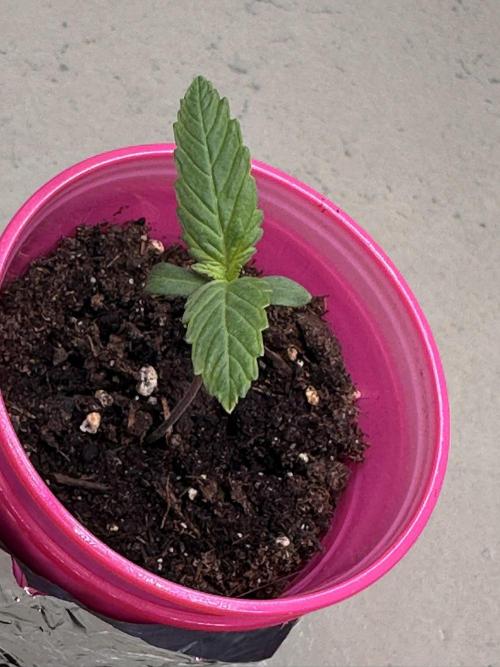
Week 3. Vegetation
2mo ago
1/2
22 cm
Height
20 hrs
Light Schedule
26 °C
Day Air Temp
7.0
pH
No Smell
Smell
3 liters
Pot Size
40 cm
Lamp Distance
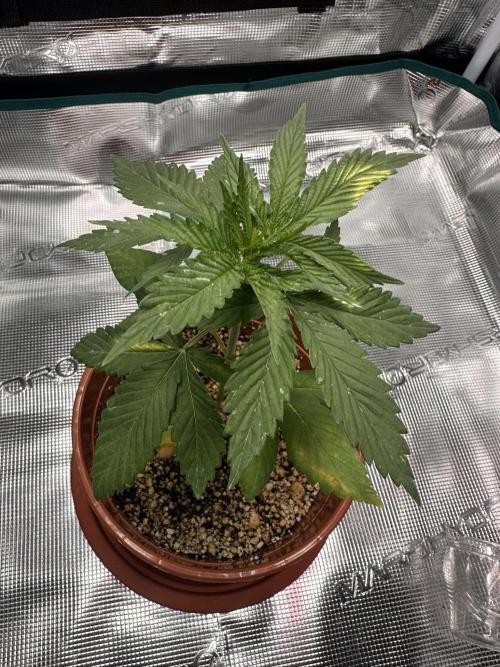
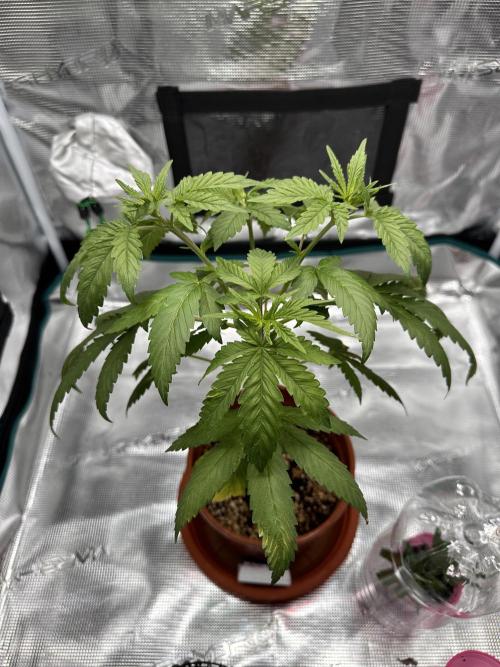
NewNewbie In week 3, she showed some deficiencies wich got worse and worse. She also had some powdery mildew, i guess because of a lack of airflow.
2 likes
comments
Share
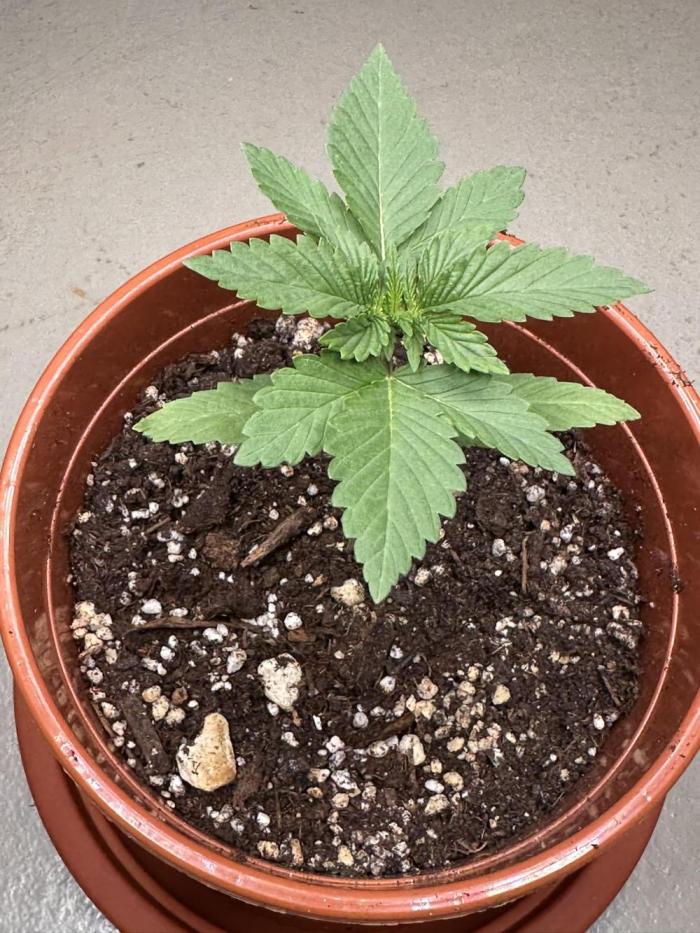
4
Week 4. Vegetation
2mo ago
1/2
30 cm
Height
20 hrs
Light Schedule
27 °C
Day Air Temp
6.5
pH
No Smell
Smell
23 °C
Night Air Temp
3 liters
Pot Size
35 cm
Lamp Distance
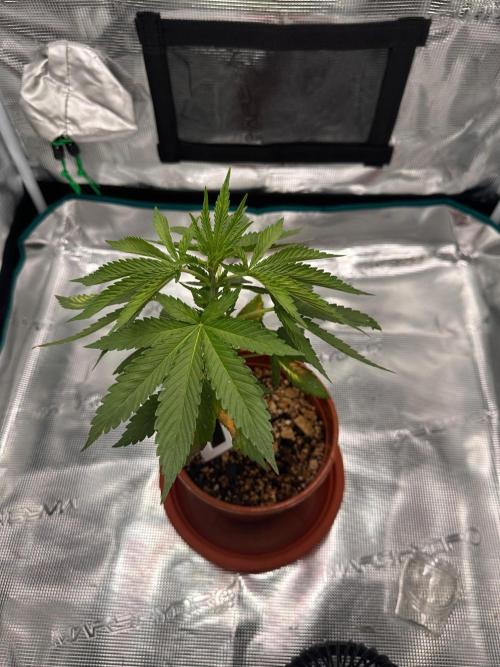
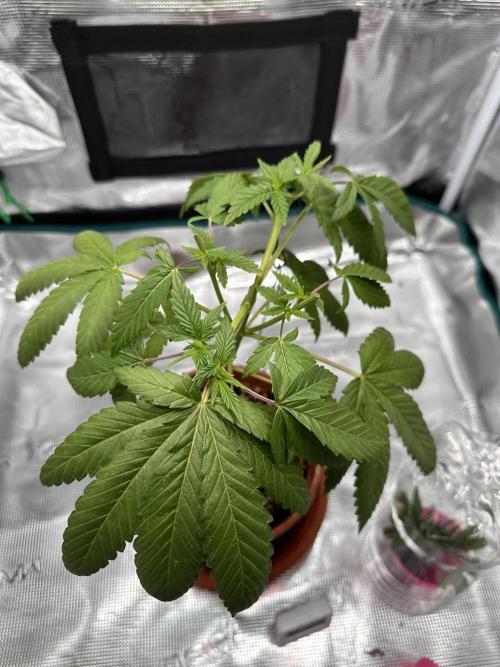
NewNewbie The slow growth continues, she showed some more signs of deficiencies after i flushed her. The flush was much needet, since the runoff PH was above 8.5. The new growth seems to be healthy, so i planned to put her into a bigger Pot with fresh nutrients.
2 likes
comments
Share
5
Week 5. Vegetation
2mo ago
1/2
35 cm
Height
20 hrs
Light Schedule
26 °C
Day Air Temp
6.5
pH
No Smell
Smell
22 °C
Night Air Temp
3 liters
Pot Size
35 cm
Lamp Distance
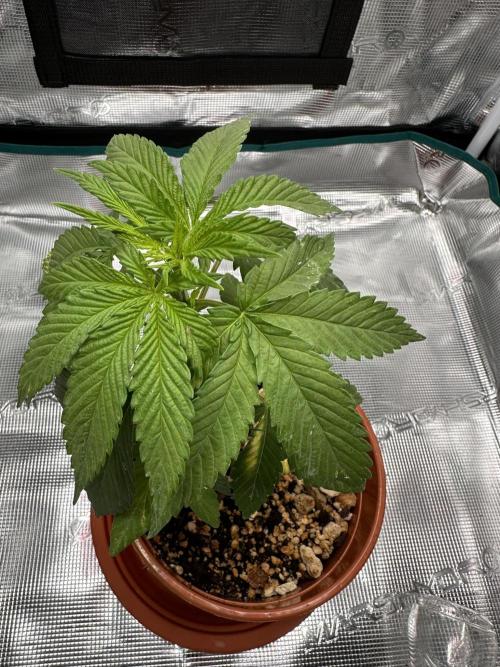
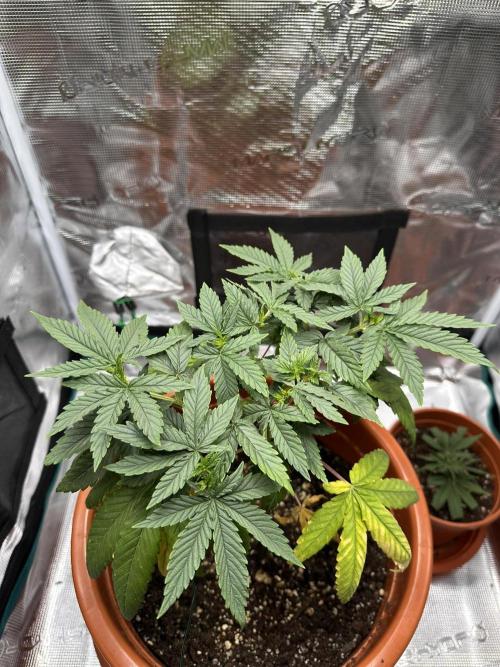
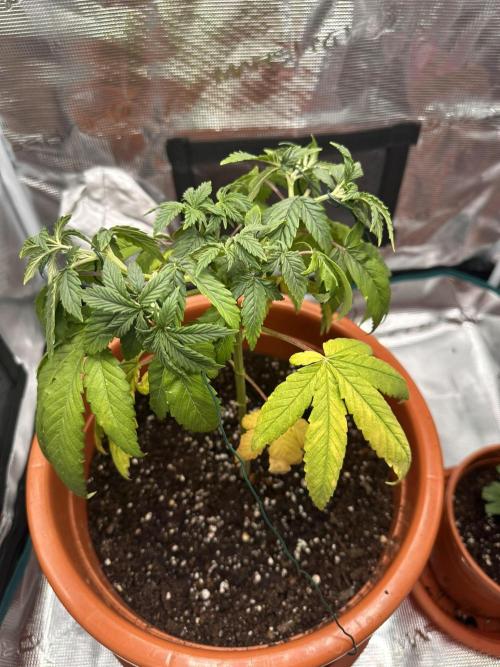
NewNewbie The growth picked up some speed, and i there were no more defficiencies in the new growth. I think the roots might not have liked my watering, since i was away most of the week and gave her a bigger watering before leaving. I decided to top her.
1 like
comments
Share
Used techniques
Topping
Technique
LST
Technique
6
Week 6. Vegetation
2mo ago
1/2
45 cm
Height
20 hrs
Light Schedule
26 °C
Day Air Temp
6.5
pH
No Smell
Smell
22 °C
Night Air Temp
3 liters
Pot Size
35 cm
Lamp Distance
Nutrients 1
Bio Vegetable
10 mll
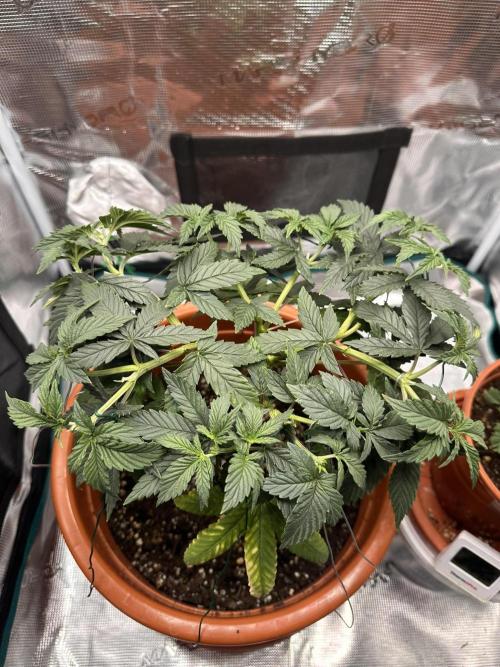
NewNewbie The lower yellow leaves started to turn green again. She got topped again at all nodes and trained downwards.
1 like
comments
Share
Used techniques
LST
Technique
Topping
Technique
7
Week 7. Vegetation
2mo ago
1/2
40 cm
Height
20 hrs
Light Schedule
26 °C
Day Air Temp
6.5
pH
No Smell
Smell
22 °C
Night Air Temp
30 liters
Pot Size
30 cm
Lamp Distance
Nutrients 2
Bio Vegetable
10 mll
Chickenshit
3.91 mll
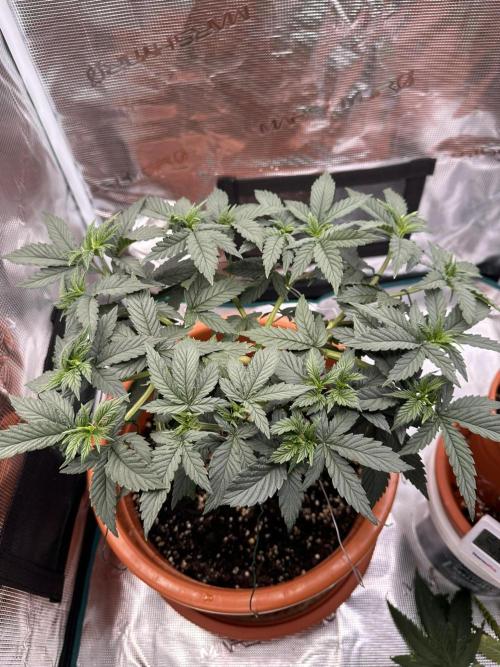
NewNewbie She got a bigger Pot and the training continued to get an even canopy.
1 like
comments
Share
Used techniques
Topping
Technique
LST
Technique
Transplantation
Technique
8
Week 8. Vegetation
2mo ago
1/3
40 cm
Height
20 hrs
Light Schedule
26 °C
Day Air Temp
6.5
pH
No Smell
Smell
22 °C
Night Air Temp
30 liters
Pot Size
30 cm
Lamp Distance
Nutrients 2
Bio Vegetable
10 mll
Chickenshit
3.91 mll
NewNewbie The days of slow growth seem to be over. She likes her new pot and is responding well to the training. New growth looks very healthy.
1 like
comments
Share
Used techniques
LST
Technique
Topping
Technique
9
Week 9. Vegetation
2mo ago
1/3
45 cm
Height
20 hrs
Light Schedule
26 °C
Day Air Temp
6.5
pH
No Smell
Smell
22 °C
Night Air Temp
30 liters
Pot Size
30 cm
Lamp Distance
Nutrients 2
Bio Vegetable
10 mll
Chickenshit
3.91 mll
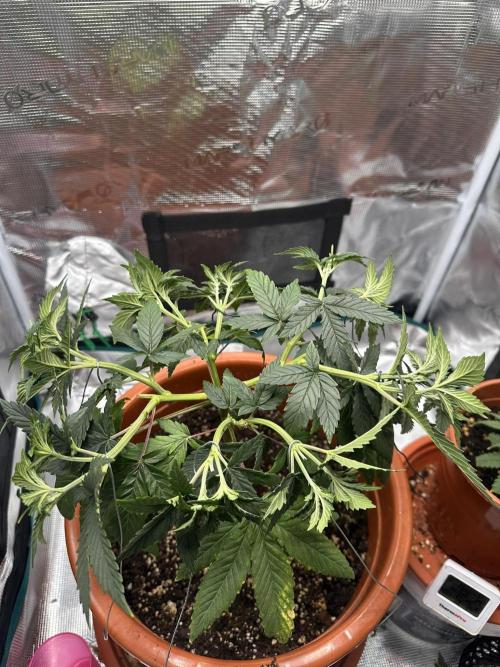
NewNewbie More topping and training. At the end of the week she got a new bigger pot.
2 likes
comments
Share
Used techniques
LST
Technique
Topping
Technique
Transplantation
Technique
10
Week 10. Vegetation
2mo ago
1/2
45 cm
Height
20 hrs
Light Schedule
26 °C
Day Air Temp
6.5
pH
No Smell
Smell
22 °C
Night Air Temp
60 liters
Pot Size
30 cm
Lamp Distance
Nutrients 2
Bio Vegetable
10 mll
Chickenshit
1.3 mll
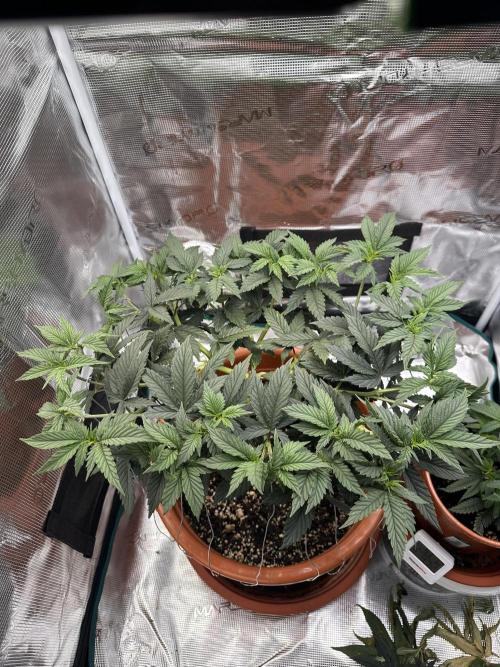
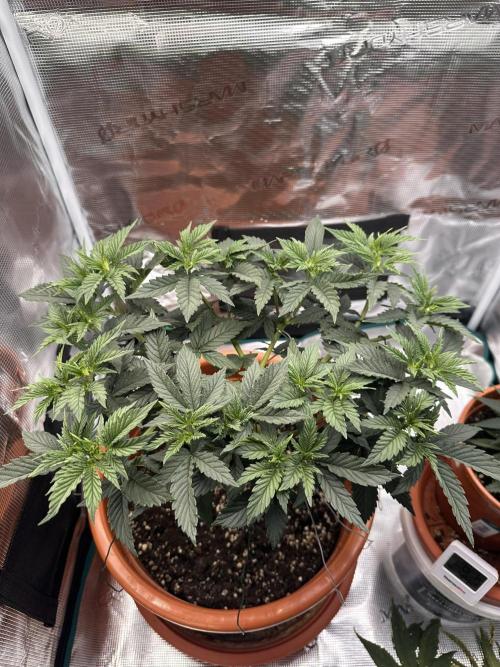
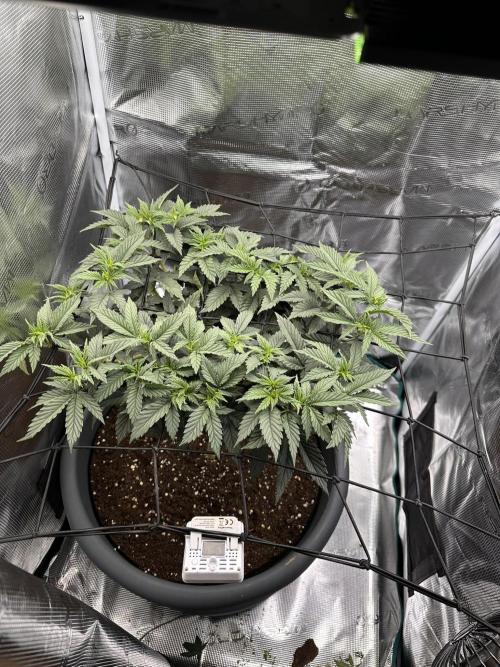
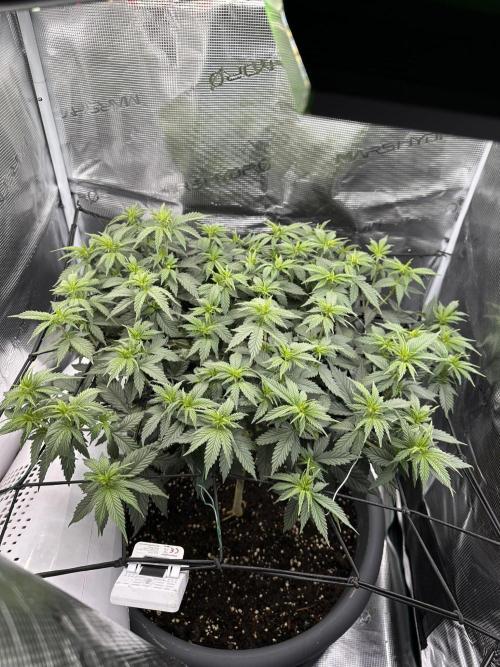
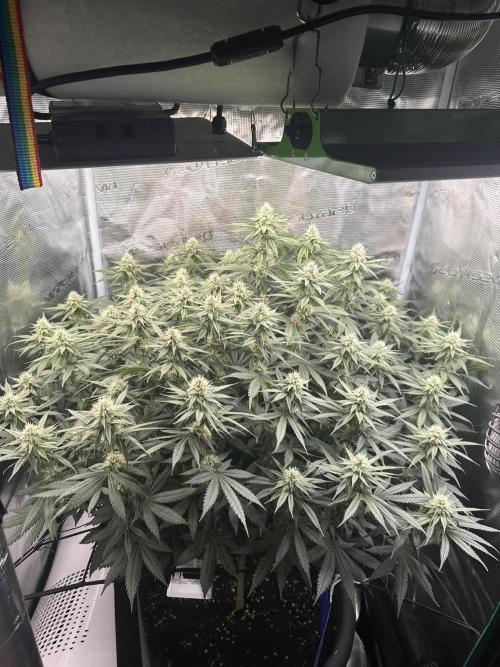
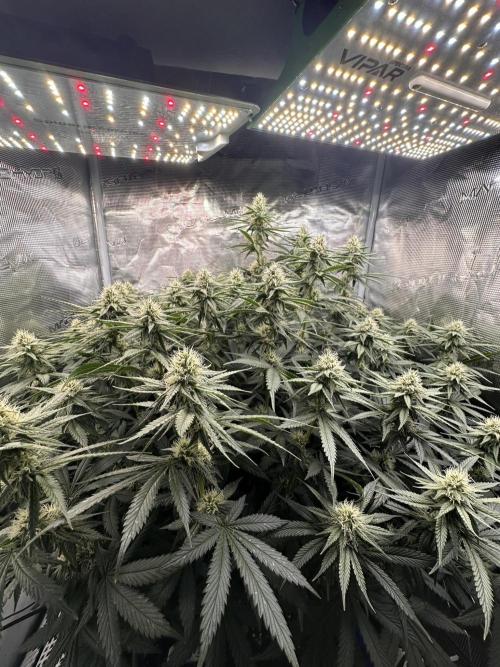
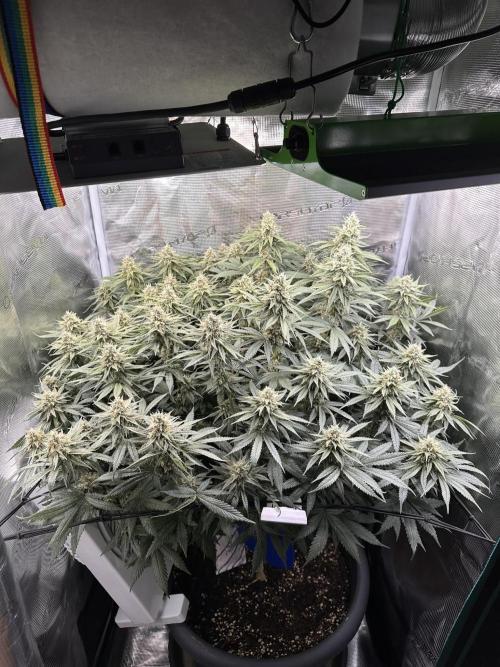
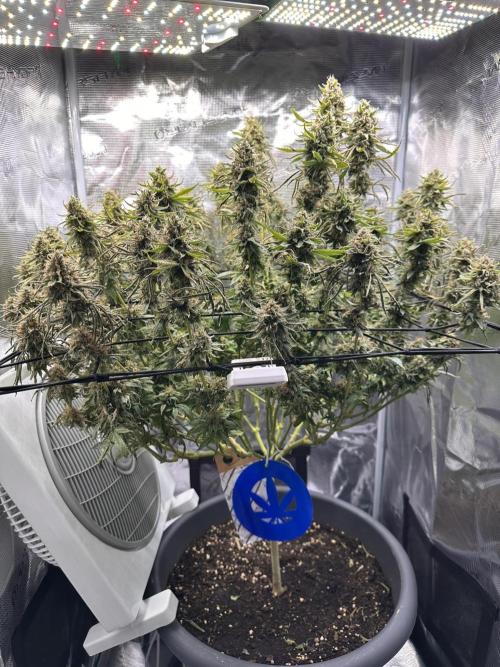
NewNewbie More topping and training, now with the ScrOG. She seems to love the bigger pot. Fast and healthy growth.
2 likes
comments
Share
Used techniques
Topping
Technique
ScrOG
Technique
11
Week 11. Vegetation
2mo ago
1/5
50 cm
Height
20 hrs
Light Schedule
24 °C
Day Air Temp
6.5
pH
No Smell
Smell
20 °C
Night Air Temp
60 liters
Pot Size
40 cm
Lamp Distance
Nutrients 1
Bio Vegetable
10 mll
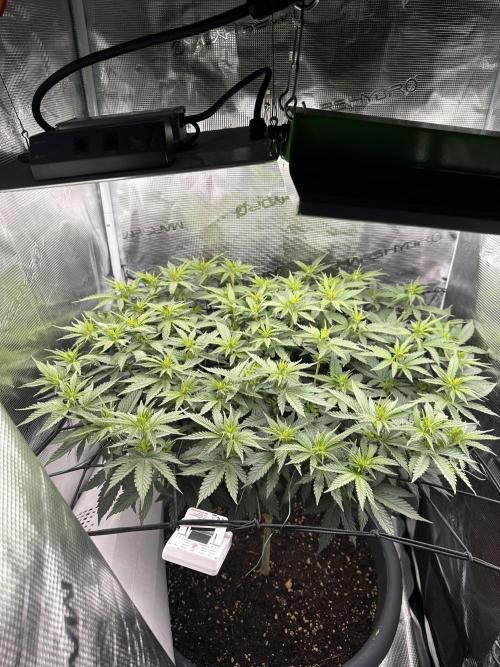
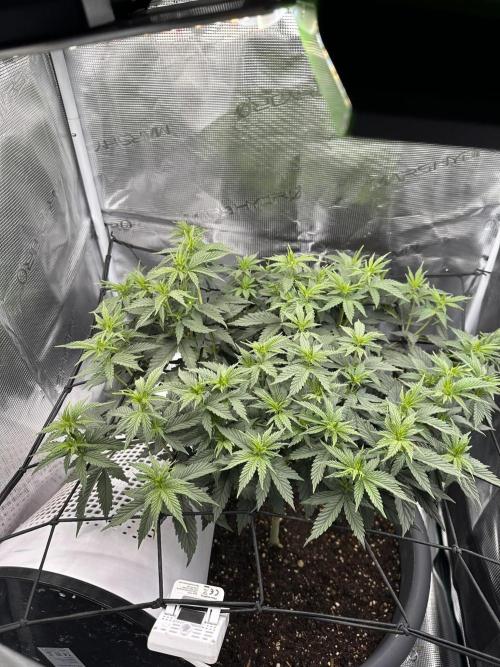
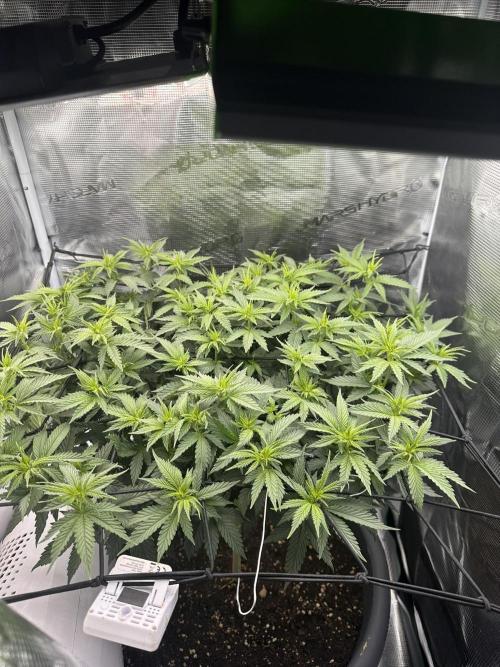
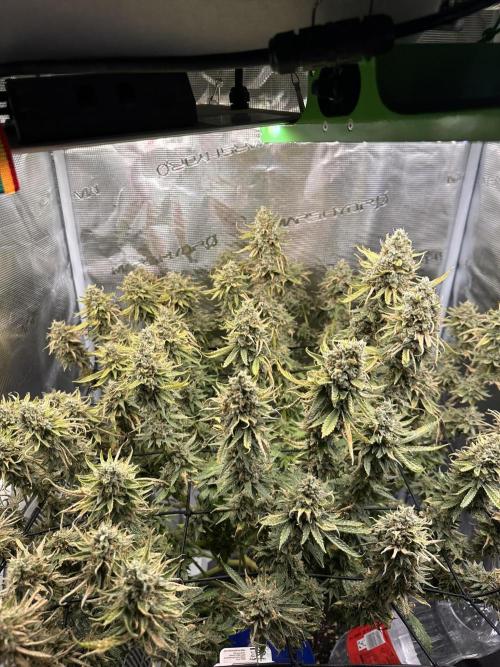
NewNewbie Scrogging and Topping, getting her ready for flower.
2 likes
comments
Share
Used techniques
ScrOG
Technique
Topping
Technique
Defoliation
Technique
Lollipopping
Technique
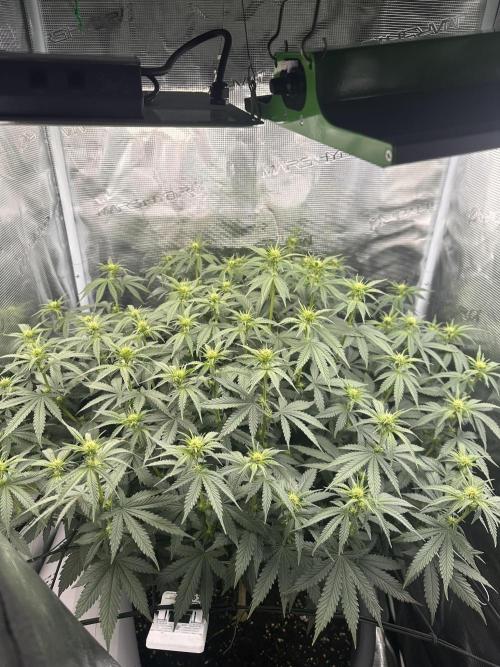
12
Week 12. Flowering
2mo ago
1/4
65 cm
Height
13 hrs
Light Schedule
26 °C
Day Air Temp
6.5
pH
Weak
Smell
18 °C
Night Air Temp
60 liters
Pot Size
35 cm
Lamp Distance
Nutrients 2
Bio Vegetable
10 mll
Bloom Complex
2 mll
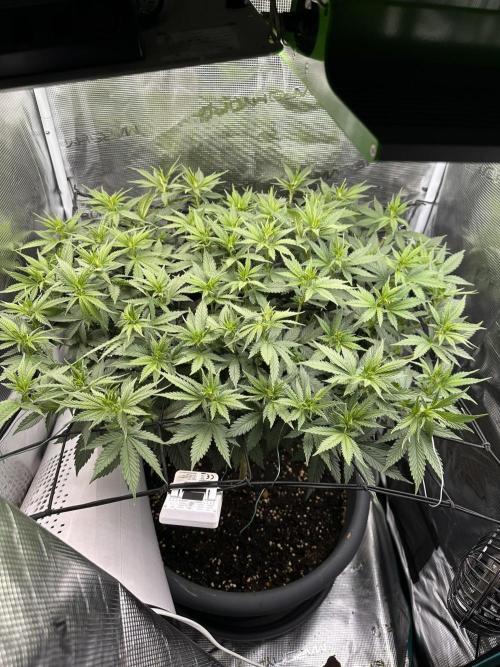
NewNewbie First week of bloom, a light stretch and the first budsights are visible.
3 likes
comments
Share
Used techniques
ScrOG
Technique
Defoliation
Technique
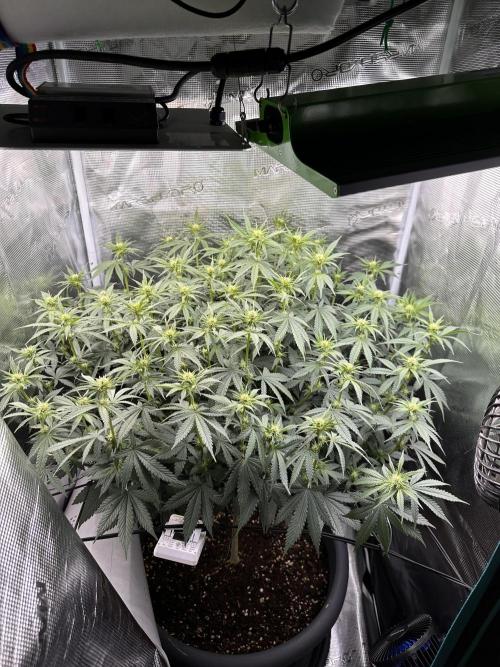
13
Week 13. Flowering
2mo ago
1/2
75 cm
Height
13 hrs
Light Schedule
24 °C
Day Air Temp
6.5
pH
Normal
Smell
20 °C
Night Air Temp
60 liters
Pot Size
3 liters
Watering Volume
20 cm
Lamp Distance
Nutrients 3
Bio Vegetable
10 mll
Bloom Complex
5 mll
Phosphorus Plus
3 mll
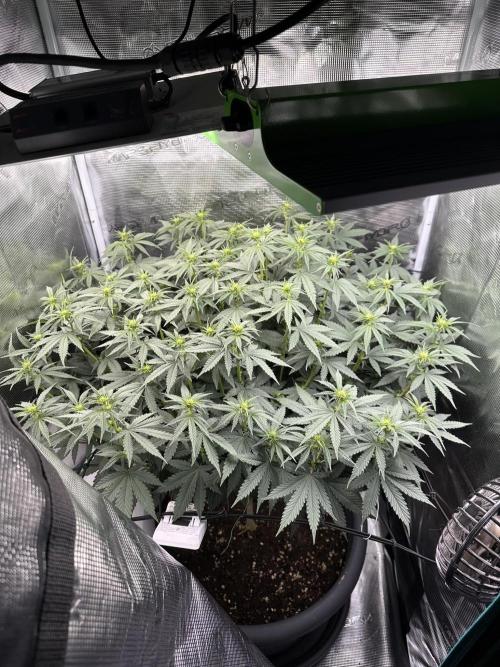
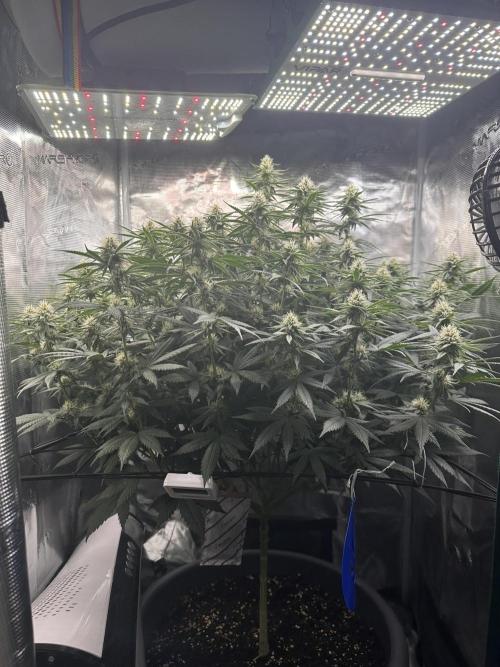
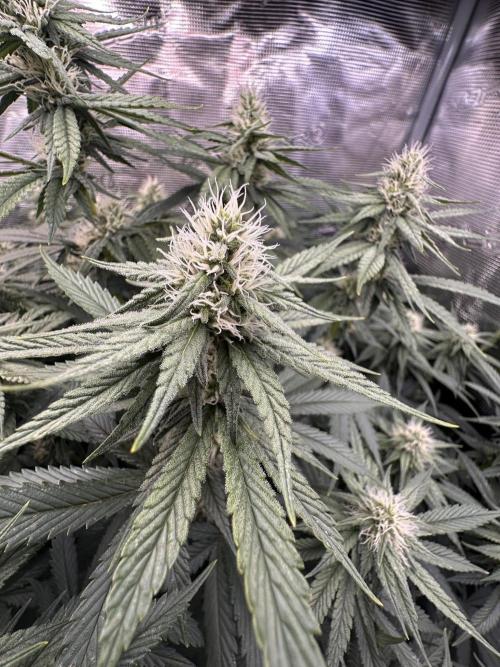
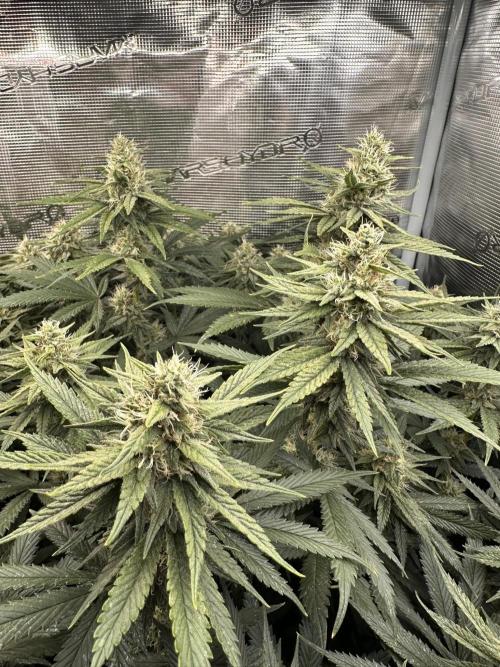
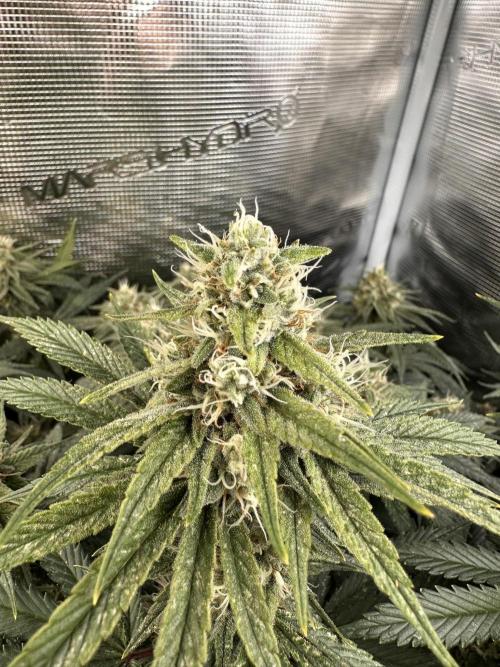
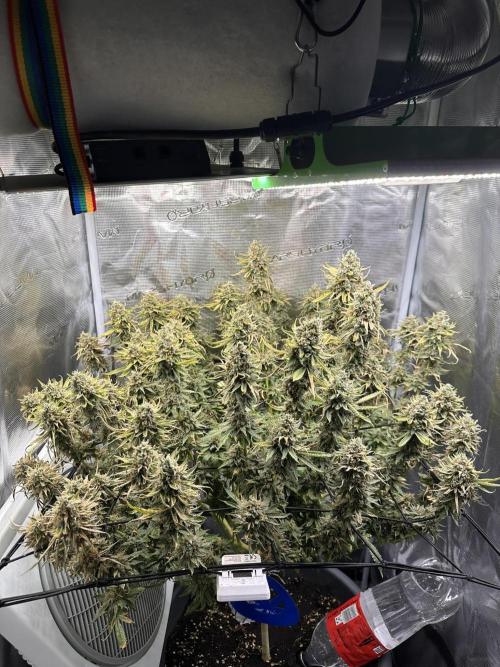
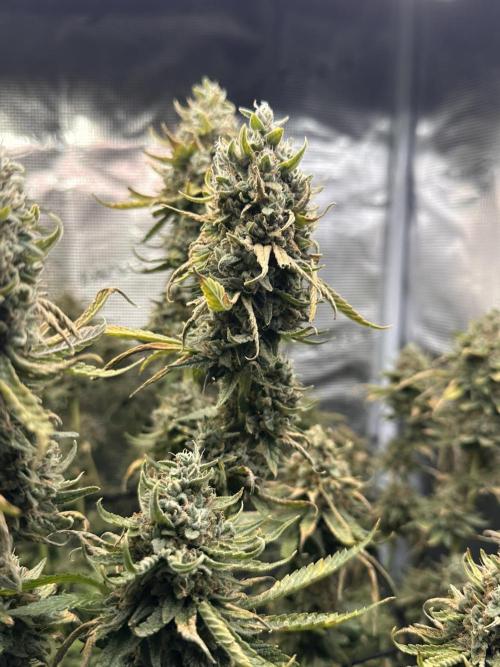
NewNewbie The stretch has stopped and the buds are fattening. She starts to smell and the first trichomes are forming on the buds.
3 likes
1 comment
Share
Used techniques
ScrOG
Technique
Defoliation
Technique
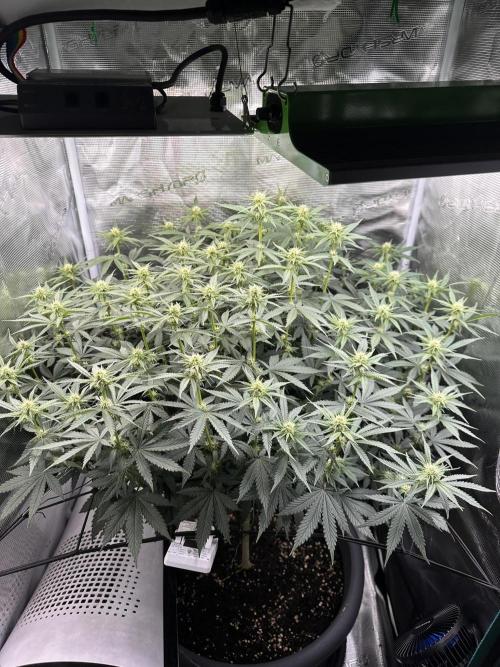
14
Week 14. Flowering
2mo ago
1/11
80 cm
Height
12 hrs
Light Schedule
25 °C
Day Air Temp
6.6
pH
Normal
Smell
21 °C
Night Air Temp
60 liters
Pot Size
3 liters
Watering Volume
20 cm
Lamp Distance
Nutrients 4
Bio Vegetable
5 mll
Bloom Complex
5 mll
Phosphorus Plus
3 mll
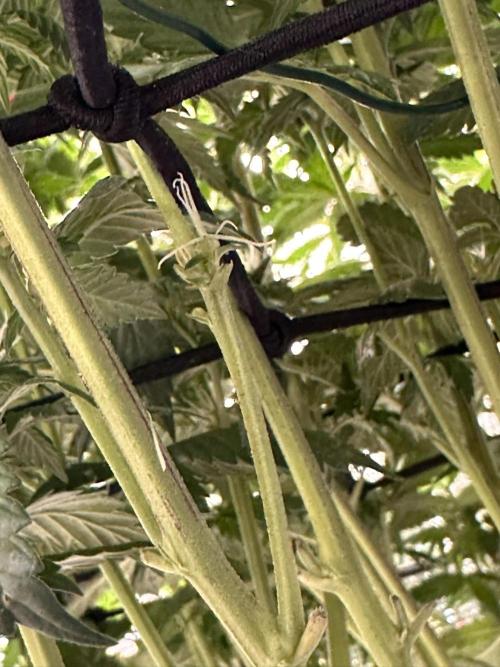
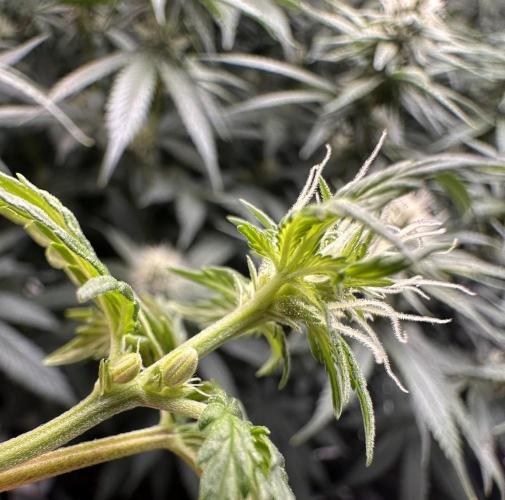
NewNewbie The Buds are developing nicely and the trichomes are forming. She is starting to smell stronger and stronger. Sadly i found some nanners while cleaning up the lower branches to get rid of poppcornbuds. She is a hermie, but since the nanners are (as far is i found) only on the lower popcornbuds (which i wanted to remove anyway), i removed them and im hoping for the best. Im not sure what caused this, i suspect light related issues, either from a fan which has a blue LED or from the time i woke her up an hour after lights out. Im going to check her for pollin sacks every two days from now on. Lets hope for the best😟
7 likes
4 comments
Share
Used techniques
ScrOG
Technique
Defoliation
Technique
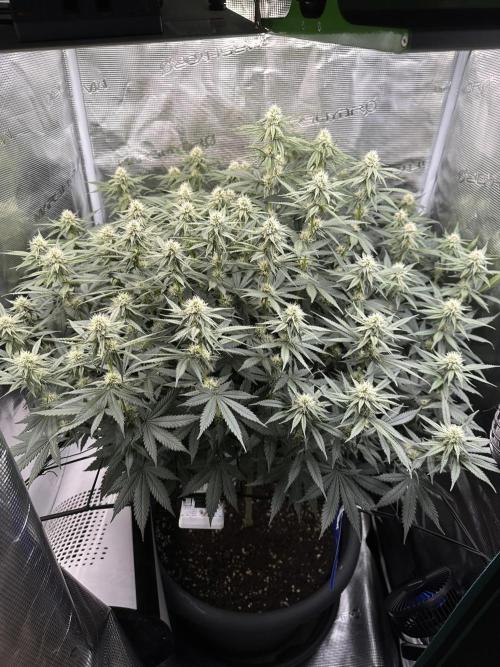
15
Week 15. Flowering
1mo ago
1/10
80 cm
Height
12 hrs
Light Schedule
27 °C
Day Air Temp
6.6
pH
Normal
Smell
25 °C
Night Air Temp
60 liters
Pot Size
3 liters
Watering Volume
20 cm
Lamp Distance
Nutrients 4
Bio Vegetable
1 mll
Bloom Complex
2 mll
Phosphorus Plus
1 mll
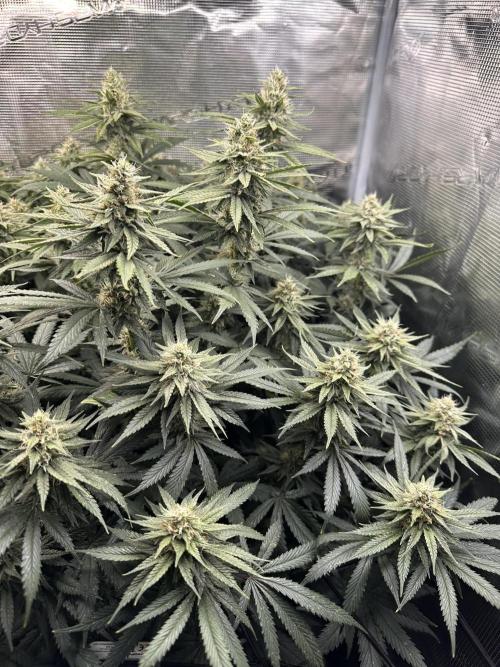
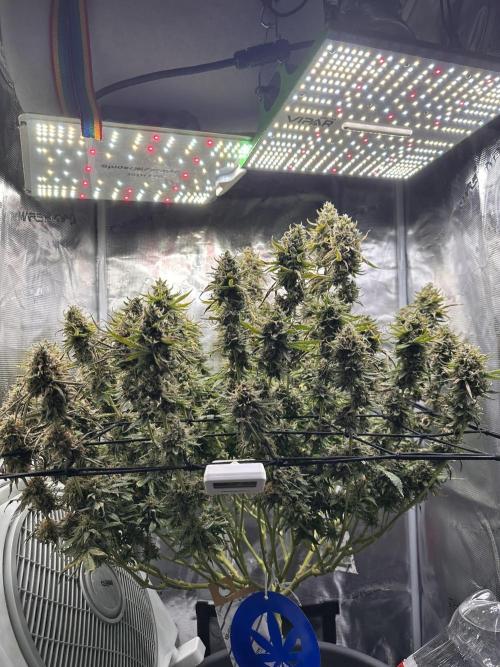
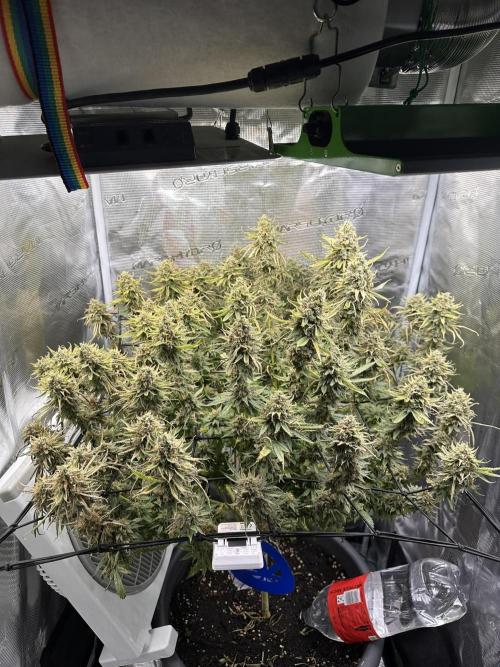
NewNewbie Im not sure if she got pollinated. A couple of hairs turned brown, but she continues to stack her buds. Seems like ive overdone it a little bit with the nutrients, so i dialed it back a bit. Besides from that, the plant seems happy.
7 likes
4 comments
Share
Used techniques
ScrOG
Technique
16
Week 16. Flowering
22d ago
1/15
80 cm
Height
12 hrs
Light Schedule
26 °C
Day Air Temp
6.6
pH
Normal
Smell
23 °C
Night Air Temp
60 liters
Pot Size
3 liters
Watering Volume
20 cm
Lamp Distance
Nutrients 4
Bio Vegetable
1 mll
Bloom Complex
4 mll
Phosphorus Plus
3 mll
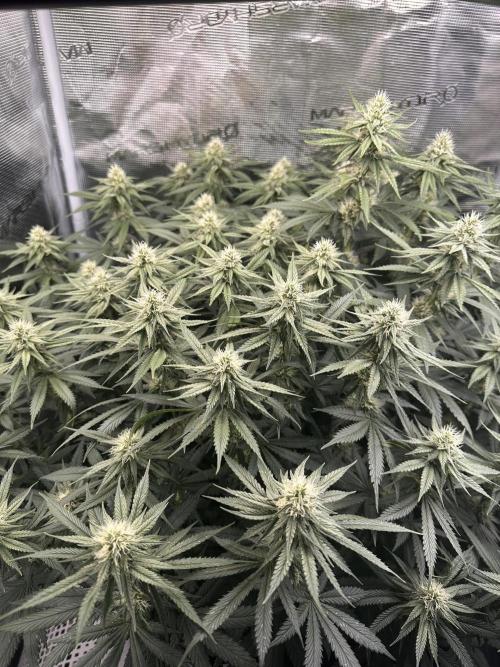
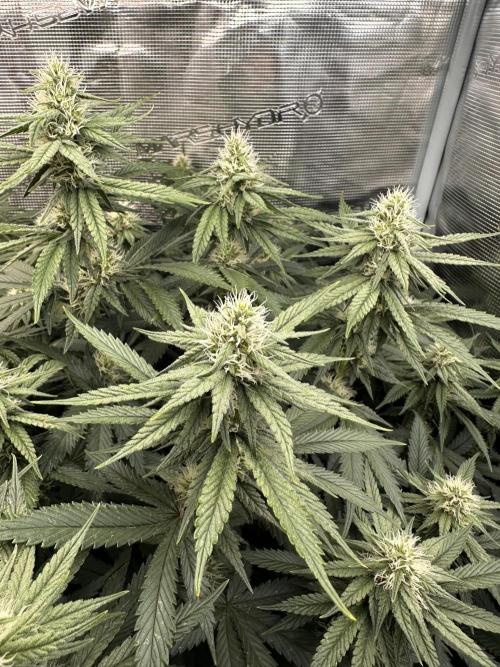
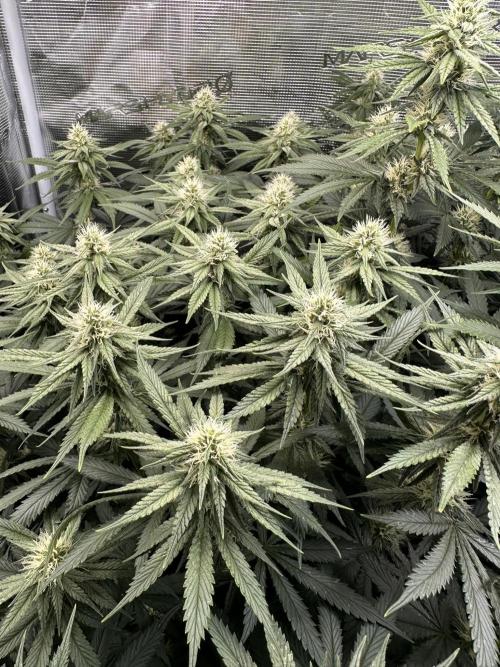
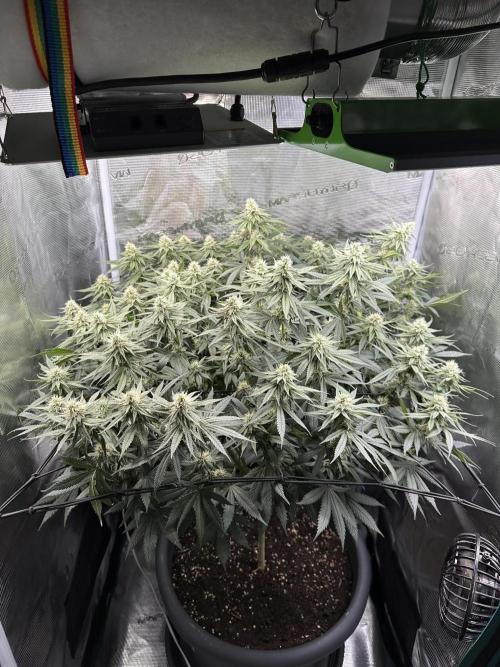
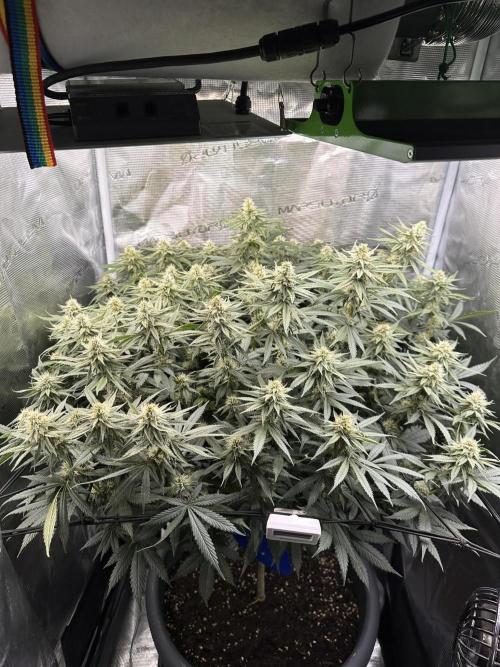
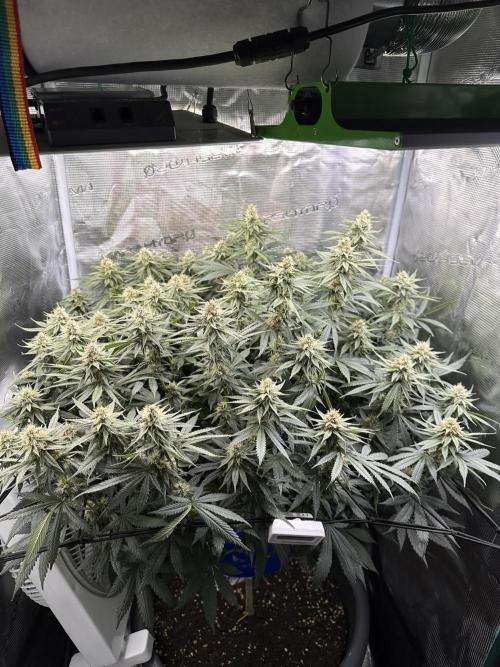
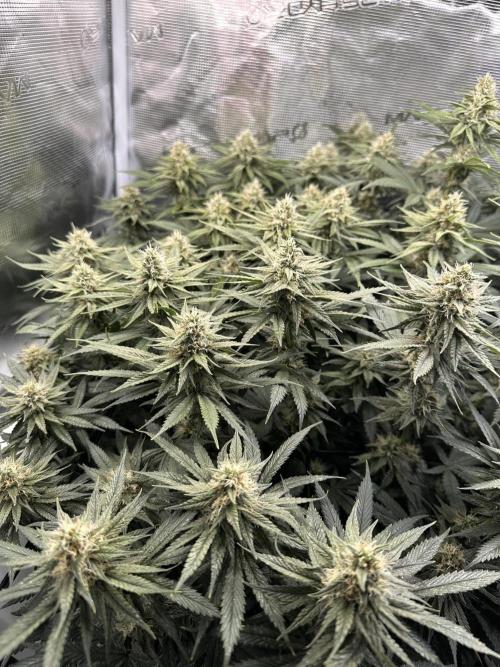
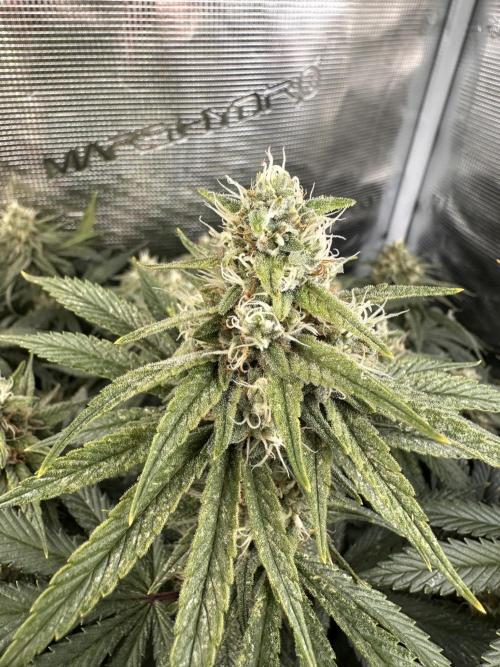
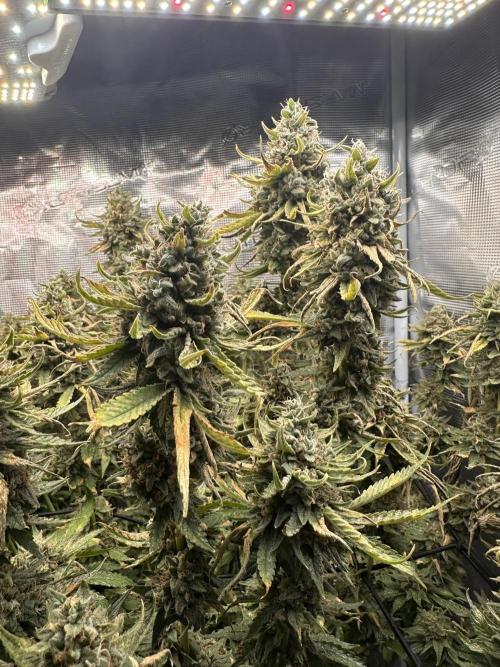
NewNewbie She is stacking her buds nicely and is now realy starting to smell nice. Some lower leafs are showing some form of deficiency, but it arent many so i just removed them and upped the nutrients again. If anyone knows what she is missing (or having to much of), feel free to let me know! It could also be related to my little thrips problem, but the little buggers i bought to get rid of em didnt do their job😀
5 likes
comments
Share
Used techniques
ScrOG
Technique
17
Week 17. Flowering
22d ago
1/11
80 cm
Height
12 hrs
Light Schedule
30 °C
Day Air Temp
6.6
pH
Strong
Smell
25 °C
Night Air Temp
60 liters
Pot Size
0.5 liters
Watering Volume
20 cm
Lamp Distance
Nutrients 4
Bio Vegetable
1 mll
Bloom Complex
1 mll
Phosphorus Plus
1 mll
NewNewbie Welp... due to circumstances life threw at me i had to leave for 5 days. Since it was so humid i decided to let my heater run to compensate for the humidity as i was worried about budrot. Turns out i was worried about the wrong thing. The high temperatures caused my plant to need more water then ususal and she almost died because of the underwatering. Im not sure if she will get back to health or just cantinue to die.
7 likes
comments
Share
Used techniques
ScrOG
Technique
18
Week 18. Flowering
19d ago
1/19
80 cm
Height
12 hrs
Light Schedule
24 °C
Day Air Temp
6.6
pH
Strong
Smell
18 °C
Night Air Temp
60 liters
Pot Size
3 liters
Watering Volume
20 cm
Lamp Distance
Nutrients 3
Bio Vegetable
1 mll
Bloom Complex
3 mll
Phosphorus Plus
2 mll
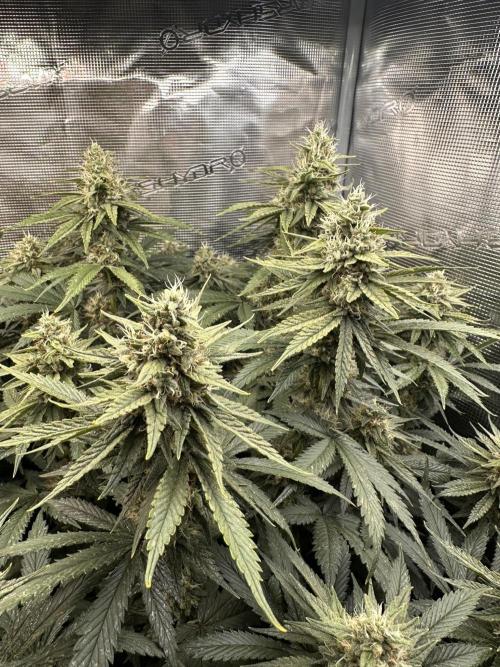
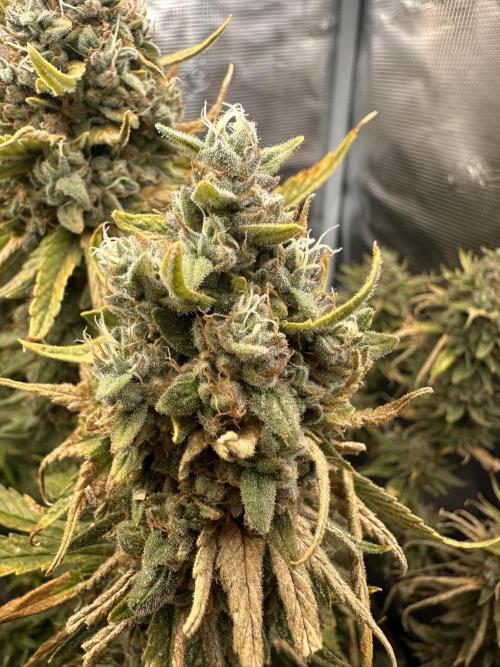
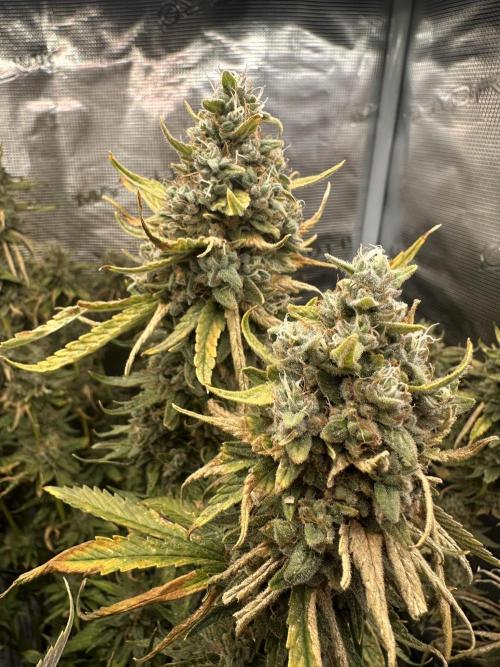
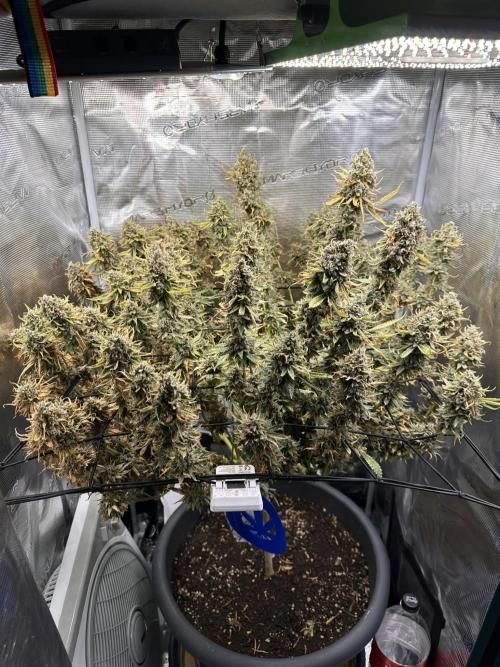
NewNewbie After she almost died last week, she came back to life. Not all leaves made it tho, the ones that got too dry continued to die. She basicly gave herselfe a really hard defoliation. Even tho she is looking very rough, the buds continue to fatten.
5 likes
1 comment
Share
Used techniques
ScrOG
Technique
19
Week 19. Flowering
10d ago
1/11
80 cm
Height
12 hrs
Light Schedule
28 °C
Day Air Temp
6.6
pH
Strong
Smell
24 °C
Night Air Temp
60 liters
Pot Size
3 liters
Watering Volume
20 cm
Lamp Distance
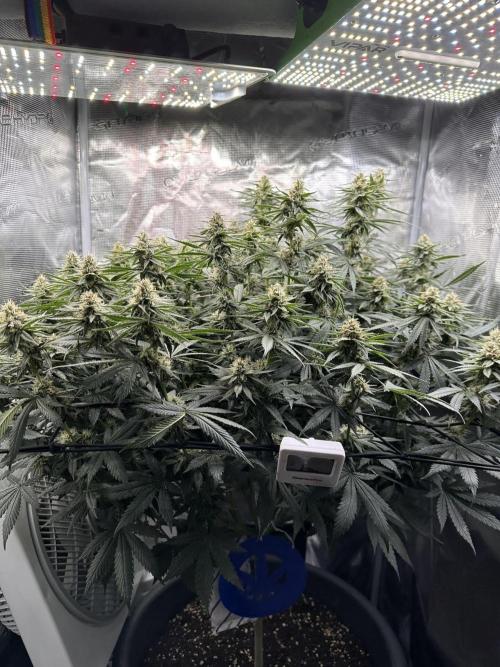
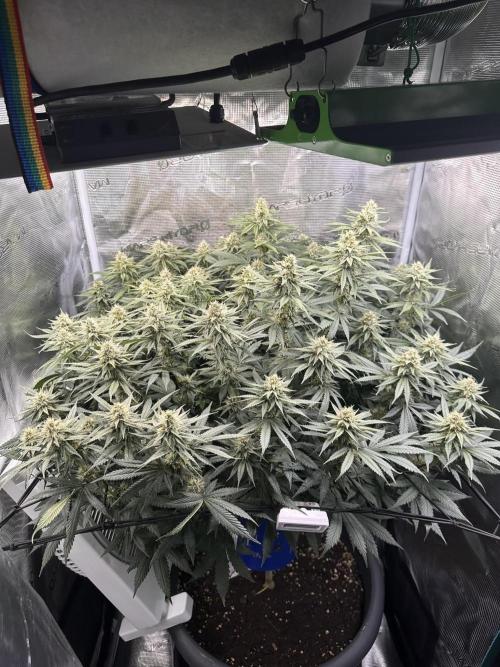
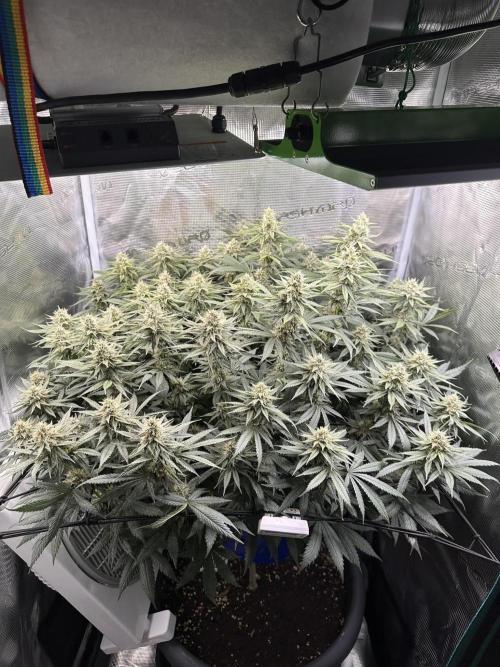
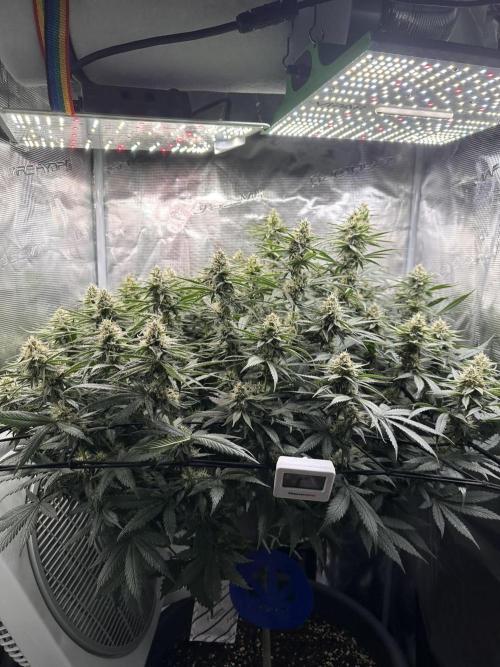
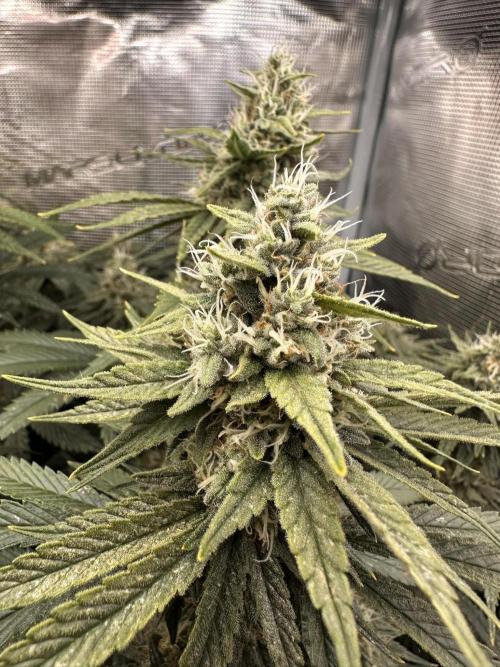
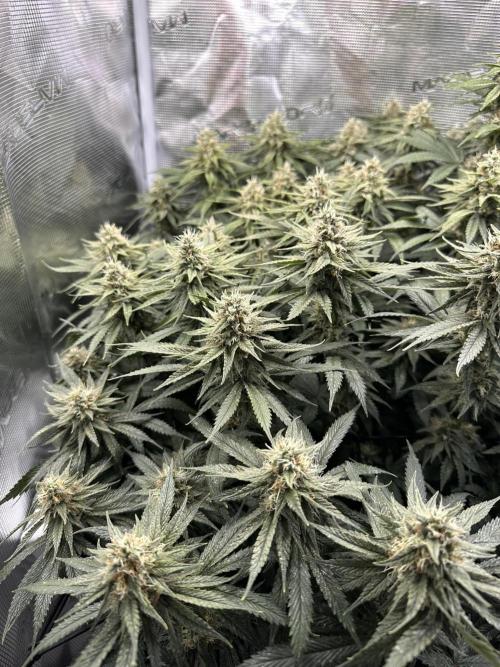
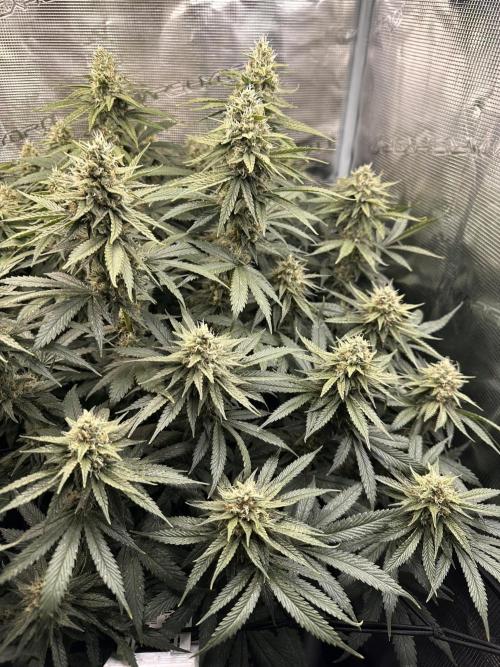
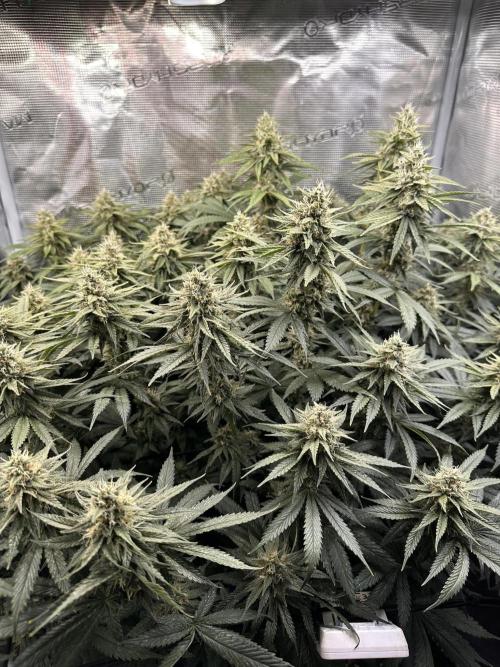
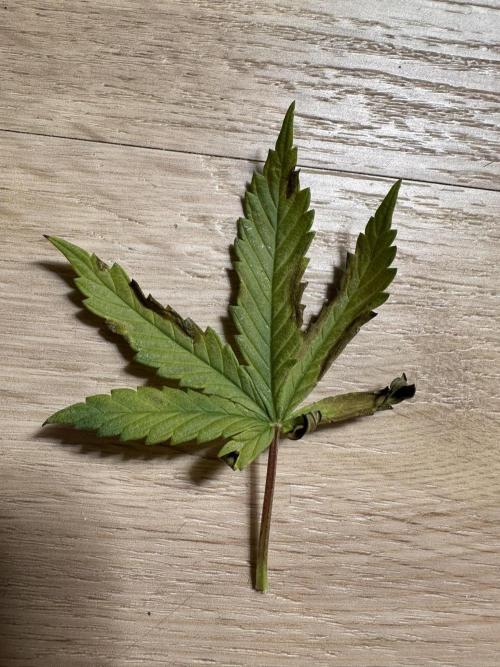
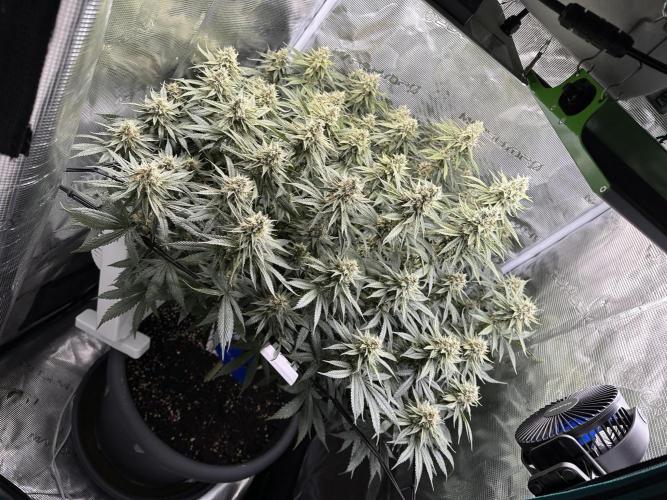
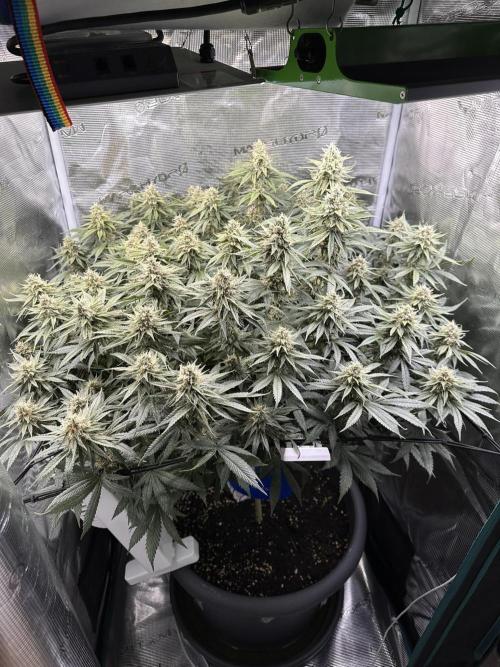
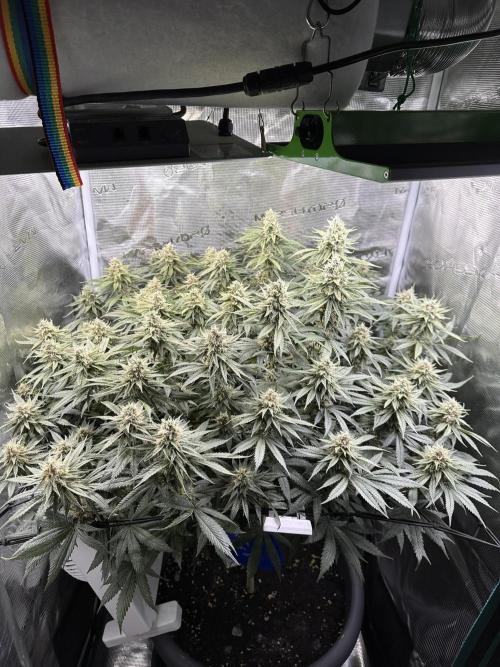
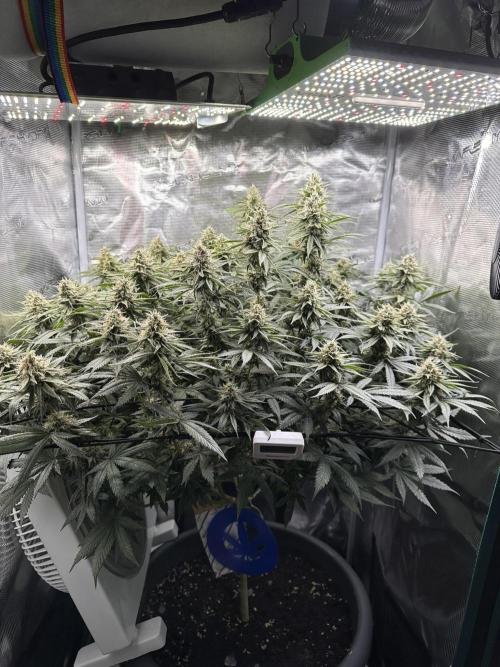
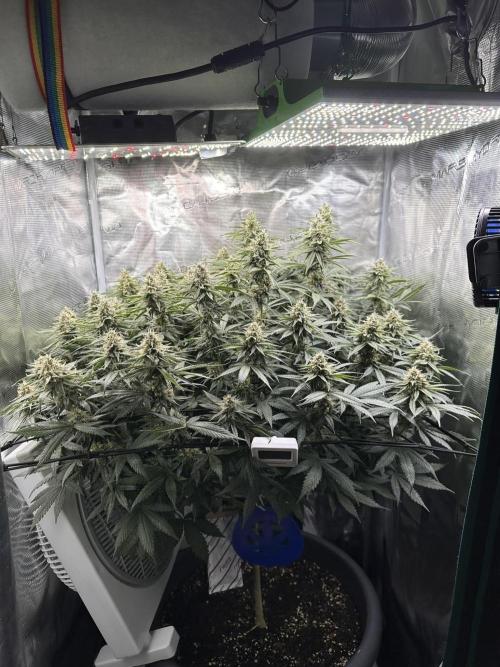
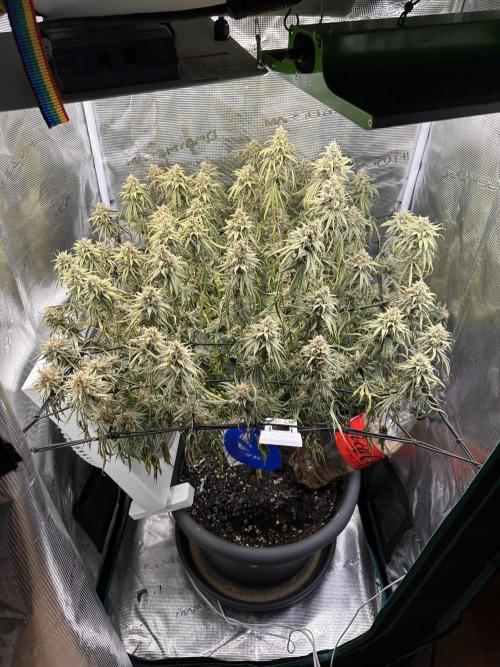
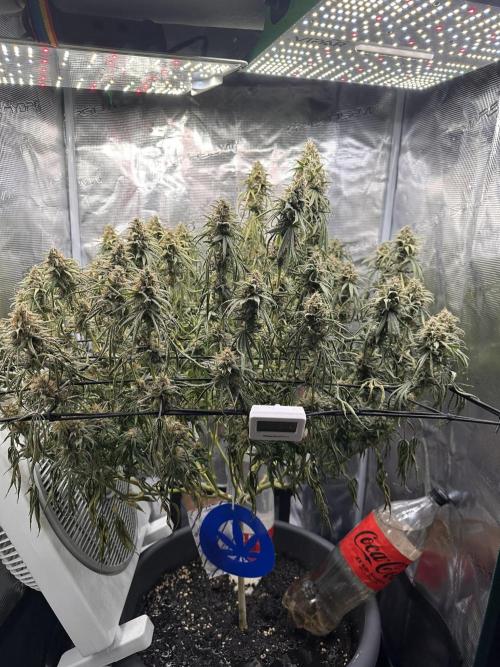
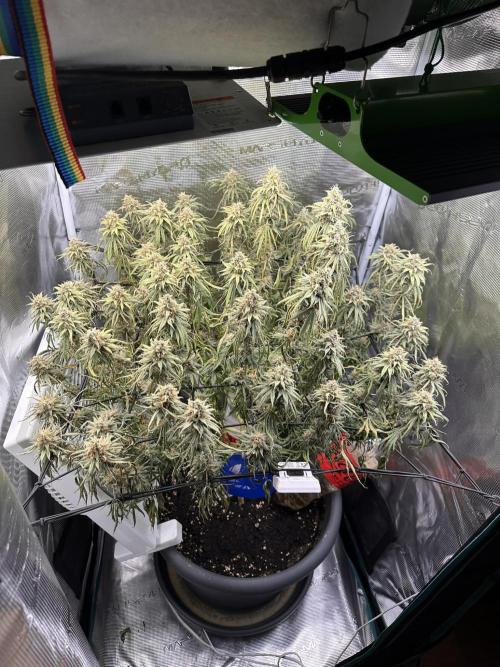
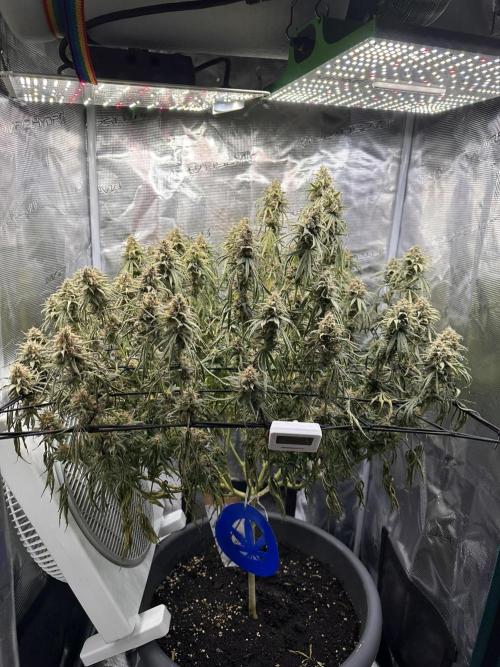
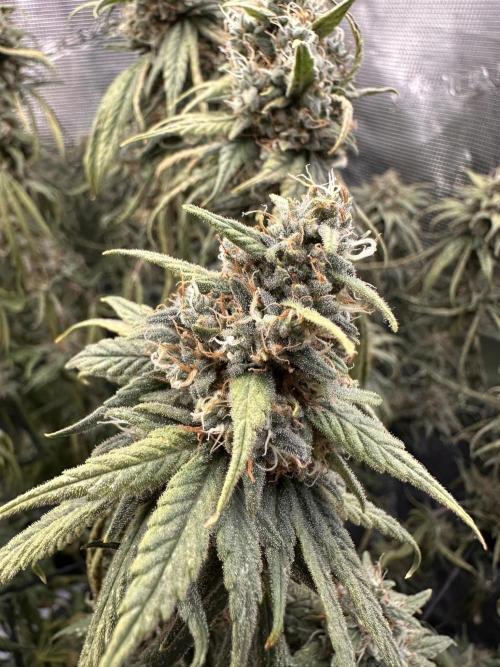
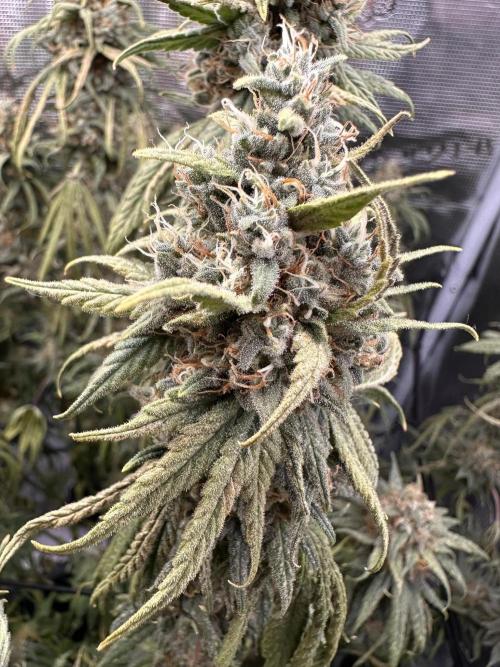
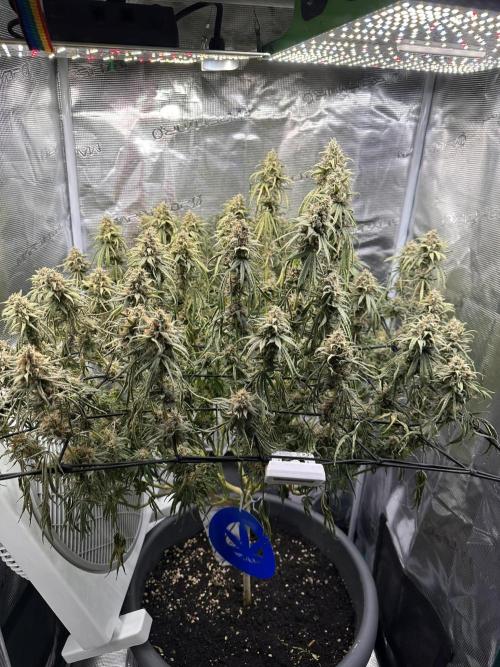
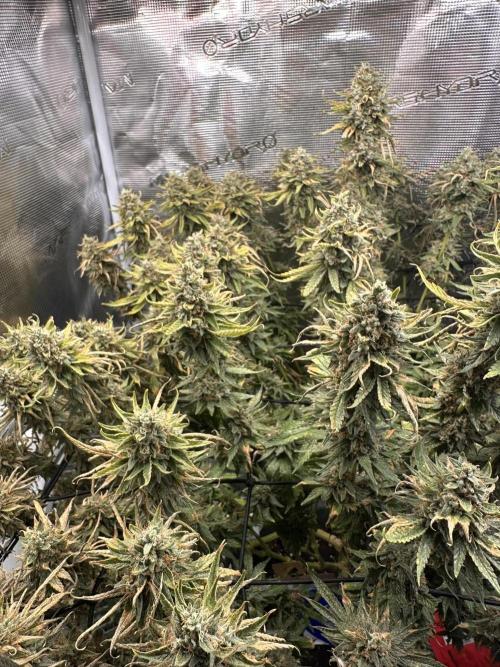
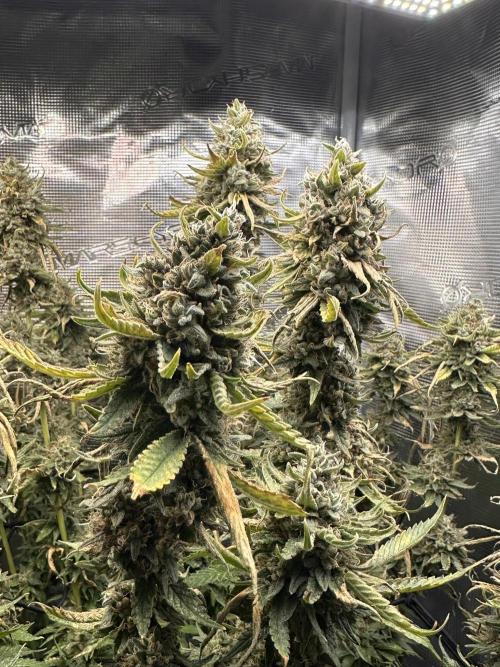
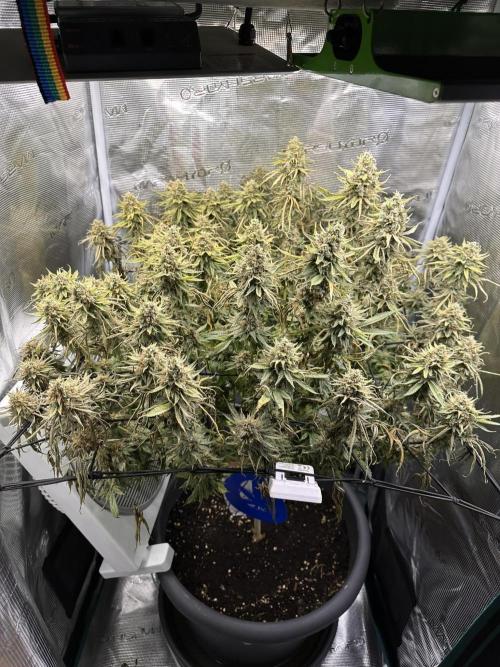
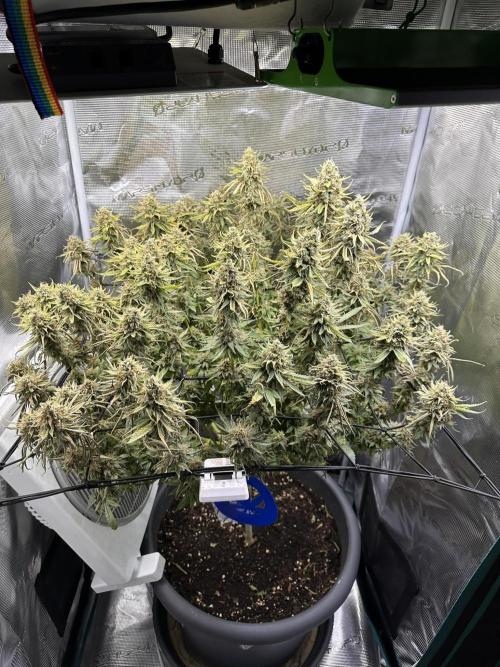
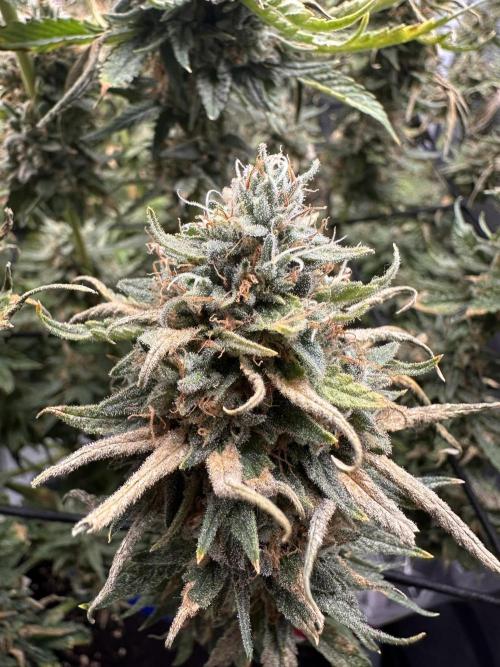
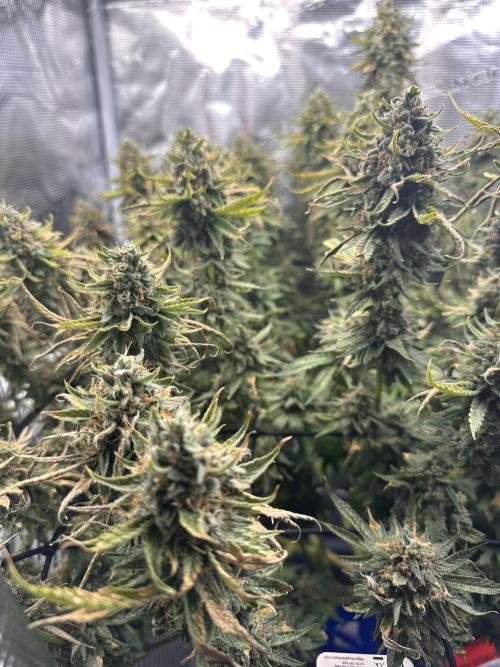
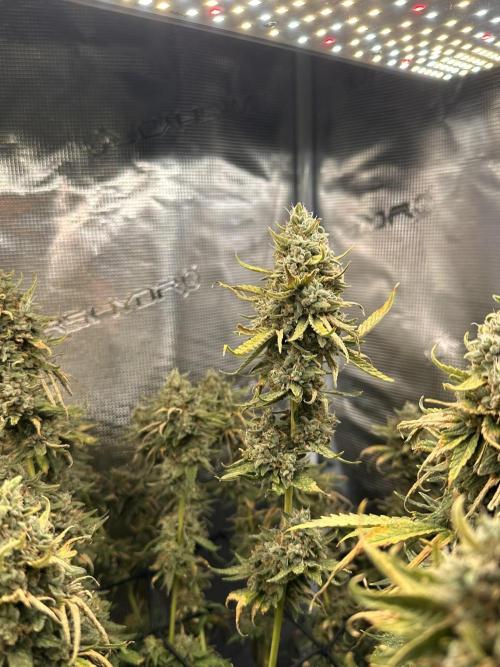
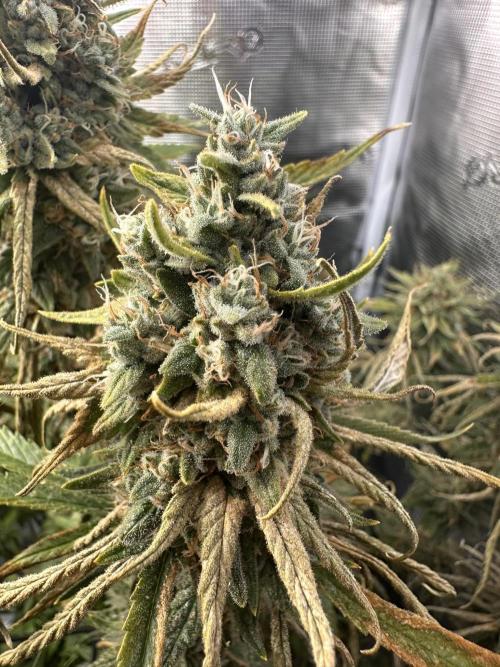
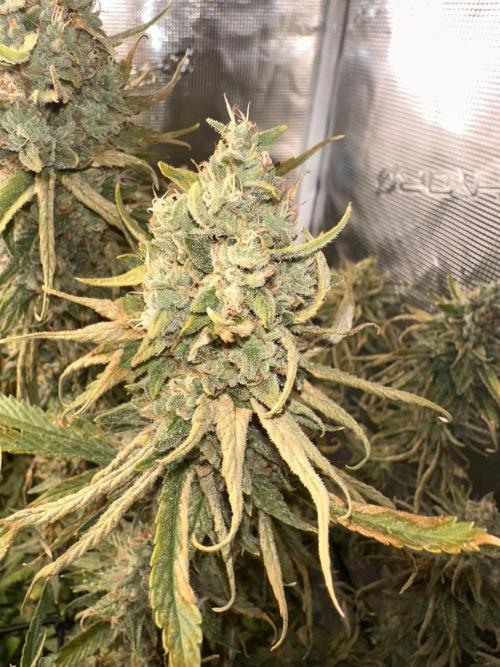
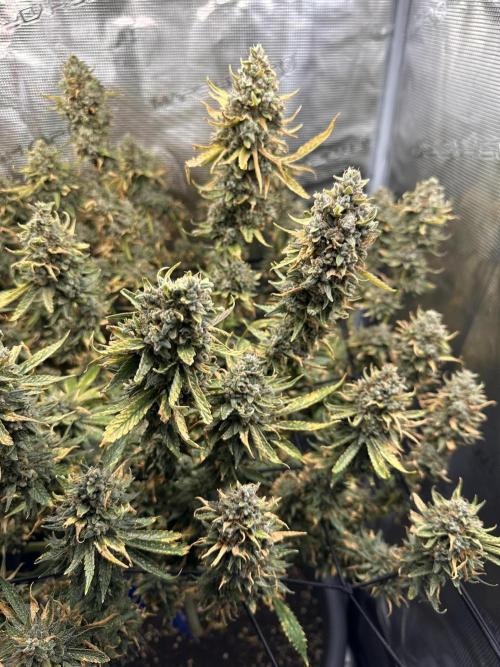
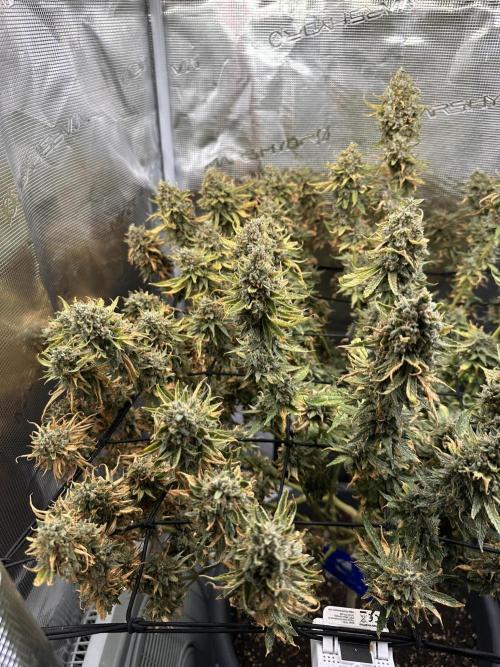
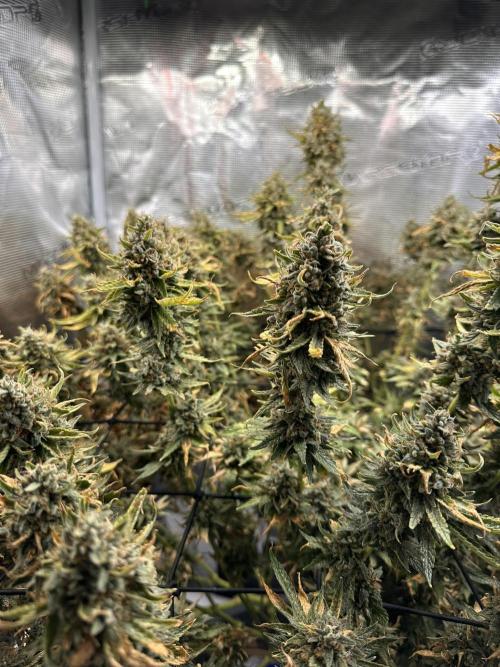
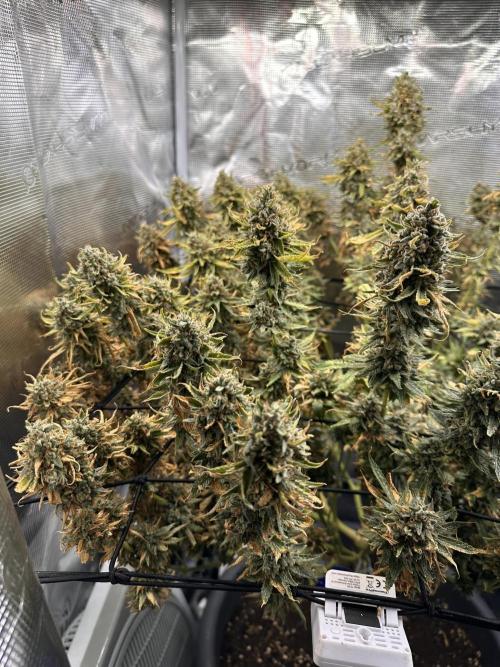
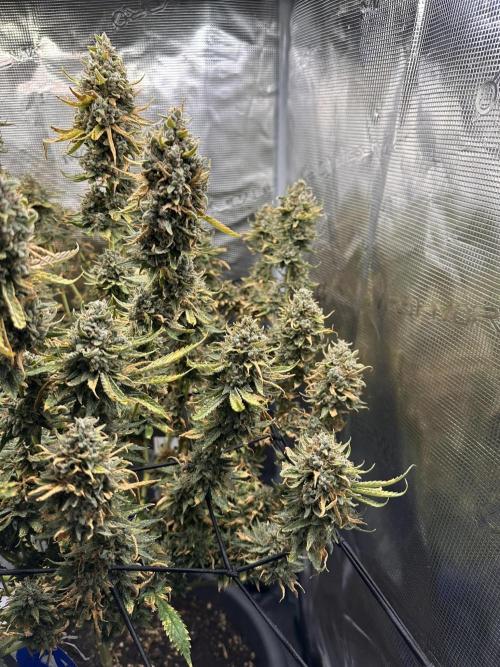
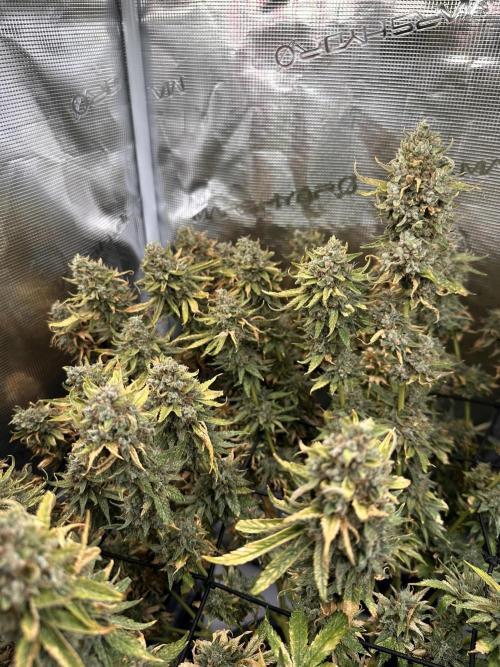
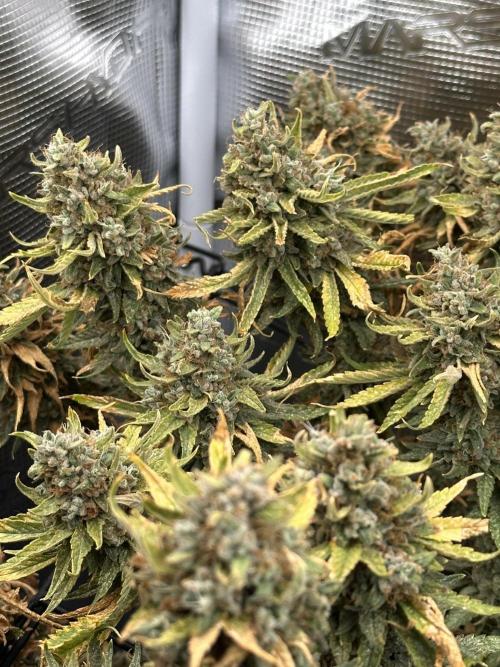
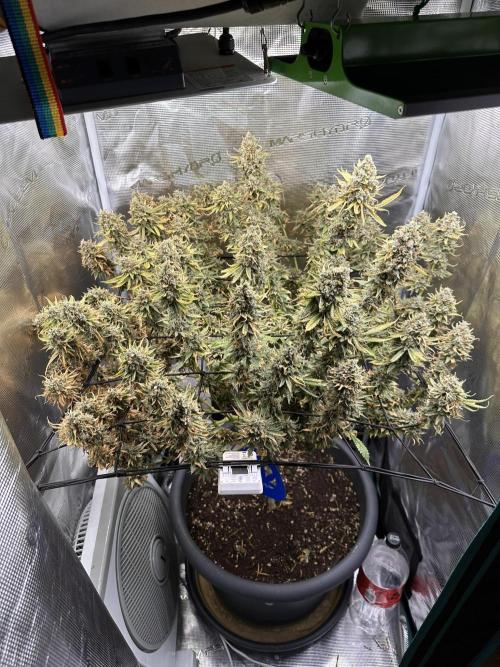
NewNewbie Chop Day! After recovering, i noticed she had the leaves closest to the fan drying up. I think since she lost most of her leaves, it was too windy and she got windburned. Considering her over all bad shape i decided to go for an earlyer chop then usual, but all trichomes seem to be milky, with just a few brown ones. Over all, this grow was filled with problems and fuckups. Many things were learned :) May the next one be better!
Looking good man! I am gonna follow this diary as i have 2 Biscotti aswell and they have the same issues as yours, but for me it got worse and worse.
So i am very interested if the steps you will take are going to help the problem :)
I still dont know exactly whats causing it, but my thoughts are that the strain is very calcium hungry, but who knows :)
@BLAZED, Thanks man😀 Yours are looking waaaay more spectacular. Insanely huge and frosty buds you got. I fear it might be the pollination that caused mine to produce less trichomes. Mabye next time ill be able to come close to yours 😀 If you look at that leave in my newer post, id say you might be right. Due to another hickup in watering, sadly i will not be fixing the issue anyway 😒


 commentedweek 195h ago